Some time ago I found adjustable Armstrong damper valves from AJB Engineering, no price shown but enquiring elicited £65 +VAT + P&P, so needed some thinking about. After several months of pondering I decided to take the plunge, and they came promptly with instructions. A bit more involved than I was expecting including draining then cleaning with a 'non-solvent degreaser', so another enquiry and paraffin was suggested - Googling got 1 Litre of Bird Brand from Amazon for £5.40. The lid has to be removed, and with a cork gasket I feared damaging it, but more Googling got a set for front and rear from eBay at £8.
That left what to refill them with - my usual hydraulic jack oil? AJB suggest motor cycle fork oil at SAE15, or 10 for softer and 20 for harder (the WSM says good quality mineral oil at 20W maximum can be used but only in temperate climates). Halfords do 10W and 15W in 0.5 Litre for £5, and I opt for the 10W.
Waiting for some dry and not too cold weather (rare over the winter this year) finally sees me tackling the job in the last week of Feb. It need some thought as with a single-width garage space at the sides is limited. I normally reverse the cars in, V8 at the front, as that makes it easier to get out of both cars, which means I would be working between the two cars unless I push the front of the V8 out of the garage and I didn't want to leave it like that. Reversing the V8 onto the ramps at the rear of the garage is cramped on one side by the fridge/freezer, driving on avoids that but with either way jacking to remove the wheels etc. is difficult when on the ramps. Which leaves having the V8 at the front of the garage with the rear against the door, which leaves even less space at the sides as the width reduces shortly before the doors. But at least it gives me plenty of room at the back (assuming it isn't raining ...) and I can shut the door on both cars even if the V8 is jacked up in the air.
Jack under the diff housing, slide axle stands under the springs immediately in front of the U-bolts and damper plate, and only partially lower the jack. Wheels off, 11/16" socket for the nuts against the damper even though the bolt heads are 5/8". Slacken the nuts with a breaker-bar manoeuvred up past the POs rear ARB drop link which adds a complication, then put my air-gun on the bolt heads as it's far easier to spin those out of the nuts rather than turning the nuts a flat at a time. There is absolutely no way I was going to mess with the tapered pin in the damper arm (again 11/16" socket, with 3/4" at the damper plate) while it was still on the car, so damper, drop-link and damper plate will come off as assemblies. Air gun with a deep socket on the U-bolt Nylocs - it's only an Aldi gun and not particularly powerful, so one of the nuts needs starting with a ratchet handle despite some penetrating oil and WD40. With both sides supported on axle stands under the springs I have to remove the U-bolt nuts both sides before I can pull either ARB plate down off the U-bolts otherwise it would mean twisting the ARB to get just one side off. I could have tapped the U-bolts up I suppose. With ARB plate out of the way the damper plates pull down off the U-bolts, and both dampers are off complete with drop-links and damper plates. Before final removal I put a 7/8" socket on the valve and slacken it off a bit using the car to hold the damper body still ... at least I did one side but forgot on the other, but that came undone clamped in a large bench vice, there is a conical rubber seal under the head so it's not done up as tightly as one might imagine.
I want to see the effect of no rear dampers so refit the ARB plate and Nylocs, replace the wheels and jack the car back down, and pressing down as hard as I can on the release it doesn't bounce much more than one and a half times! I even drove out to go between a couple of the pillows and that doesn't bounce much more, it shows how much damping comes from the leaf springs alone. Only 2 hours to get them off, but that's enough for today as continually getting up and down and under the car, let alone lifting the air-gun up above my shoulders when I'm lying on the ground, is pretty tiring at my age.
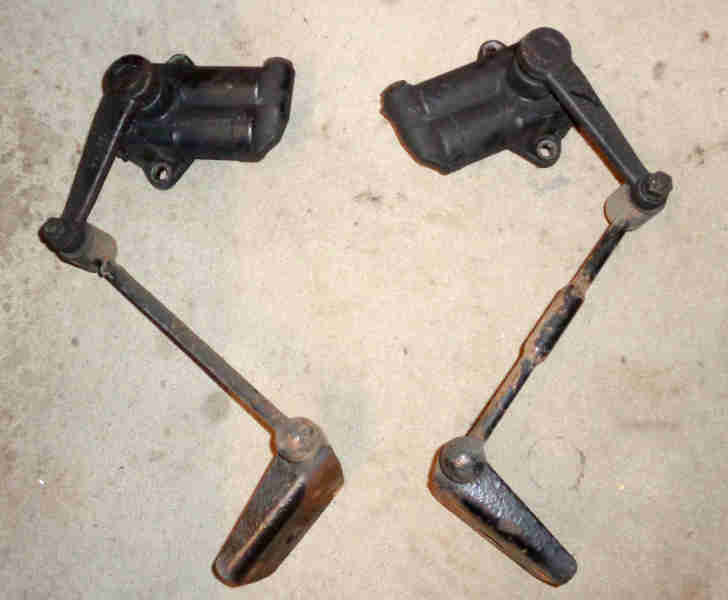
Next day start on the dampers. First is degrease the outside with Gunk although they are pretty clean anyway, then get some idea of the resistance to compare the new valves with. Clamped in a vice just the weight of the drop-link and damper plate is enough to pull them down both taking 12 seconds, but what about upwards? I have a spring-balance so hook that round the drop-link pin, and pulling up to keep it on the 15lb mark takes 9 secs on the one damper and 10 secs on the other, several times, so they are pretty even given they were rebuilt units.
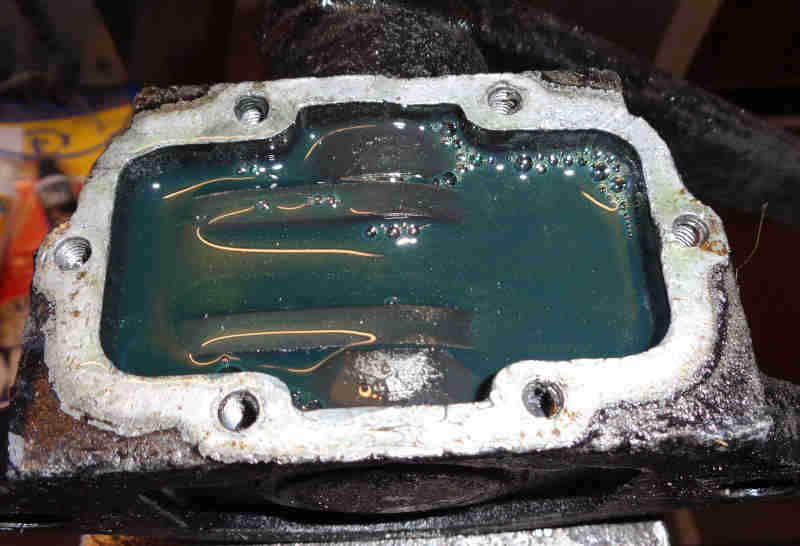
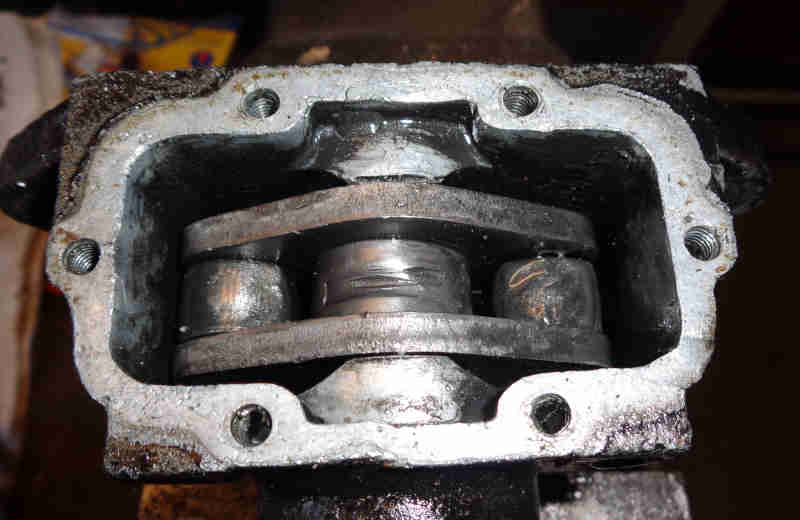
One concern was the cover plate screws but they all came undone easily. Another was the cork gaskets (hence buying replacements) but the cover came off with the gasket without damage. Fluid level is nearly at the top of the body:
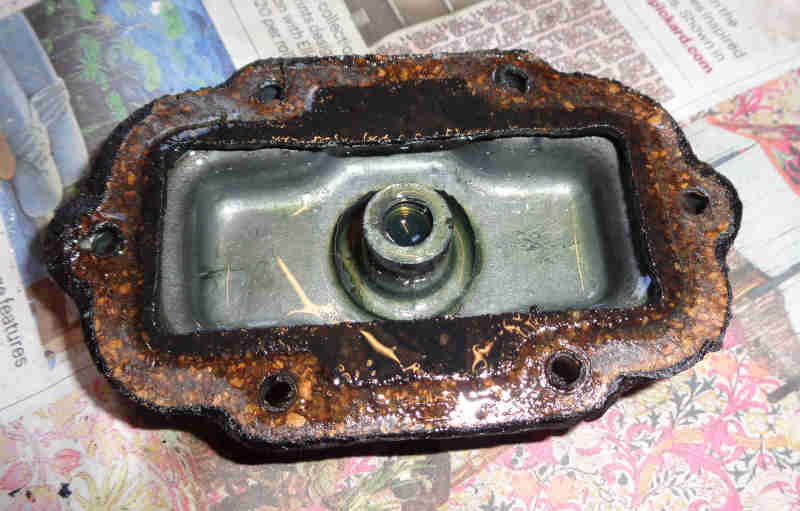
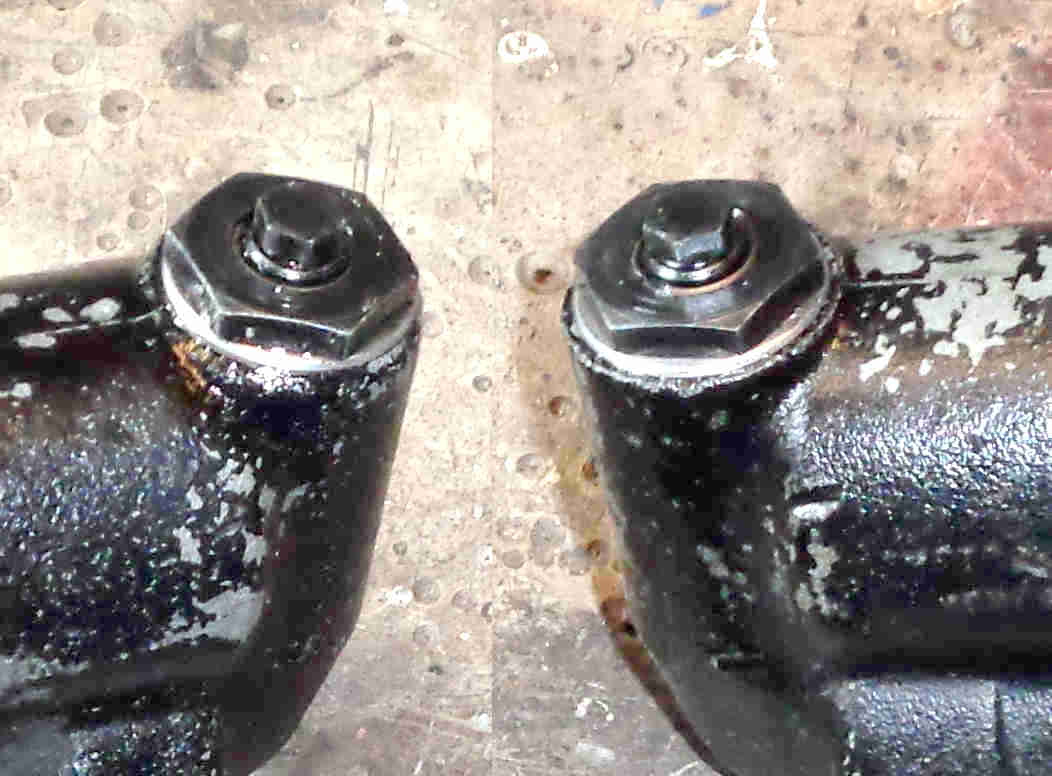
And looking at the cover the filler plug thread extends down by quite a bit so there will always be an air-space at the top of the top-fill rears, but filling the threads is best avoided:
Then unscrew the valve, over a receptacle, but probably not even an egg-cup full comes out. A pin, and a large spring, has to come out as well so the valve chamber is empty:
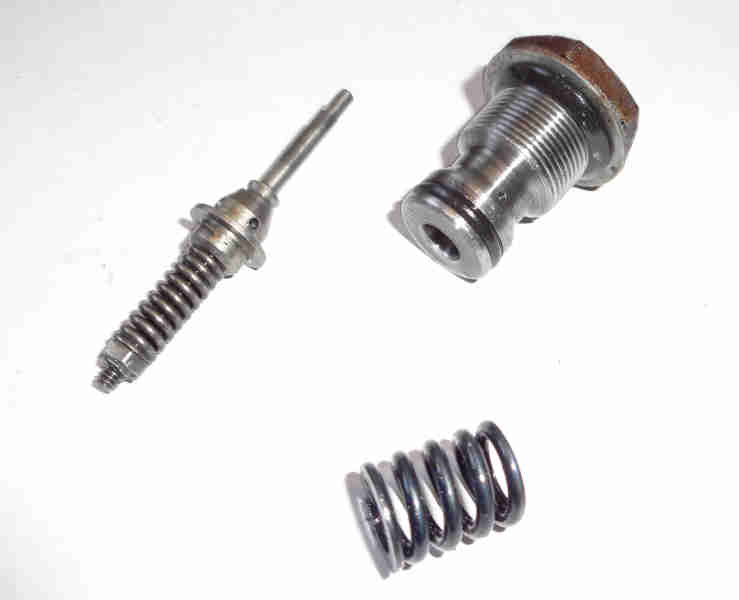
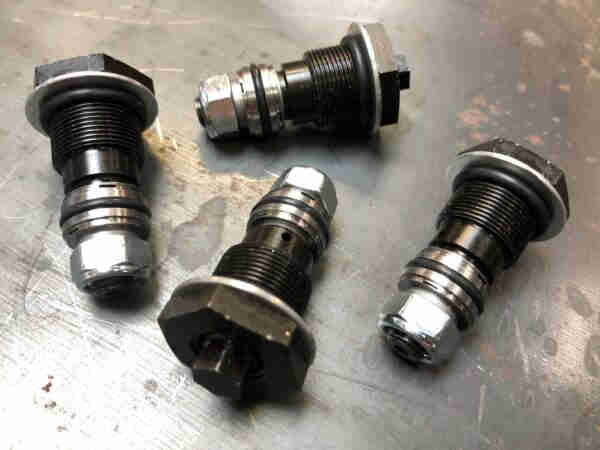
AJB valve, odd that the original fixed seems to have more bits than the adjustable! Maybe the difference between the 2-stage originals i.e. softer with small movements, these almost certainly being single-stage.
Valve chamber, one hole at the bottom and another on the left at the bottom of the threads:

Upend the damper and more fluid comes out, but not that much. Work the damper arm back and fore as several strokes are needed to clear all the oil, still less than a cup-full:
Gouges on the shaft a bit concerning but as it happens the AJB picture seems to show the same. Two pistons one each side of the shaft, the bottom of each piston being connected to one of the holes in the valve chamber. As each piston goes up it sucks fluid from the valve chamber, and as it goes down it pushes it back. The valves have an O-ring which sits between the holes when fitted, so the fluid has to pass through the valve via small holes just below the threaded section and another at the end.
Pour paraffin in the top, work the arm, and it flushes out the valve hole, until clean fluid runs out. Nothing in the instructions about removing the paraffin, or leaving it to dry, so I wipe off what I can, making sure the valve threads and outer seal seat, and the top where the cork gasket will go, are clean and dry. However draining the oil from both the reservoir and the valve chamber showed the old oil and the chamber to be perfectly clean, so probably didn't need that cleaning process.
With the valve still not fitted pour your damper fluid into the main chamber just short of the top, and refit the cover with gasket.
With the damper orientated to put the valve opening uppermost pour more fluid in, then work the arm. That will suck that fluid into the internal pistons, so keep topping up and working the arm. There will be much gurgling and bubbles, then as you work the arm one way the fluid level will drop and as you work it the other way a jet will be visible from the side of the valve chamber partially refilling it. Keep topping up and levering and eventually the jet bubbling and fluid level reduction lessens until the fluid level stabilises. After doing both dampers the 500mL bottle of fluid is still showing 250mL, fronts may take more.
Fit the new valve, put the damper the right way up, and work the arm until a smooth and steady action is achieved. You will almost certainly need to turn the adjuster hex anticlockwise i.e. softest to do this as fully clockwise i.e. hardest makes it very hard indeed. There is a fraction less than two full turns on each hex adjuster.
Back to the spring-balance for a comparison and fully anti-clockwise i.e. softest plus the 10W fluid the 9 sec damper now takes 6 secs and the 10 sec damper 8 secs pulling them up, so about 25-30% reduction in damping, I'd hoped for more. Turned clockwise halfway pulling up takes 16 secs, so these valves are very much biased towards making them stiffer, not softer. Again not much more than 2 hours, and again enough for today:
Next day reverse the process to refit the dampers. To get a torque wrench or breaker bar on the chassis rail nuts the damper plate can be pulled fully down on the passenger side to get the lever arm out of the way of the rear nut, but on the driver's side there is less room to the single battery box and I can't get the socket on either with no extension or a medium so have to push the damper plate up to get the lever arm out of the way, a short extension would probably have done it. I have to get the second damper plate and ARB plate over the U-bolts before I can fit the nuts to either of them, then it's wheels on and jack down. Take her out for a tour of the local tables and pillows, and the rear does seem softer compared to the front. I'll see how I get on, and maybe fit them to the fronts as well.
March 2022: With the improving weather the first time we went shopping in the V8 the Navigator immediately said how much better the ride was, the shopping wasn't crashing about coming off the 'tables' like it always had before. Going out myself I could feed a definite bounce coming off them, then a few days later in the roadster coming off the same tables it is a definite thump, and that's with roadster springs supposedly softer than V8. So it is declared a success. Not worth doing the same on the roadster as the time spent going over these humps as a proportion of the total mileage is far less than in the V8. The fronts have a similar 'bounce' in the same situation, so again no need to change those - at the moment anyway.