
June 2019:
Same day of the week, same paper shop, same paper, same problem - tested the batteries the same way and the same battery (passenger side) failed - enough for courtesy light but dimmed with the ignition on. A couple of chaps were good enough to try a push-start but not enough power left for the ignition. Got a lift back home and brought the (same) ZS battery and (same) jump leads back in the V8, but despite wiggling and tightening the crimps I just could not get enough power to crank. So for the first time in 50 years I was forced to ring the AA. Recorded announcement said a 2 hour wait nationally, but in the event the operator said it would be 50 minutes. So took the V8, battery and leads back home and walked back to the paper shop to settle in for a 15 minute wait - and the AA arrived two minutes later. Got Bee going with their jump-pack straight way of course, and the alternator continued to run the engine with that disconnected, the duff battery good enough to cope with the 'Do not run engine with battery disconnected' warning you get with alternators. AA patrol followed me home and waited while I backed into the garage - good service (mind you with one call-out in 50 years I've hardly been a 'drain' on their service!).
A while ago I pondered one of the then new lithium jump packs vs capacitor-based jump packs vs some better quality jump leads, but of course did nothing. Has to be one of those now, but jump leads need another car right next door and we do some pretty remote touring single-handed. Capacitor packs need a donor car within a reasonable distance to charge them up, and random owners may not be keen on that, so really the lithium option is the only one suitable for us. It also needs to be suitable for starting the ZS and the V8, which means one for 3.5L as a minimum. Off to Cornwall in the V8 in two days so I need something I can buy NOW - Halfords can supply both but the lithium pack only on the day after we have left. After this experience I don't fancy going all that way with neither and Vee's 15 year old battery, so get 3.5L leads from Halfords before we go which I can return in 28 days. Mindful of the problem with leads, I also take the ZS battery! And of course need neither. I swap the jump leads for a lithium pack on our return from Cornwall.
Since the 2018 restrictions on acid sales which initially made getting a replacement other than over the counter difficult, suppliers seem to have fallen into four camps: wet collection only, dry mail-order and obtain acid locally, some still saying they do dry charged with acid packs, and some doing wet mail-order. This time I don't want exposed links, and several sources are doing 80Ah 600CCA 'modern' topped batteries at about Ł67 (cheaper than five years ago!) each, delivered filled, with variously 1, 2 and 3 year warranties. Sought confirmation of the design from the 3-year place, didn't hear backs so I opt for the 2-year MGOC ones as they deliver wet albeit with a Ł10 delivery charge. In the meantime I remove the old batteries, and mindful that Bee has had a creak from the passenger-side rear for some years that I haven't been able to find, and the passenger-side battery has failed twice now, have a good look at the cradle. Tap all round with a decent hammer and no 'dead' or 'odd' sounds, same as the other side, so I don't think it is that. The top of that battery did crack alongside one of the end cells a couple of years ago and I filled it with Araldite, but in the event it is the cell at the other end that is dead. Clean up the clamps - there is a bit of white corrosion on part of one of the clamp plates - by the crack as it happens, and await the new batteries as well as the jump pack. I'll drop the old batteries back in when I get the jump pack as it will be a good test for the pack.
Batteries arrive and I unpack them, to find one of them has leaked a little electrolyte into its poly pack despite sealed caps being fitted in place of the breathing filler strip fitted when the batteries are in use. So watch out for that regarding skin, eyes, clothing and anything else.
Test-fit the batteries into the cradles to find the base is about 1/2" smaller all round than the old batteries, and if pushed fully onto one of the rubber buffer strips the other end is barely supported.
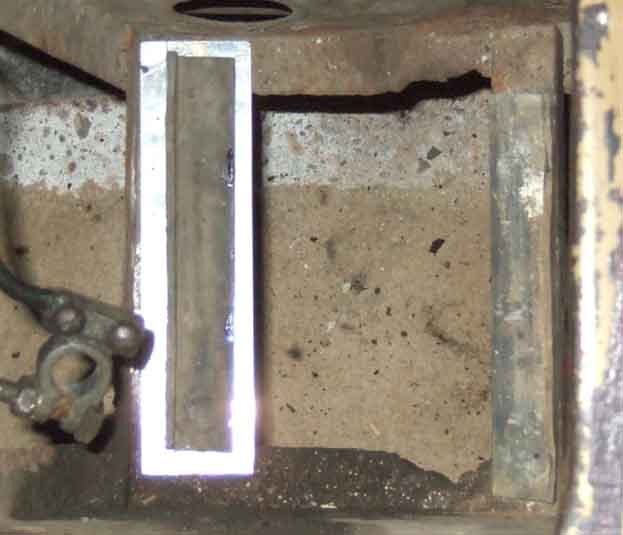
I had the opposite problem on the previous set and had to trim one of the buffers to get it to sit correctly. I can't leave it like that so cut a strip of 50mm wide 3mm thick alloy I have to hand, and glue the buffer to it in the correct position.
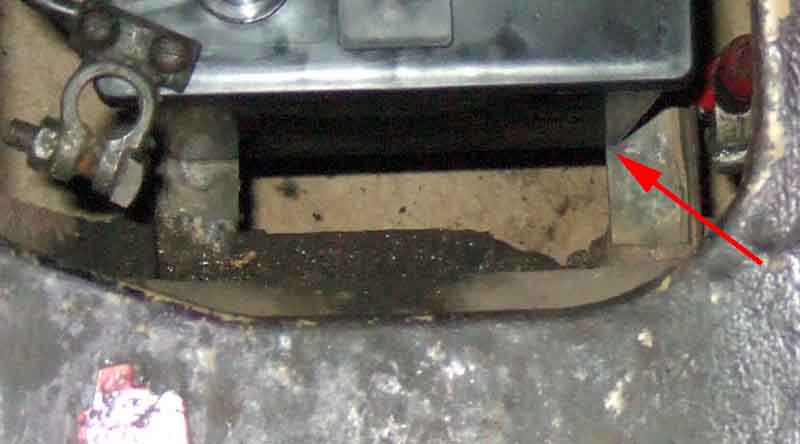
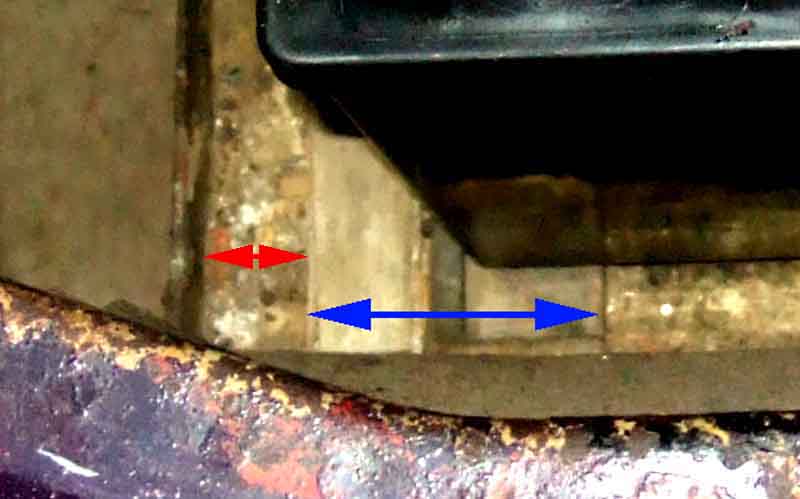
That's the near-side cradle, for the off-side I had to do a similar thing when first fitting 6v batteries many years ago as the cradle had been extended to take a small 12v, so I can just slide that (blue arrows) forwards under the battery, leaving a gap to the back of the cradle (red arrows). The hold-down will be pulling the battery in that direction so nothing is going to move.
At least the smaller case means I can get my hands down the sides to lift them out, and not be dependent on finger-tips under a lip, which is pretty minimal on these batteries.
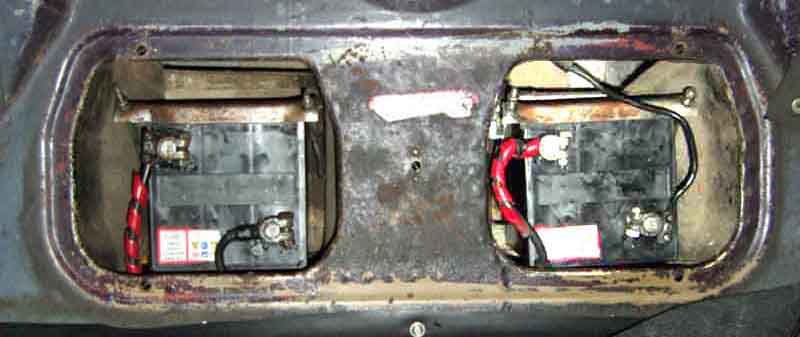
Orientation of the cables needs some thought as with the filler cover being a single strip they have to go round the ends or you won't get the cover off to check the electrolyte level. The last link cable I bought was shorter than previously and I had to extend the 12v cable from the cut-off switch, and all three cables are long enough to be clear of the covers. Care also needs to be taken to keep the 'live' post clamps clear of the hold-down strip as much as possible. Although on the near-side battery only one of the posts is 'live' and the battery could be turned to keep that way from the hold-down strip, on the off-side both posts are 'live' with respect to earth - one at 12v and the other at 6v. I had to cut down the earth clamp bolt as there was so much thread sticking out I couldn't get both that and the cable clear of the filler cover. Trial-fitted I check Bee will start, and she cranks away like billy-oh starting instantly with no choke, although part of that is having started and run very briefly with the old batteries to test the lithium jump-pack..
Next problem was the hold-downs. I'd bought a kit from MGOC when first going back to 6v batteries, but the rods were way too long so I had to put an 'S' bend in all of them to take up the slack. These new batteries are about 1/2" shorter top to bottom as well as having smaller bases and I run out of thread! But I have dies now so cut another half-dozen threads on the rods and that is enough. With the earth cable disconnected it's the usual fiddle getting the hooked ends of the rods in the sides of the cradle, but again with the batteries being smaller easier than usual.
Finally remove each of the clamps (earth first!) and daub Vaseline on the posts and round the clamps, as well as on the top of the hold-down strip. Reconnect (earth last!), switch on, fire up, and all is well I wonder how long these will last.
October 2014: Sunny Sunday morning, could be the last for a while, so get the paper in Bee. Went to restart and just a clonk from the starter, then apparently dead. I say apparently, as when I opened the door the courtesy light came on at about half-brilliance. "One battery dead" I said to myself. Took the cover off and tapped a spanner across the posts of both batteries - spark from one, nothing from the other, diagnosis confirmed. Still, 13 years of service is pretty good, and sudden failure like this is unusual given I've not had any problems starting before this. Having said that these are Lucas batteries, and in the 70s I bought a new Marina with a Lucas 'Pacemaker' (I kid you not) battery and that also failed suddenly and completely with no prior warning.
Called daughter who lives about a mile away on the off-chance she might be up and about, she was, so she picked me up and took me back home where I took the battery out of the ZS and collected the jump-leads from Vee. Back to the roadster, balanced the battery on the shelf between the two holes and connected the jump leads. With a bit of wiggling of the connectors (these are cheapo leads with aluminium conductors and crimped clips) Bee fired up, so we got back home.
I've been pondering getting new seat covers for Bee from Leacy as they were the best quality I'd seen, so rang them with a view to popping over and picking up a couple of batteries and the covers. No covers, only ordered on request which didn't surprise me due to the low turn-over, but no idea how long they would take. Also no batteries, waiting for stock, no idea about a delivery date. I didn't want Bee off the road any longer than I had to so I would have to consider somewhere else for the batteries. Leacy gave me the number of B J Banning just down the road from them. They do normally stock them which for a conventional tyre and battery place was quite surprising, but only had one in stock. They said they could order me two for a couple of days time. They are very high capacity at 80AH and 600CA which is getting on for double the power of the originals, but I obviously don't need that capacity, and they are Ł90 each so expensive as well. MGOC and Moss are mail order, with an additional charge for the acid packs, which is going to be about Ł80 before P&P. So opted for Battery Megastore with a more conventional 57AH, at Ł73 including the acid, and free delivery next day which is a good deal. These batteries have exposed cell links, so care needs to be taken with spannering both clamps on both batteries, even if the earth lead is left until last, as per the first set I had. Other suppliers may have the more modern single fill, covered links design, as per my previous batteries.
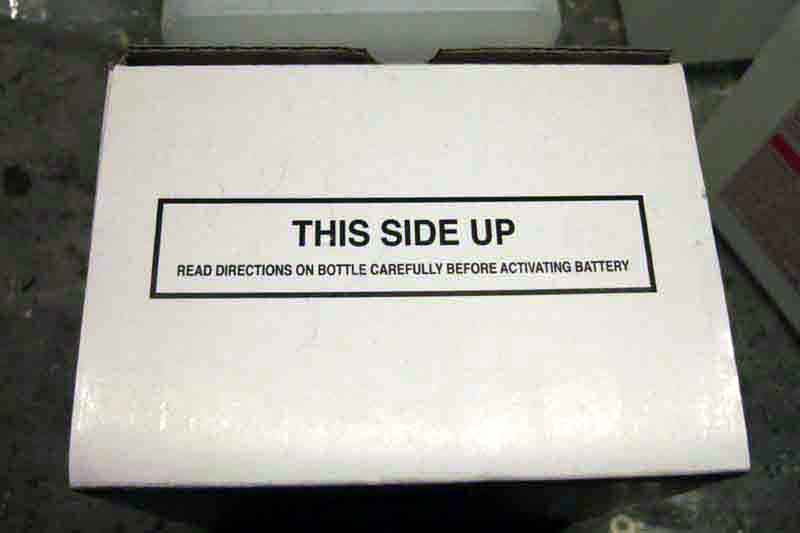
Two identical boxes duly arrived, opened the first to find both batteries in it, and for a moment I thought they had sent me four! But the second box contained the acid. Eight packs which rather surprised me, as I was only expecting six i.e. one per cell. Big notice on the box lid saying "READ DIRECTIONS ON BOTTLE CAREFULLY BEFORE ACTIVATING BATTERY":
Took the acid bottle out of the box, and one side had a label giving dire warnings about the hazards and what do in the event of contact with eyes, skin or swallowing it (!), and the statement "Filling Method. When filling, be sure to read instructions for Handling Electrolyte on reverse side:
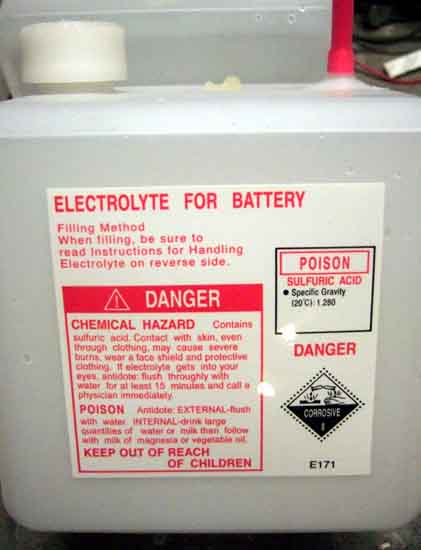
And what is on the reverse side? Nothing!
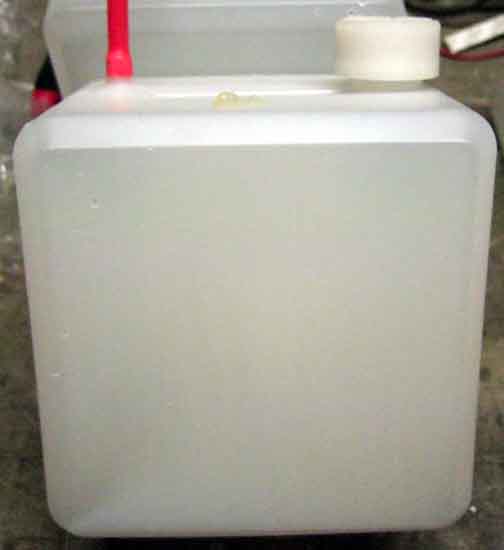
There is a screw cap on the container, and a sealed spigot, and a red plastic tube. Now given the rectangular shape of the container there is no way you are going to pour the electrolyte from that into each cell, unless you use a suitable funnel which I don't have. The red tube looks like it might be intended to fit over the spigot once the top is cut off, but it seems too small.
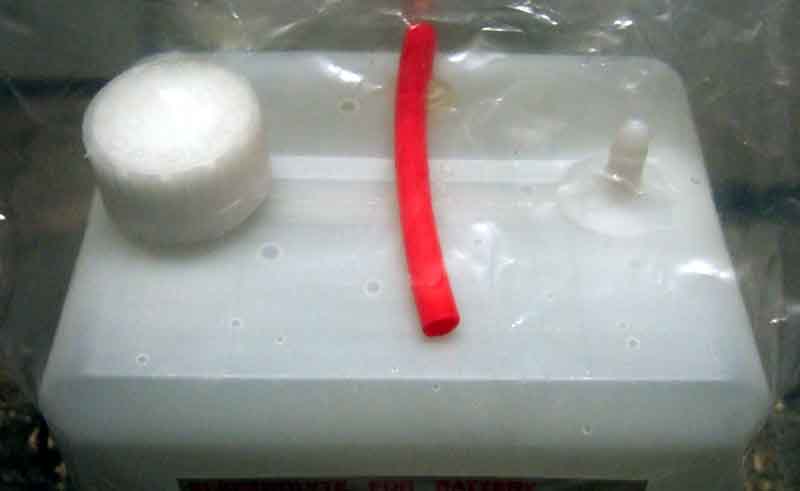
So ring Battery Megastore and say there are no instructions, to be told that one does have to cut the end off the spigot, fit the tube, and pour in that way. You need to cut as high as you can, but below a circumferential 'rib' where the end of the spigot has been plugged, but not so low that you don't leave enough spigot left to fit the red tube such that it stays on while you are pouring. The spigot takes some cutting as the walls are pretty thick, and you have to be really careful the container is held securely so it doesn't tip over. Fortunately there is a large air space above the acid, so little chance of squeezing the container with enough to force electrolyte out of the cut spigot. However with shipping some electrolyte has got into the spigot, so I get droplets scattered about each time I cut one of the tops off. Given the thickness of the walls of the spigot, the hole in the middle is pretty small.
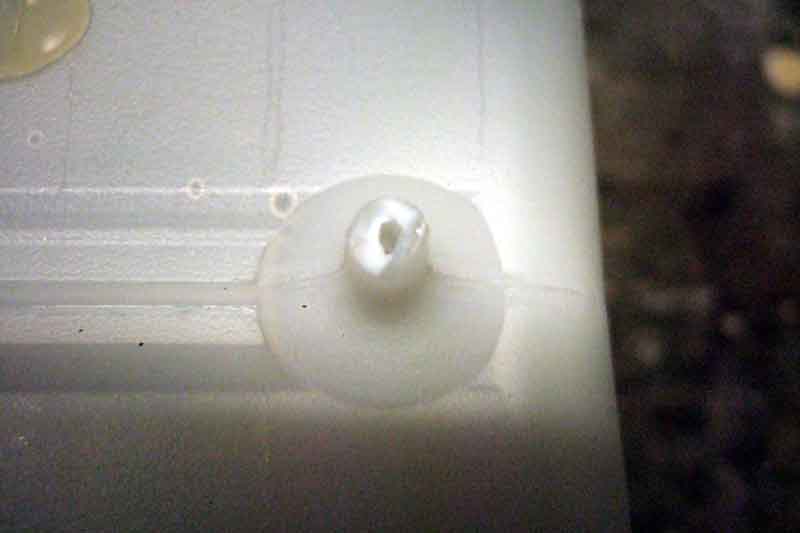
Now comes time to force the tube over the spigot, which takes some doing. It has to be on far enough such that it doesn't slip off, but the spigot becomes wider further down, which is why you need to leave it as long as you can, but cut below the rib which would make it even harder to get the tube on. However I subsequently wonder if the cut should have been above the rib, to better retain the tube, even though it would be harder to push on.
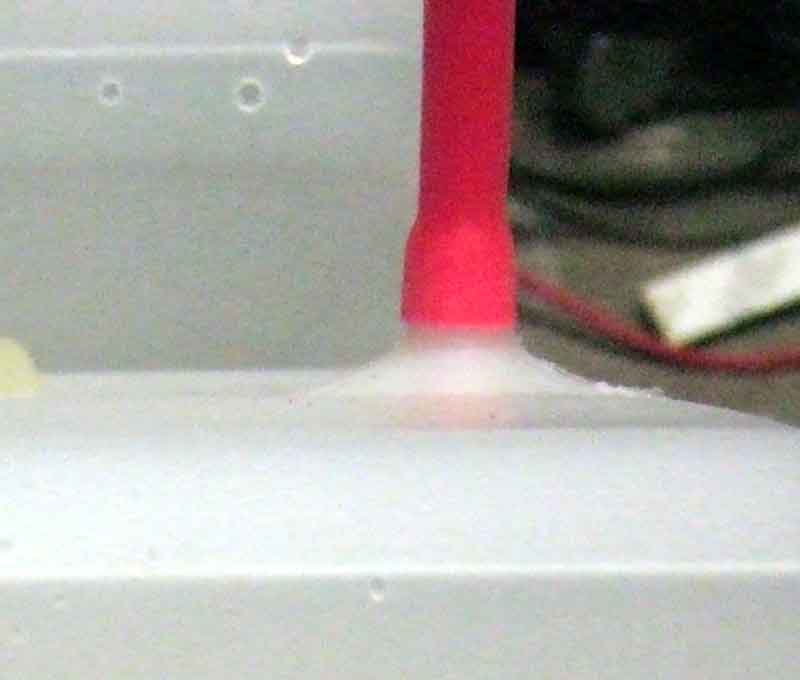
The next thing is to wonder if the cap has to be unscrewed to let air in while acid is coming out - it does contain instructions on how to do so. That seems risky, with a large quantity of acid likely to pour out if you tip it up too much while concentrating on keeping the tube in the filler hole. But without it removed only a tiny trickle of acid comes out - I could be here for some time. I also ponder propping the container up and leaving it to dribble out at its own rate - but that would have been a Bad Idea as will be seen later. In the end I opt to leave the cap on, and apply pressure to the sides of the container to force electrolyte out a little faster, but not so much pressure that my hands start shaking and electrolyte starts going everywhere.
Squeezing with periodic releasing to allow the container to suck air back in (it takes a second or so each time), I realise the level is getting near the top of the separators in the first cell, but there is still loads left in the first container! Quite a bit of fizzing from the electrolyte when it reaches the top, so I leave that and move onto the next as I can't clearly see the level and it might drop anyway as it filters into all the nooks and crannies of plates and separators. I leave it to stand for an hour or so, then top up to just above the separators. I note that the case is now slightly warm to the touch - not noticed that before (last time - possibly MGOC - the bottles were 'bottle' shaped with just a screw cap and easy to pour into each cell, also each cell needed one bottle). Eventually it only takes two packs to fill three cells, hence the Bad Idea of leaving the container to dribble electrolyte into the cell unattended. Fill the second battery the same way, so I have four left over!
Then comes fitting. These batteries have a deeper recess under the rim on the short sides making it easy to pick them up to lower them into the cradles. The old batteries have a narrow recess meaning you are lifting them with just the tips of your fingers, hence liable to slip. But once in the cradles, I realise they aren't sitting correctly on the rubber pads at the bottom of the cradle. There should be two of these (AHH 6351) per battery, going across the cradle at the front and the rear (Image from Brown & Gammons.

So I compare the cases of the old and new batteries and find they are quite different. The old batteries are 160mm x 150mm at the base, with vertical ribs down the sides that stop an inch or so short of the base. The new batteries are 170mm x 160mm i.e. a full centimetre bigger in both dimensions, with large ribs on each corner that run right down to the base. There is only 165mm available between the raised edges of the pads. The base of the new battery is too big to sit on the main part of the pads, and is sitting on the raised edges instead. New battery on the left, old on the right, with the rear edges aligned.

I try turning the batteries through 90 degrees, but the more secure finger-holds under the deeper recess at the top cannot now be used as there is not enough room for fingers fore and aft in the battery holes, so I have to use the narrower recess on the other two sides. And although they then sit correctly on the pads and I can attach all the cables, it puts the nuts on some of the clamps very close to the inter-cell links, which I'm not happy about. In the end I decide to slice a couple of mm off the raised edges of the pads, which, given that the corner ribs on the new batteries curve under as they reach the base, gives just enough room for them to sit properly the right way round.
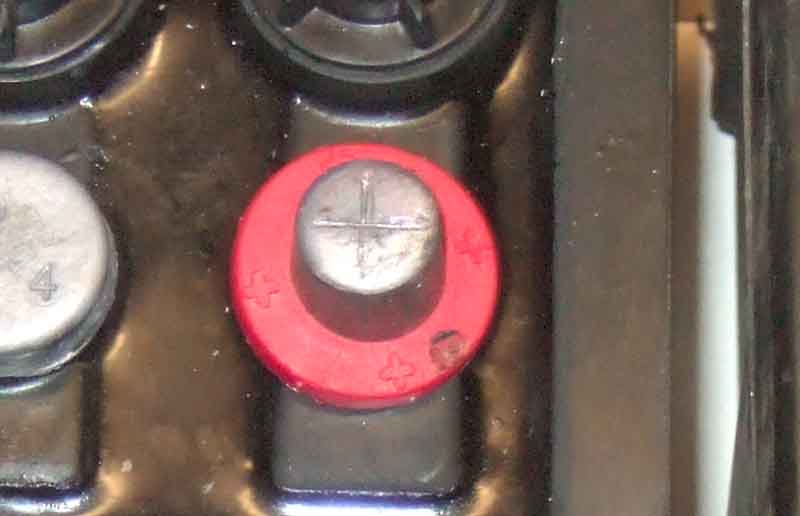
The posts have blue and red discs on them, as well as '+' markings on the positive post. Some are loose but others not, and when I fit the clamps over the post some of them don't seem to fit down quite so far as I expect. I don't know whether the discs are supposed to be removed before fitting the clamps, but as it's only marginal I leave them on.
After that it is just a matter of refitting the battery clamps, then attaching the cables. A quick test crank gives a decent speed, and when the weather is clement I give her a run round the block to settle things, recheck the electrolyte levels, and do some voltage tests to check the charging is OK.
So quite a fiddle with acid and installing, it remains to be seen how they perform over time (less than five years!). The first set I had with the same 'tar top' and exposed links lasted seven years, the last set were more modern-looking with a single fill and concealed links and lasted 13 years i.e. nearly double.