
The tool I put together:
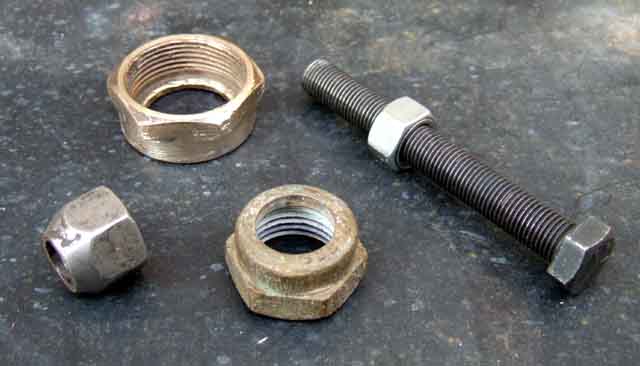
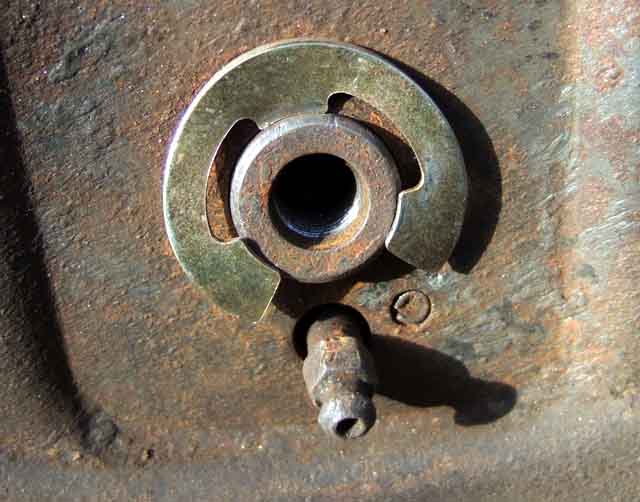
Looking at the clip it consists of a ring with a section cut out and three tongues pointing inwards. It isn't flat but slightly twisted such that the middle tongue is bent one way and the other two the other which makes it 'handed'. Whilst it can be fitted either way I found that if fitted with the two end tongues pointing towards the backplate held the cylinder in place, it was a bit sloppy, but fitting the clip the other way up results in the 'spring' in the clip holding the cylinder firmly. It seemed to me that by pressing down evenly on the outer part of the ring you could get the tongues to ride over the edge and slide down the sides of the boss on the cylinder at least part of the way. Then it should be a relatively easy matter of pressing the tongues down to drop into the groove of the boss. Both the commercially available tools use a bolt screwed into the pipe fitting of the cylinder, and a nut on the bolt to apply the force which seemed reasonable, and a 3/8" UNF bolt and nut satisfy that requirement.
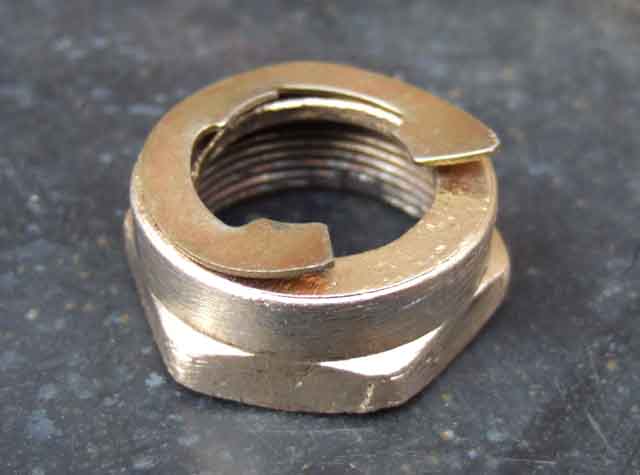
I found a brass pipe fitting in a box of bits where the outer circumference of the fitting was just slightly bigger than the clip as shown above (note that this picture shows the clip the 'wrong' way up).
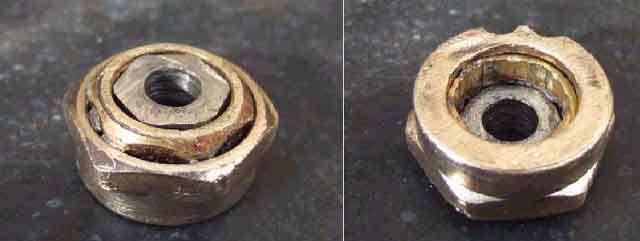
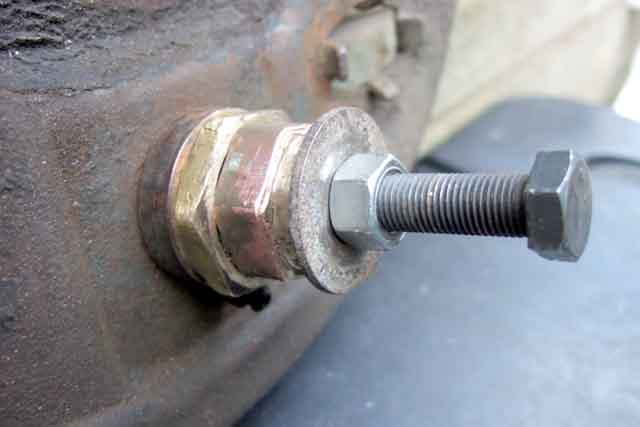
The next requirement is to be able to position the clip correctly and firmly before applying the pressure. The fitting above has a large hole in the centre which allows far too much lateral movement, but I found that the Outside Diameter (OD) of a nut off a 1/2" compression fitting was just slightly bigger than the Inside Diameter (ID) of the larger fitting, and with a little filing down of the angles of the spanner flats allowed it to be pressed into the larger fitting. This still left quite a bit of free play, but I found a wheel nut (off a Metro, or possibly dating back to when I had a Mini around 1970) again with a little filing could be pressed into the inner fitting. This was the same 3/8" thread as the bolt, so drilling a clearance hole allows it to slide up and down the bolt while giving very good lateral location. This left the tapered section of the wheel nut standing proud, which I cut off.
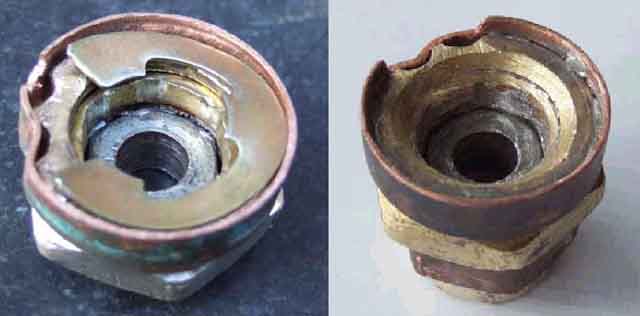
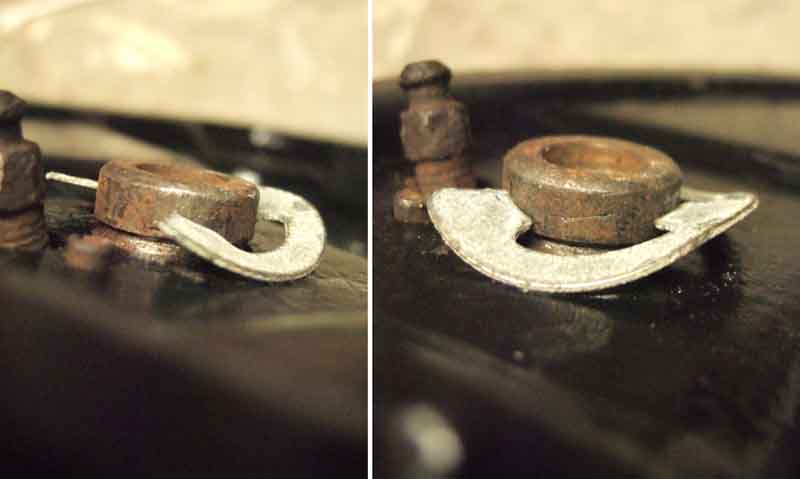
This still allowed the clip to move around under the 'tool', but I found an old copper U-bend a short length of which snugly fitted over the circular portion of the larger fitting to hold the clip in exactly the right position. To clear the bleeder valve and locating peg I shaped the brass fitting and copper sleeve as shown. A later refinement (right-hand picture) was to chamfer the ID of the outer fitting to make it easier for the tongues of the clip to be eased over the end of the cylinder boss. Note that in the left-hand picture the clip is in the correct orientation for fitting.
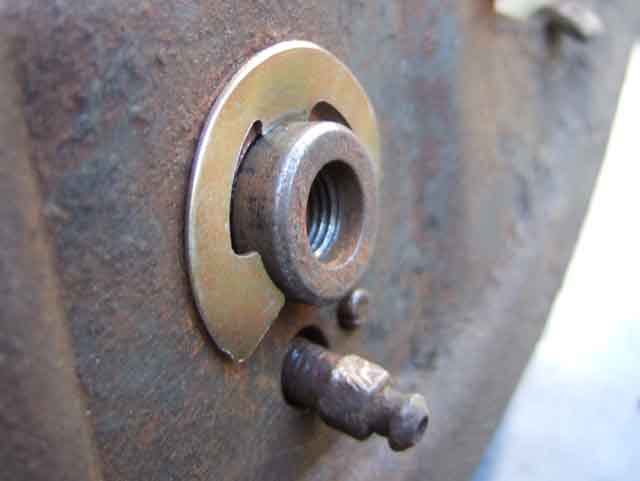
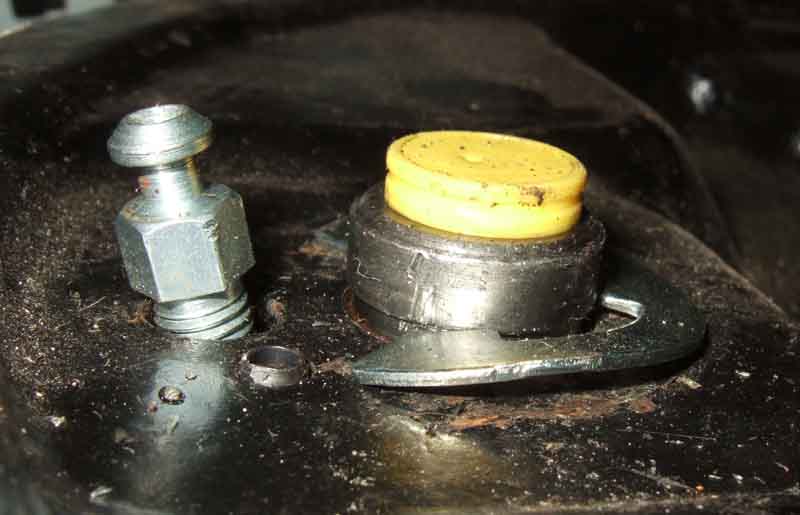
In use you just 'hang' the clip off the boss by its middle tongue ...
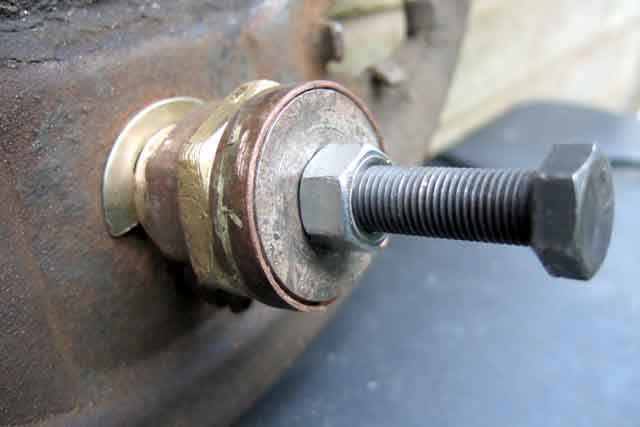
... then fit the tool over the clip while you screw the bolt into the pipe fitting. Gently turn the nut, there is a little resistance then a 'click' and the nut becomes much easier to turn ...
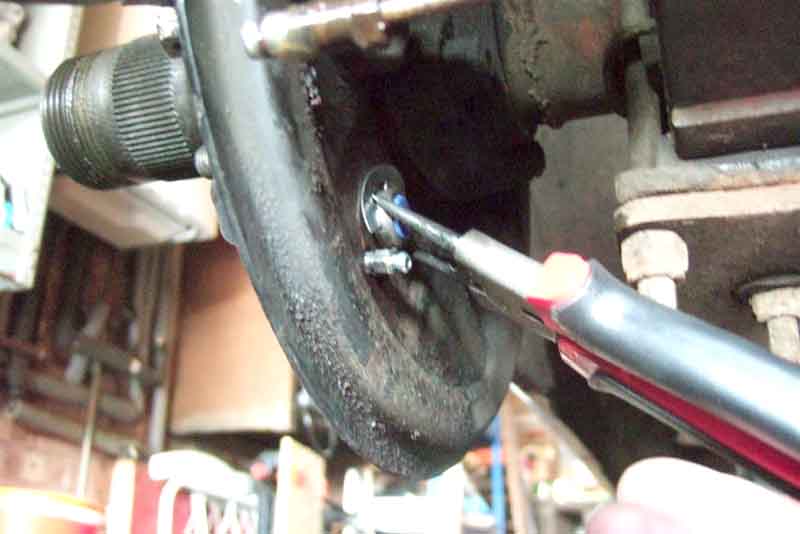
... as the clip slips onto the boss, although the tongues are not yet located in the groove. At this point you could press the tongues of the clip into the groove one-by-one with a screwdriver with no chance of it pinging off but I wanted to go a bit further. I had noticed that the ID of the 1/2" compression fitting nut I had used was just slightly smaller than the OD of the slave cylinder boss. I found another nut and a bit of work with a file opened it out so it just slides over the boss. This then can be used with the bolt and nut as before and a suitably sized washer to press all three tongues into place in one go. I felt it would be nicer to have both parts of the tool attached together and found another piece of copper pipe of smaller diameter than the first which with a bit of shaping was an interference fit over the spanner flats of the two 1/2" compression fitting nuts so holding them together. They could be brazed but I don't have the facilities.
So now I just install the clip over the boss with the tool one way round, remove it and refit it the other way round as above, and with a couple of turns of the spanner you can hear the tongues clip into place in the groove.
So there it is, a few hours fun in the garage saving some aggro under the car.

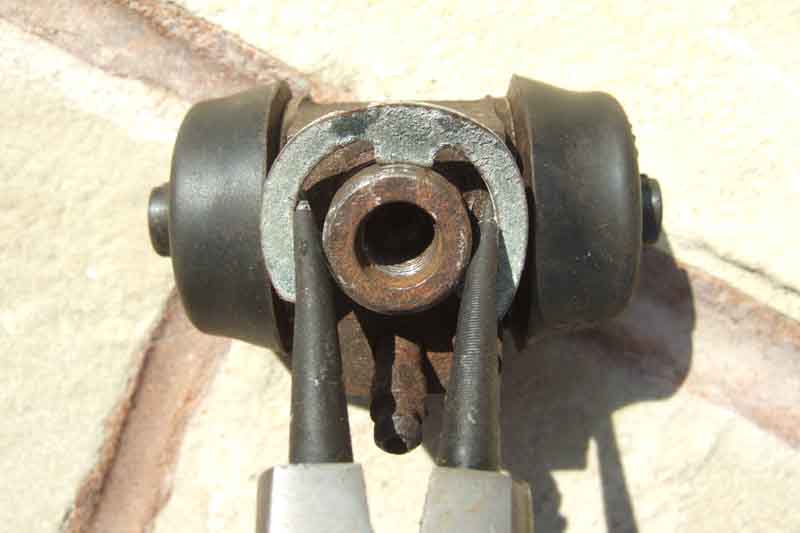
But one year I was not able to use the tool so came up with using a pair of outside circlip pliers to fit the clip. The pins on the pliers naturally gravitate to beside the end tabs, so just squeezing the handles opens up the clip:
August 2015: A while ago someone on one of the fora got rather exercised about my orientation of these eclips insisting quite vociferously that my way was wrong. A couple of other people saying their known-history cars were as I describe from the from the factory made no difference, and this from the sectioned MGB at Gaydon looks the same to me.
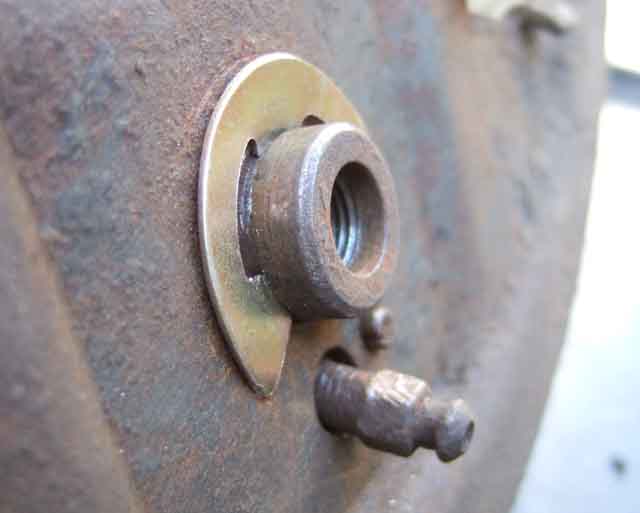
With the convex face of the clip towards the back-plate the curved part is pressed against it:
All three tabs snap into the slot on the cylinder:

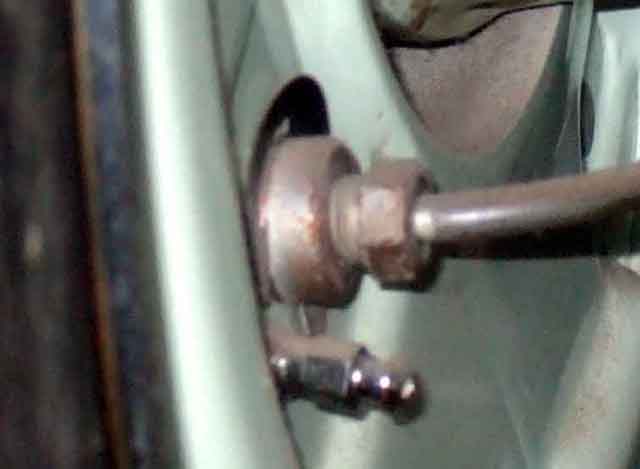
Whereas fitted the other way the corners of the clip are digging-in to the back-plate, the outer tabs do not snap into the slot, and pop out again all too easily:
In September 2020 Dave O'Neil came up with this document that does say it should be fitted with the concave face against the back-plate, not the convex:
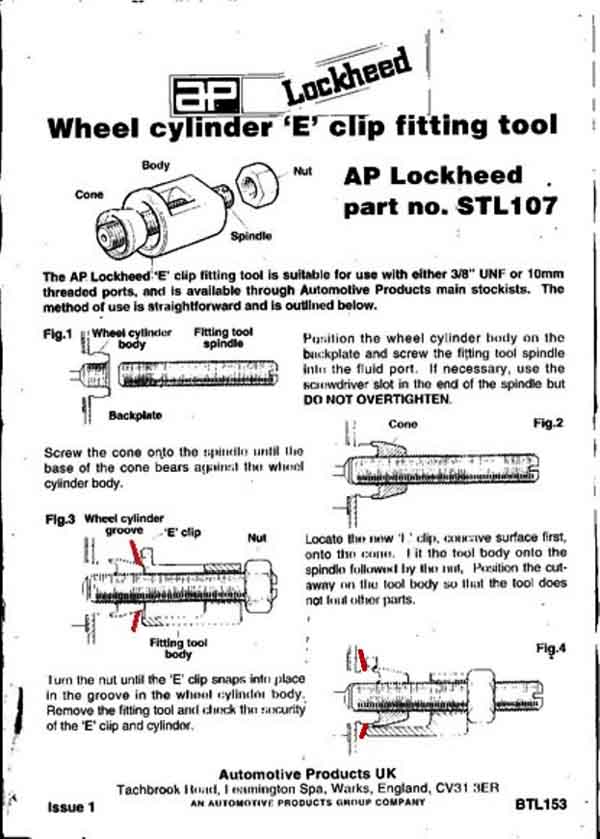
Nigel Atkins (who applied the red highlighting to the document to emphasise the edges of the tabs) said he had used a similar tool and that way round the clip did slide on easier. There is also a YouTube video out there that shows the tool being used to fit the clip my way round, but someone has posted a comment that the clip just digs into the cone. So if using the tool you may have to do it that way, but using the circlip pliers I'll stick to my way.