
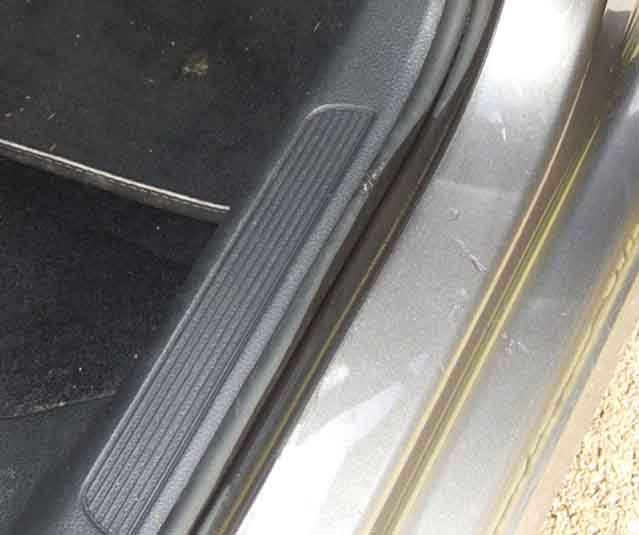
Necessary as first one then both rear door speaker seals were found to be faulty and letting water into the car. After significant rain it could be found sitting on top of the seals, which is effectively inside the car. It evaporates even in winter, creating a problem of significant condensation, and unless it gets so much it overflows onto the carpets which then feel damp you have to open the rear doors after rain to spot it:
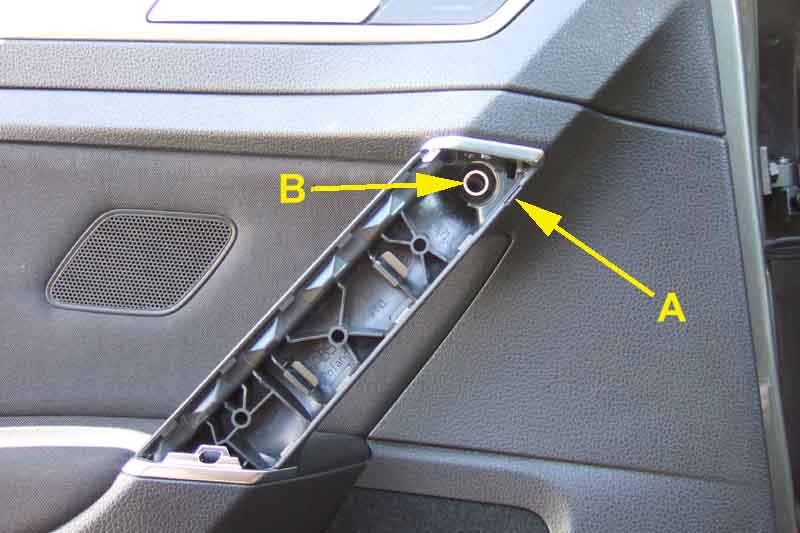
Flip the cover off the door-pull by twisting a broad flat-blade screwdriver in the small depression at 'A'. Remove the T30 Torx screw at 'B':
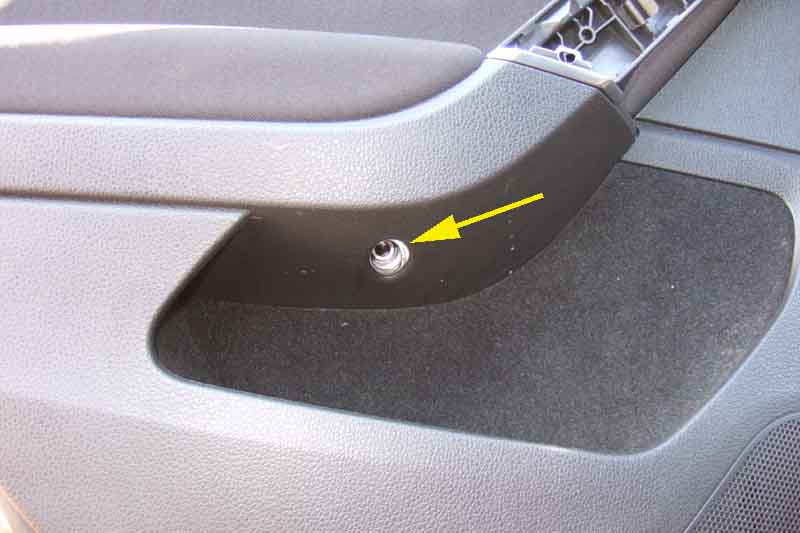
Below the door pull there is another T30 Torx screw without a cover:
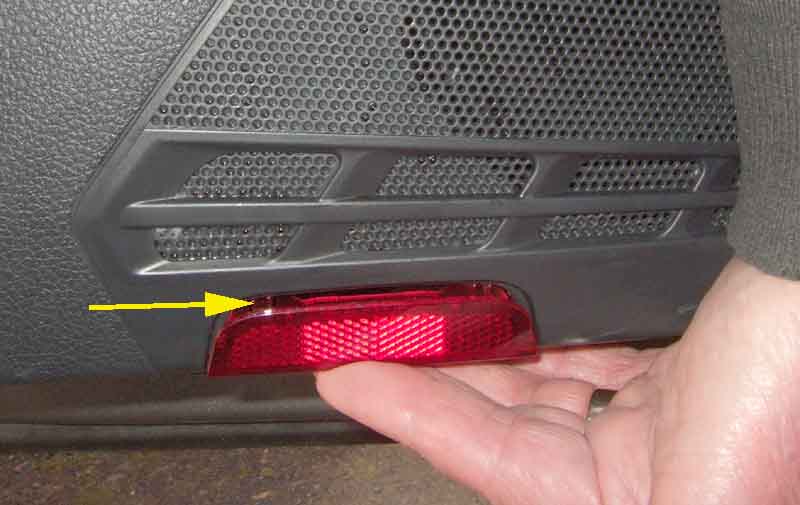
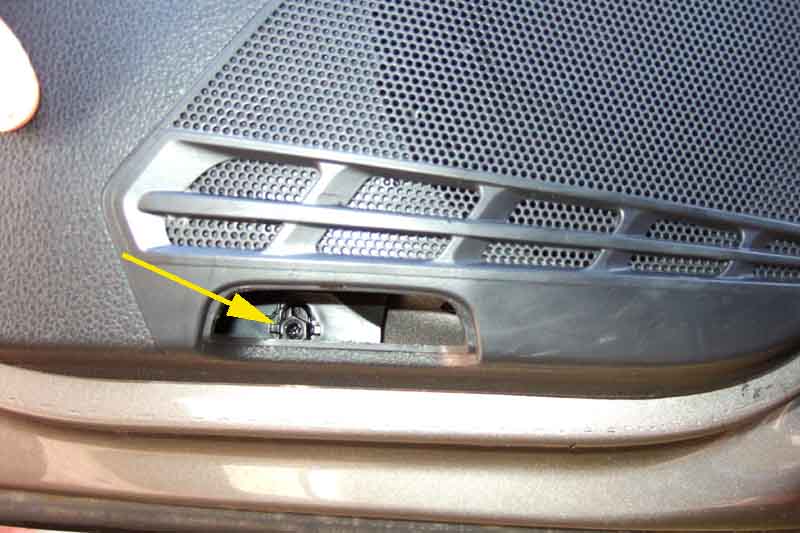
Below the speaker there is a reflector, flip the top edge down, finger-nails were enough for mine:
Behind that there is a plastic 10mm hex/Torx fastener:
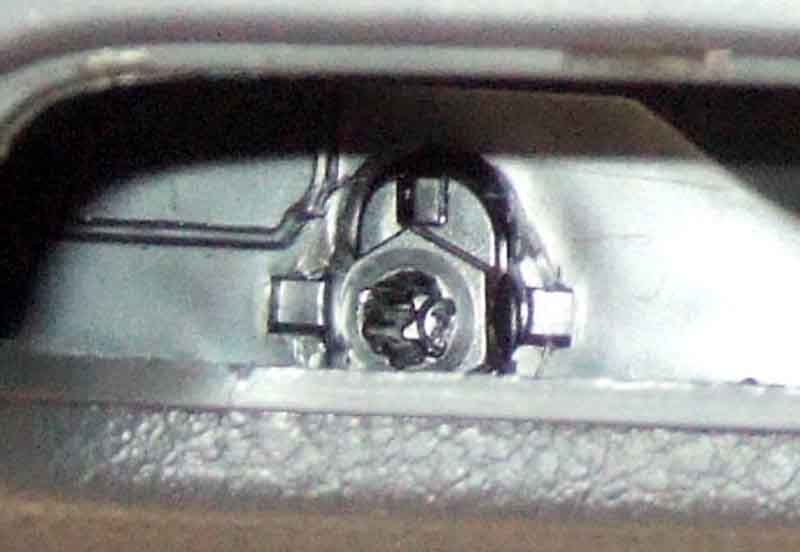
Turn this fastener 90 degrees to release the panel, another 90 to fasten it, and so-on. Check by pulling against the bottom edge of the panel and you should be able to see movement when it is released and no movement if it is still fastened. When replacing make sure the tongues on the fastener are vertically up and down as shown here:
Lever the panel off the door working up from the bottom - effort required, then slide the panel upwards to release it from the top of the door by the glass - considerable effort required!
There are six clips that fasten the panel to the door - three up the front edge and three up the rear. They have a centre pin that slides back and fore in the main part to 'open' the clip to allow easy removal of the panel from the door, and a 'closed' position that firmly attaches the panel to the door.
Really they need a tapered trim tool that wedges between the two halves of the clip to pop it into the open position, which means knowing where each clip is! But without that and with the videos just appearing to lever them off, that is what I did with them still in the closed position and it took a lot of force. It says something for the clips that they didn't break which would have been annoying, nor the part on the panel they attach to which would have been a disaster.
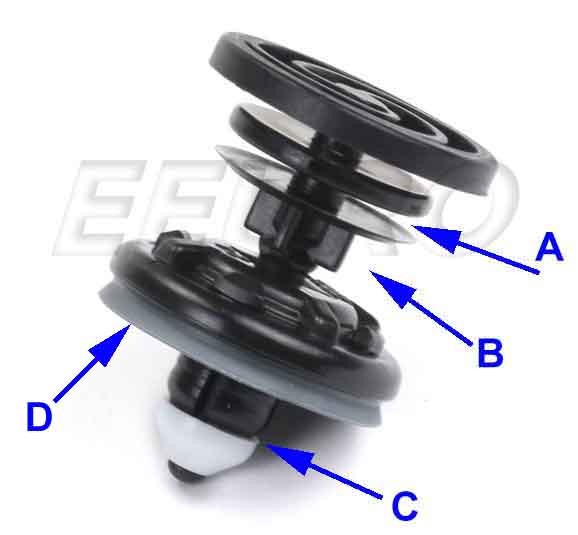
An open clip - 'A' is what slots onto the trim panel, 'B' is where the tapered trim removal tool must be forced in to open the clip. 'C' shows the white part on the end of the pin up against the end of the main part of the clip that fits in the door hole. This allows the four legs on the main part to close up for easy removal and insertion. When refitting the trim panel pressing on the panel should pop the clip into the closed position, and if that wasn't enough 'D' is a soft seal that prevents any water running down the back of the inner door skin from leaking through to behind the trim:
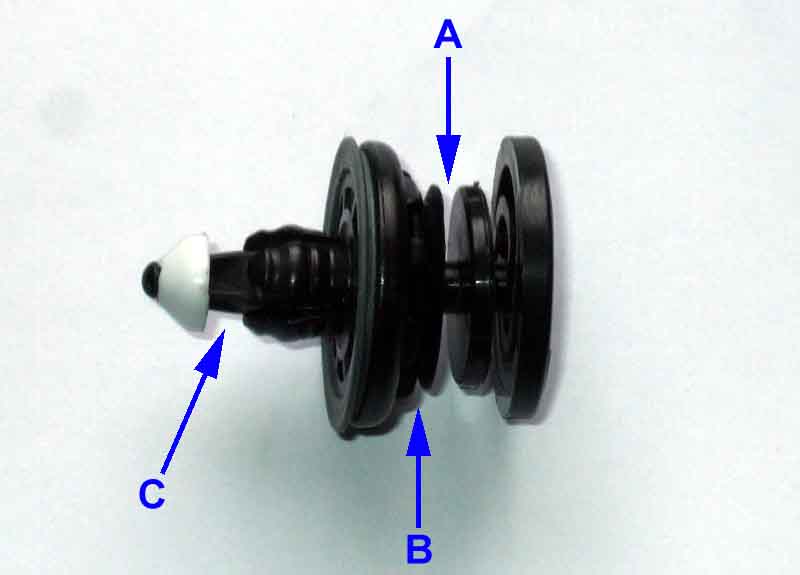
Here is how my clips variously came out of the door, or out of the trim panel - 'A' is where the clip slots onto the trim panel, 'B' is where the trim removal tool must be forced in to open the clip, and 'C' shows the white part on the pin further away from the main part of the clip, which opens up the four legs that go through the hole in the door to firmly attach the trim panel to the door:
The first three I popped out were down the front edge and came away with the panel, but once they were out it allowed more movement of the panel relative to the door and the rear three came out of the panel while staying in the door. At that point - had I known how the clips worked - I could have used something to open them up and remove them from the door easily. As it was I had to lever them off twisting a broad flat blade screwdriver against a piece of thin wood to protect the paint on the door. I tried pressing the end of the pin with the white part back into the main part of the clip, and levering them with screwdrivers, but no go. In the end I 'just happened to have' a thin spanner that I think was originally supplied with a new cooker donkeys years ago to adjust the feet. I was able to force that into the appropriate place on the clip and use a flat-blade screwdriver to twist between that and the lower part of the main body to open them up, but even that took quite some force. The proper plastic forked wedges would definitely have been easier!
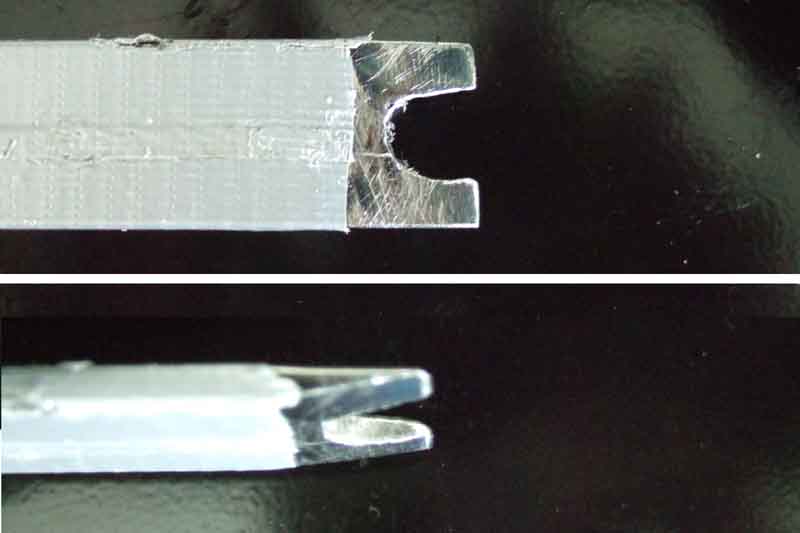
When I discovered the driver's side speaker was also leaking water into the car I knew where the clips were and how they worked so thought about a removal tool. It needs a forked wedge to open the clips, 4-piece plastic kits on eBay at less than Ł2 but how good can they be for that money? So I hunted around the garage to see what I had to make one. Plastic would be ideal but couldn't find any of suitable thickness. Wood is the next most obvious material, but short of a hardwood like oak would probably break. Then I found a strip of 20mm x 4mm flat steel strip which looked like it would do. Ground a chisel-end, then cut a slot 9mm wide and 10mm deep. This was trial and error, 10mm would probably be fine. It needs to be that wide to fit round the cross-piece on the pin, the 'B' arrow in the picture of the open clip above is pointing right at it. If the slot is not wide enough to fit round that it breaks off the legs, which was what I found with the 'error' referred to above. Duct tape wrapped round to protect the trim and the door:
Once it is the right size progressive plastic and wood wedges are needed to open up the gap between trim and door so you can see where the clips are, and where to insert the tool. With the tool inserted in the correct gap and the trim panel already being wedged open it didn't take much effort to pop the clips open, and the other five opened easily.
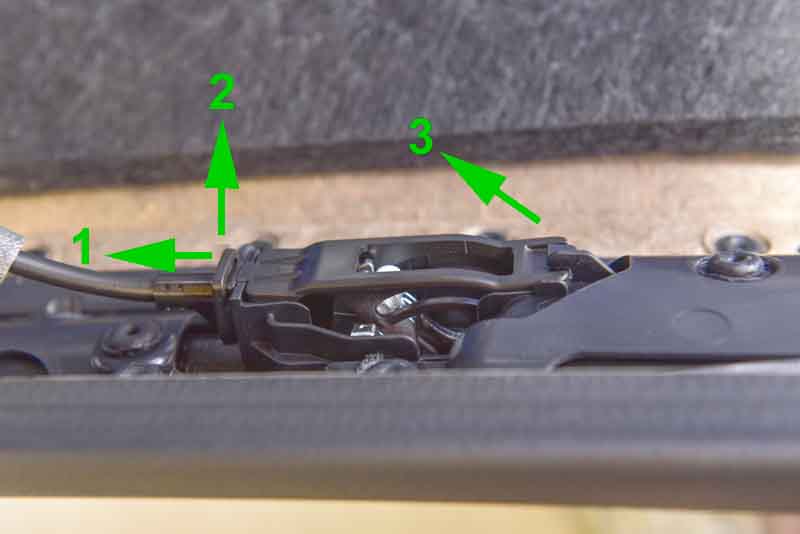
Door handle cable - as easy as 1, 2, 3. Pulling the cable end back (1), then away from the panel (2), and the other end will come out of its retainer:

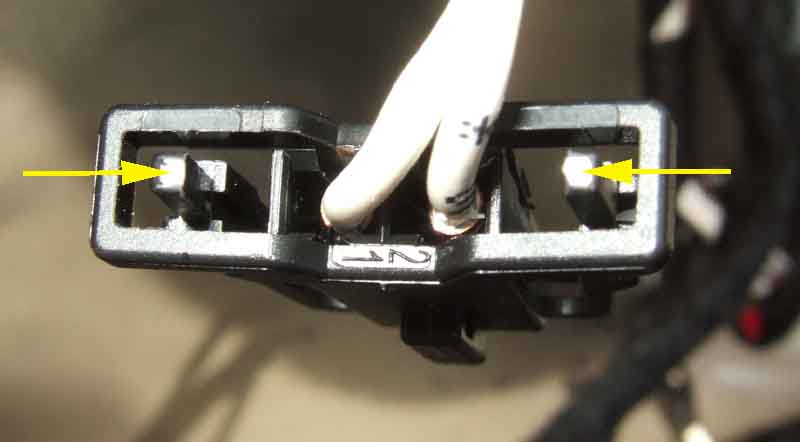
Tweeter connector - push the arrowed posts towards each other to release it from the socket:
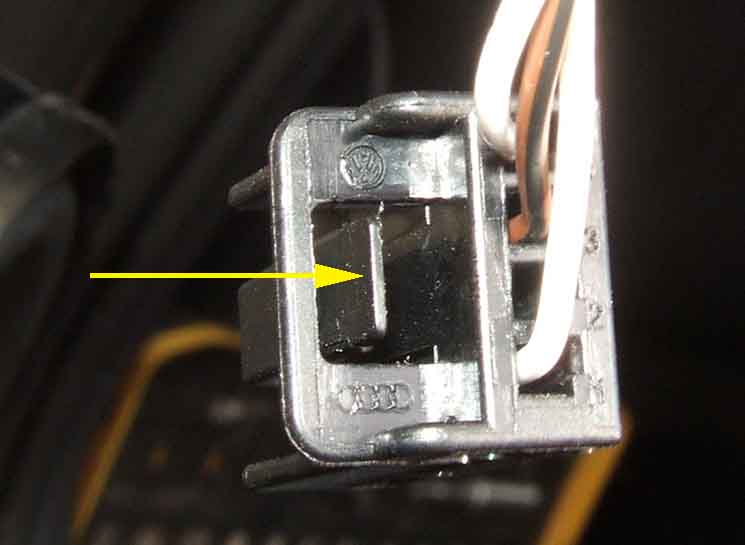
Door switch connector - with everything else disconnected rotate the trim panel through 90 degrees for better access. Push the arrowed tab in the direction of the arrow to release it:
Replacement is the inevitable reverse of removal, with the ends of the open door trim clips in the holes a sharp smack with the palm of the hand against the trim over each clip snaps them shut.