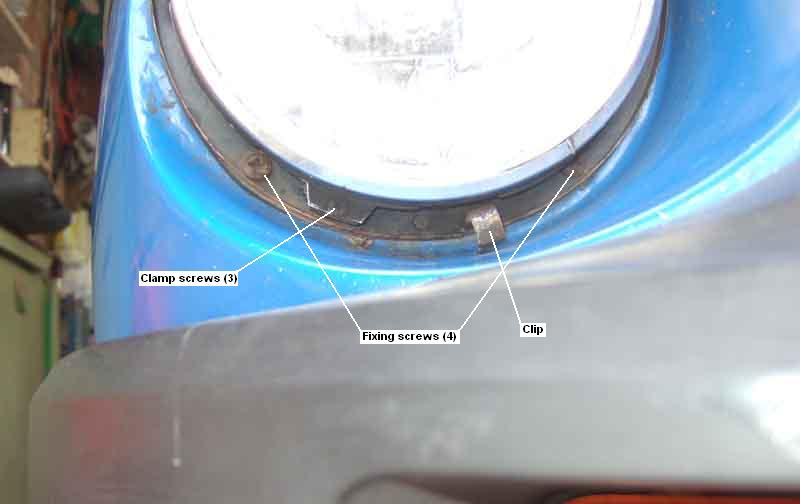
Trim-ring removal Clearance to wing Beam adjustment Reinforcing ring
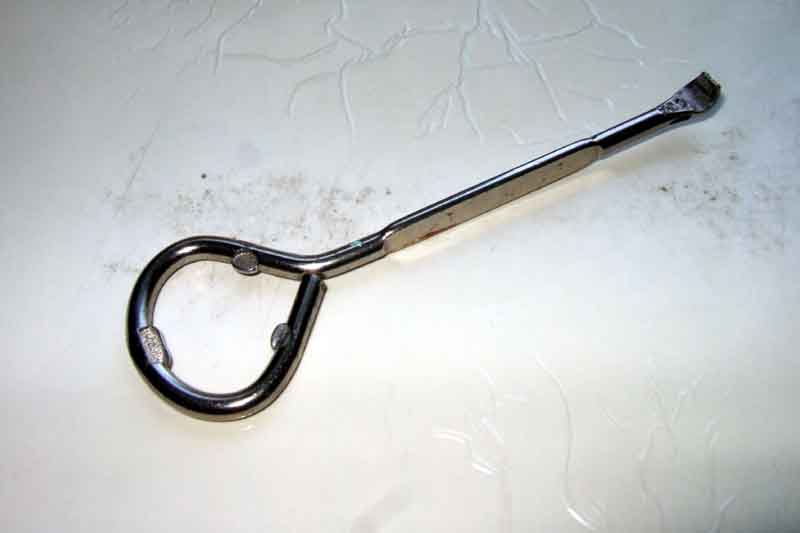
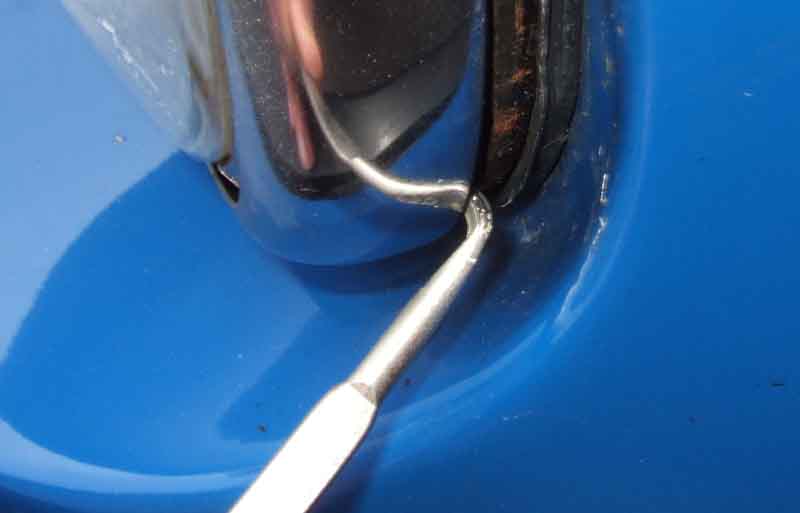
The right-angle end:

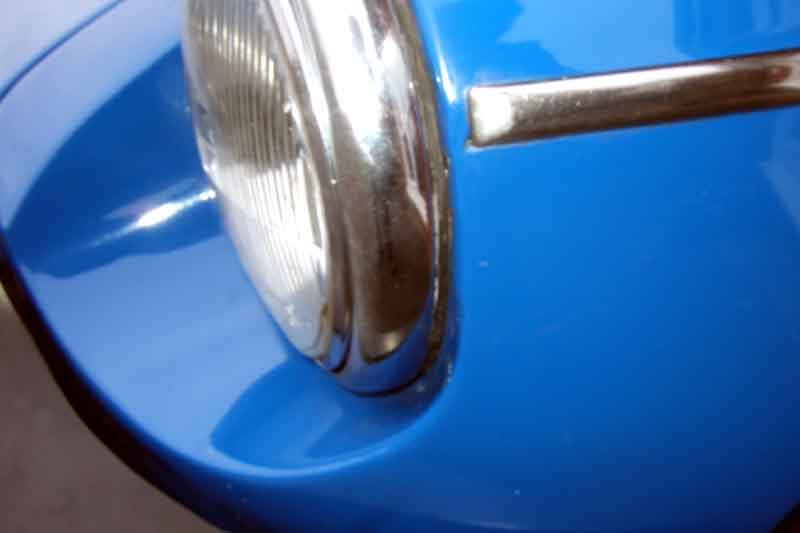
Trim-ring flush against the rubber gasket initially:
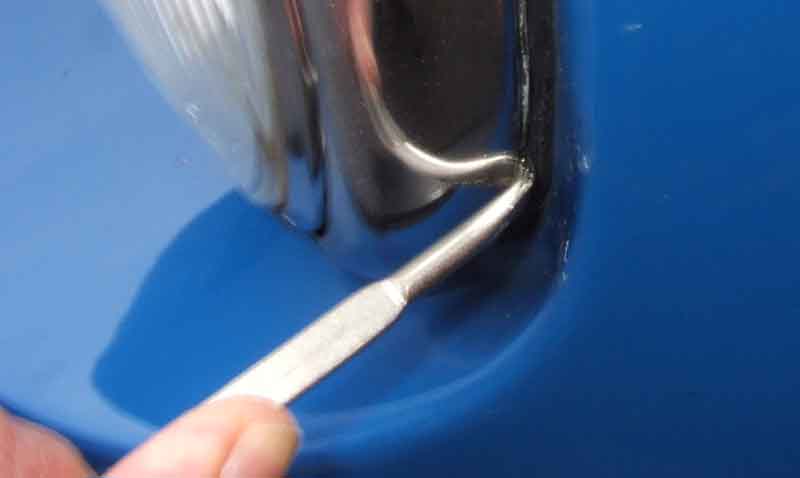
Ease the end of the hook behind the ring:
Pull forward:
Then work round to the bottom of the ring:
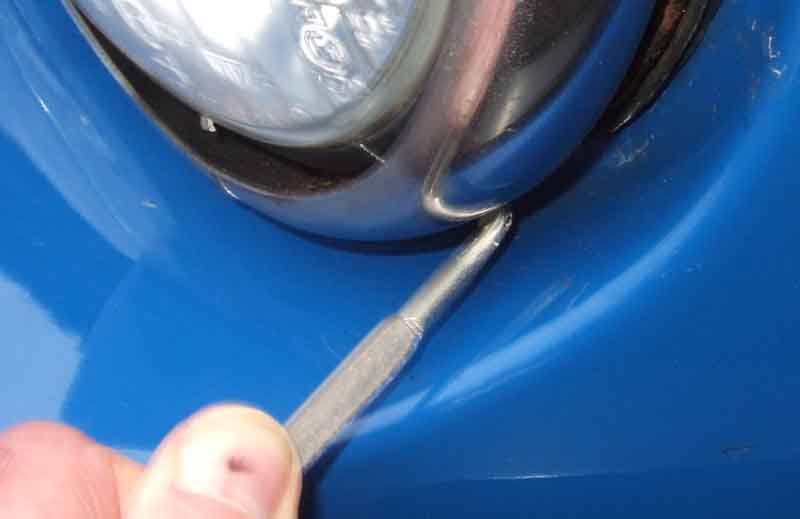
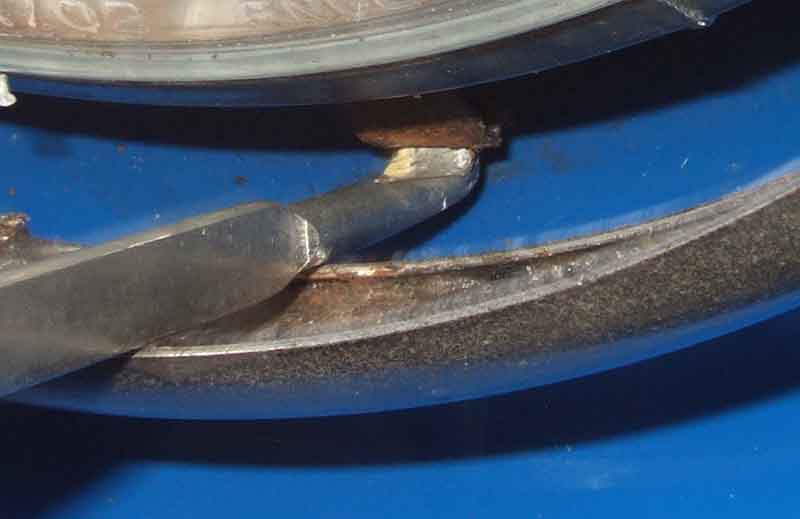
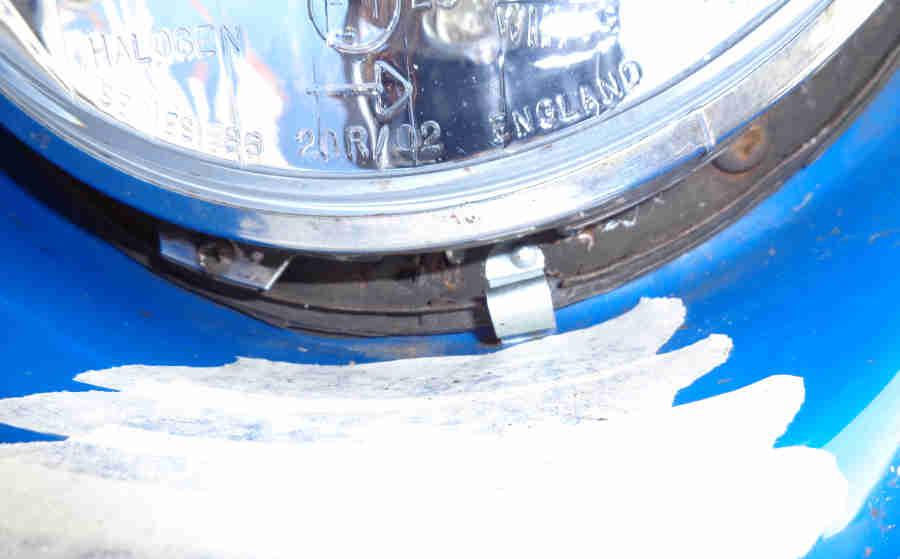
And pull forward to expose the clip, which is wedged behind the lip on the ring. At this point brute-force is normally needed to pull the ring off the clip, bending it right forwards and risking fracture:
But with the tool positioned with its hook under the clip:
Lever upwards to lift it off the ring:
And relax:
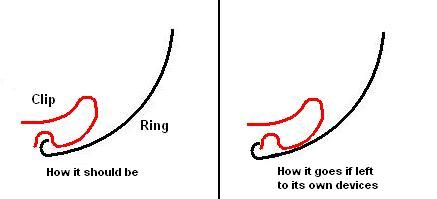
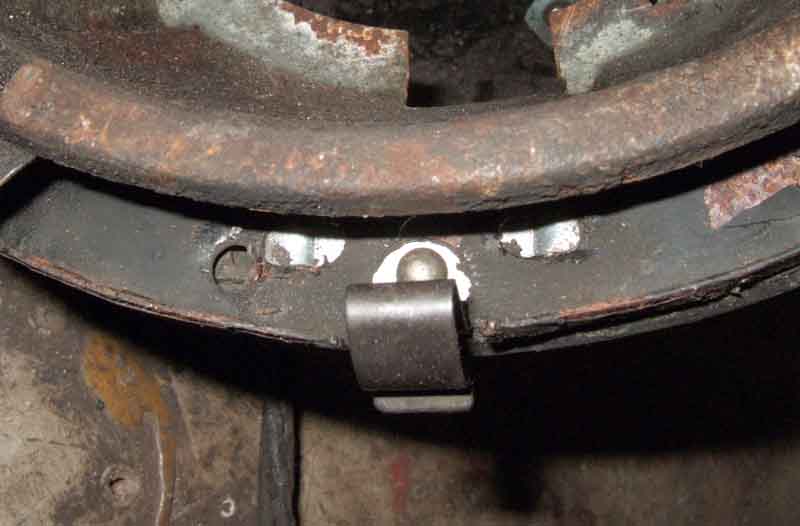
How the clip should engage, and how it engages if left to its own devices. Even as it should be there is far too much engagement, making removal harder than it needs to be.
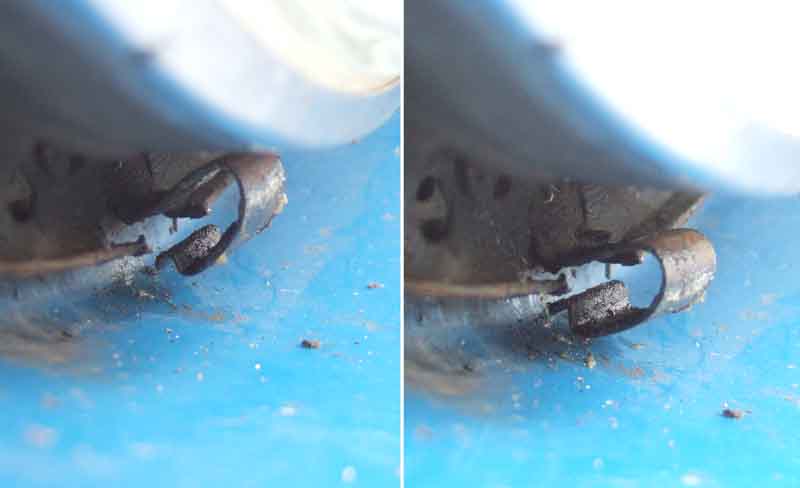
The spring clip, pulled downwards and forward once you have managed to get the ring off (left image), and where it needs to be to avoid getting jammed behind the lip on the rear of the ring. In theory. In practice as soon as I refit the rings the clip goes fully behind the lip again.
Up till now I've always had to lever them off, which I really didn't like doing:

Even using the removal tool it had obviously been bent back once too often on Vee as eventually the end of the spring broke away:
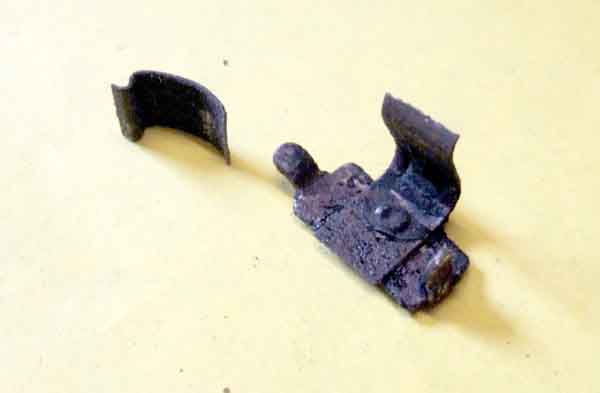
But replacement clips BAU1460 (one clip) are available from the usual suspects. Taking a ring off Bee I found that had broken as well, when I don't know so two ordered. Lever one tab up and the clip falls out, the new one just needs both tabs tapping down:
I have seen a recommendation to cut a section out of the lip at the bottom of the ring, slightly out of line with the spring when the ring is finally fitted. Then fit the ring so the cut-out goes over the spring, and rotate the ring into its final position. To remove rotate the ring so that the cut-out lines up with the spring, and it should pull forward more easily. However that involves cutting the ring, and the cut edge will rust if they are steel, and my rings at least show no sign of rotating when fitted. September 2020: At least, they didn't on the roadster, but they do on the V8. I checked them with a magnet to find that the ones I replaced on the roadster over 30 years ago are strongly magnetic and so probably steel-based, whereas what I assume are the originals on the V8 are not - stainless? Brass?
You have to laugh but pal Terry had a car with plastic Wipac bowls with a moulded fitting for the Mini screw, and with careful positioning of the screw before the ring was fitted, the edge of the ring went over the domed head of the screw very easily, in both directions, and retained it firmly enough so it wasn't going to fall off! Ironically a replacement bowl for Vee came with the screw fitting which I swapped for the old clip which fortunately (or maybe not) was sound. Maybe I should have left the screw fitting on mine!
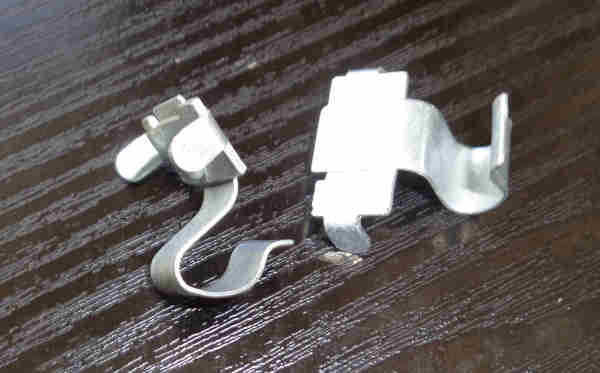
January 2023: Needing to change a headlamp unit with cracked glass on the other side of Vee the clip I had swapped over broke! So two more ordered. Quite a difference in price from the usual suspects ranging from £1.85 from MGOC to £5.00 from B&G, plus P&P of course. On eBay for £4.99 with free postage but that still comes to more than MGOC including postage so two more ordered. Not immediately apparent unless compared side-by-side with an original is that the end of the clip where the lip on the trim ring engages is flatter on the new than the old:
Rather than remove and dismantle as I had before I reckoned I could bend the tabs up with it in-situ, then by slackening the bowl screws could tilt it forwards and remove the old clip, and literally only took a couple of minutes. Only the outboard tab needed to be prised up, the other is more difficult to get at, but by pushing the clip back the inboard one was bent back enough for the clip to come out:
Fitting the new one was a bit more fiddly, I layered masking tape below the headlight to protect the paint. Once in position I tightened the screws then pushed just the outboard tab flat, it's against the rubber gasket so no damage to paint and it's not going anywhere:
The bottom of the clip is very close if not touching the paint below the light unit while the ring is off, whilst it might mark the paint it's not visible with the ring on and shouldn't cut right through the paint to cause rusting anyway. One thing that was immediately obvious with this clip, unlike the originals or the previous replacements, is that in fitting the ring it was obvious that the lip of the ring was sitting in the groove of the clip and not lodging behind it as had always been the case previously, probably because of the flatter shape of that part of the clip. The upshot is that removal is much easier than previously, but it's still held firmly.
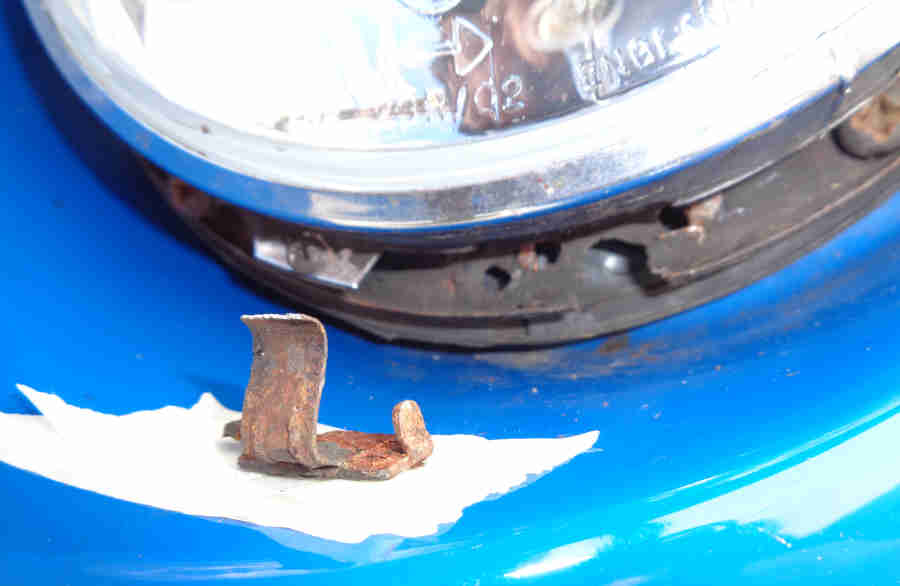
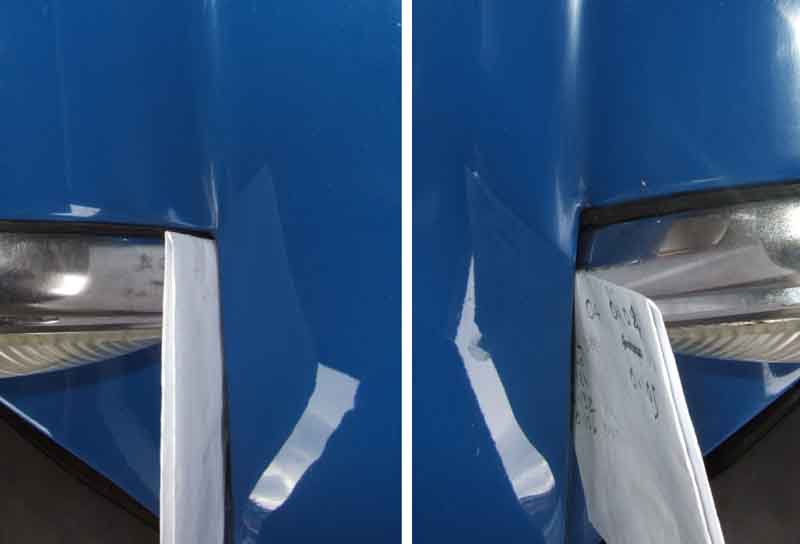
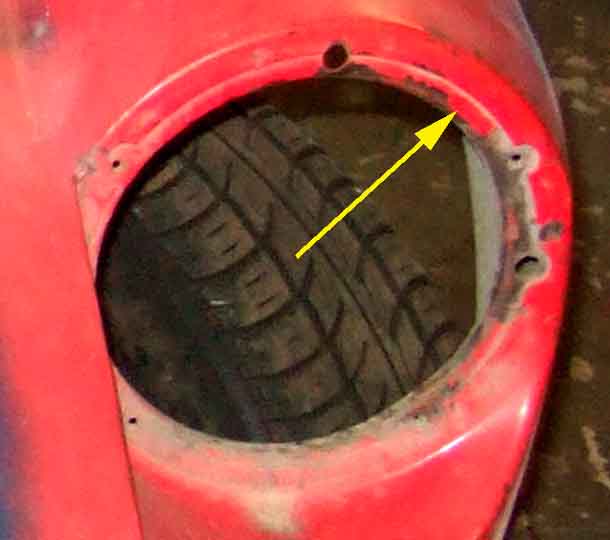
It can be very tight indeed, on Vee's passenger side a sheet of paper folded in half twice will not go all the way back between the ring and the wing, even though the ring has been flattened slightly (by a PO) in that area without which the ring would not fit at all. On Bee the same paper fits both sides, and on the passenger side it can be folded again and still fit:
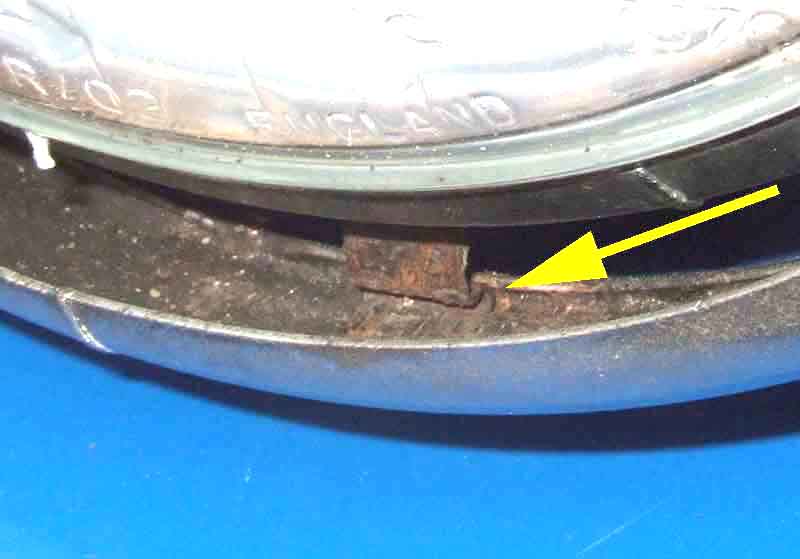
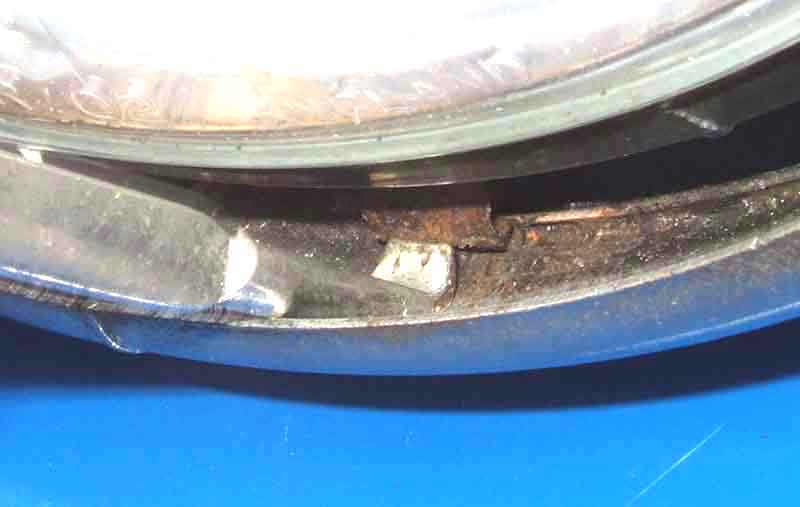
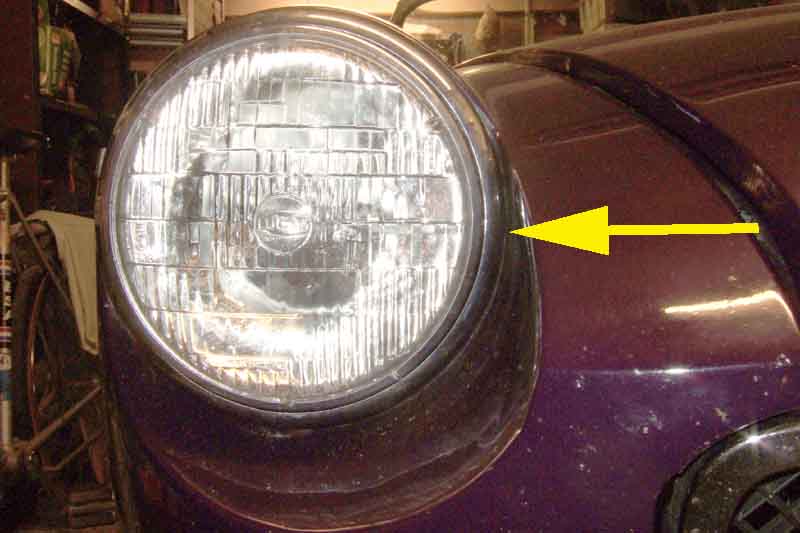
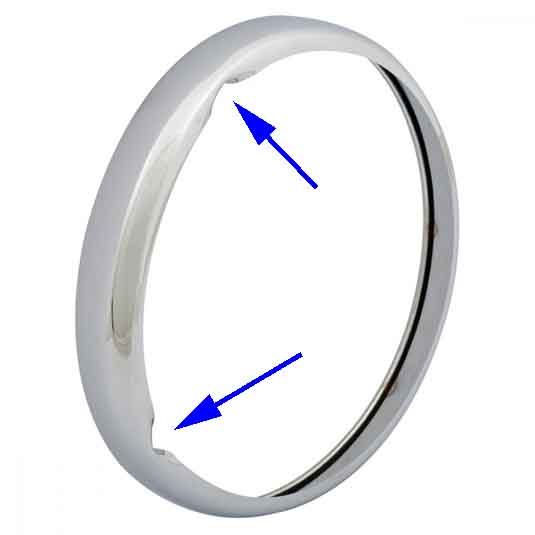
In September 1979 US legislation required headlamp adjustment to be performed without any 'dismantling', and modified ring ALU 1020 was provided with cut-outs (arrowed) for this purpose. Available from various suppliers in the UK: (Moss Europe)
They do look a little odd, after having been used to plain rings:

And main beam:

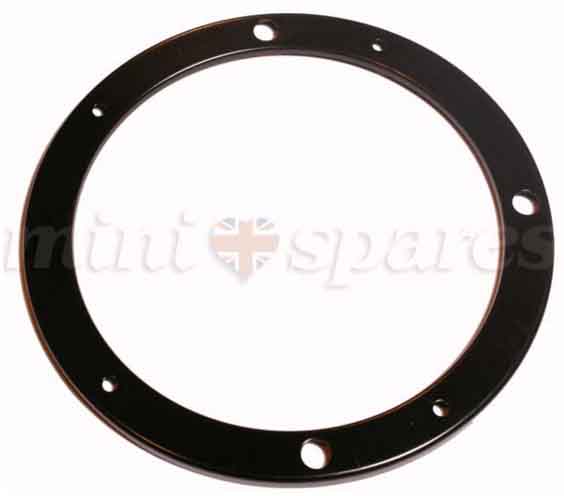
Not seemingly available from the usual MGB suspects, this classic Mini mounting ring part No. 14A6693 seems to be the same. (mini spares)