


With the well publicised risks to life and limb in the event of a breakdown on 'Smart' motorways or during 'all lane running' at peak periods on others, and further extension of the program on hold, for some time I've been thinking more and more that the hazard warning lights on our cars are not really up to those situations. They are not particularly bright especially in bright sunlight, and neither they nor modern cars are very 'urgent' as far as flashing rate goes. Some of the latter have indicators that are a triumph of style over function being very narrow and often obscured in sunlight.
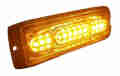 In May's Enjoying MG Michael Beswick published an article on a supplementary light, that could be clipped on as needed, using an extreme high-intensity unit similar to those used on road maintenance vehicles from Response Vehicle Lighting. Available in various colours and combinations but all-orange probably makes the most sense. There are 16 flash programs involving various combinations of the 12 LEDs and various rates of flashing. One of them is named 'wig-wag' a term I had seen used in relation to American Police vehicles and assumed referred to the semi-rotating beacons that swing back and fore, but in this case refer to pairs of these flashing beacons operating in anti-phase to each other, like the red flashing lights on railway level crossings. However this mode is not legal other than on emergency vehicles, and in any case needs a pair of light units. In went my order for one.
On receipt first thing was to test it, and boy it is bright. I went through all 16 programs and decided on No.3 which has a basic on-off flash rate similar to hazards, and while on they all flicker rapidly. In between I'd been pondering how to mount it. Needed for both the roadster and the V8, with the top up or down on the roadster, probably the only universal arrangement will be something that clips onto the top of the drop-glass. It also needs to be reversible so it can be used on either side of the car, and facing forwards or back - another job for black plastic square-section guttering down-pipe.
 I had a couple of small offcuts one in black which would do for the window clip and the other narrower and longer to mount the light unit - the latter is in white but that doesn't matter at this stage. A bigger job was what to use for the swivel.
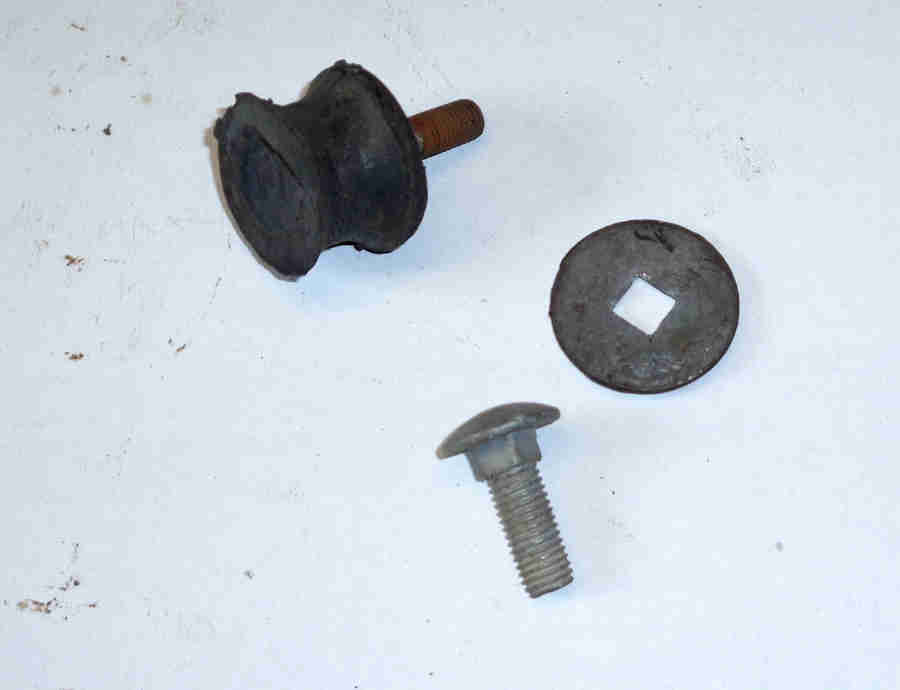 Nut and bolt is the most obvious, but I didn't want a big chunk of bolt head against the glass, and looking through my tins of misc bits I found a couple of old exhaust rear mount cotton reels where one of the end-plates had parted company with the rubber. I pressed the threaded stud out of the plate and that has a nice low-profile domed head. It also has a short section of square shank adjacent to the head which had located in a cut-out in the bonded plate and that will be ideal to sit in a square hole in the plastic piece for the window. A slim nut (cut down standard 5/16" nut) will hold it in place as I rotate the lamp section.
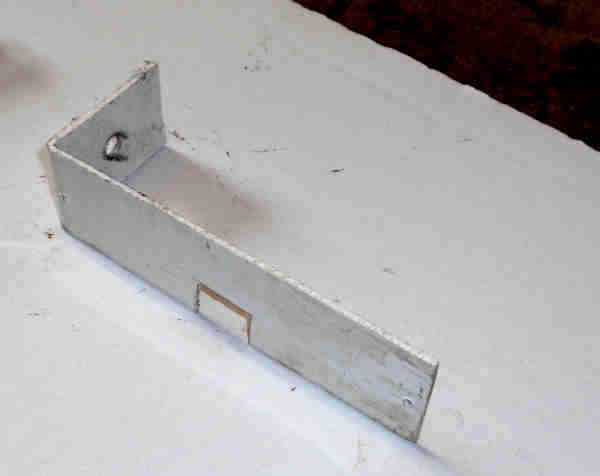
Didn't take long to bend the one bit of plastic into a 'U' for the drop-glass with the heat-gun, and a right-angle in the other piece for the light unit. However I soon realised that the window piece would need to be wider at the top edge with the 'legs' coming together lower down so as to 'grip' the glass otherwise it sits up a bit, the 'legs' come away from the glass and it can flap about. No matter, a bit more time altering the glass piece, it's only a proof of concept at this stage. Bolted them together with a 5/16" Nyloc where the end of the stud goes just to the end of the nylon so no rough bit sticking out. Screwed the light unit to its piece with the self-tappers provided.
 Popped it on the drop-glass - and 'Ah'. I hadn't thought about the glass being angled inwards at the top, so the light unit was cocked up at an angle. No big deal in usage but it didn't look right. After coming up the inside of the glass the top would need to bend over at slightly more than a right-angle, be horizontal for about an inch, then turn though 90 degrees to be vertical - but only for a couple of inches until it met the outside face of the glass then be angled out slightly to lie flat on the glass for the remainder of its length.
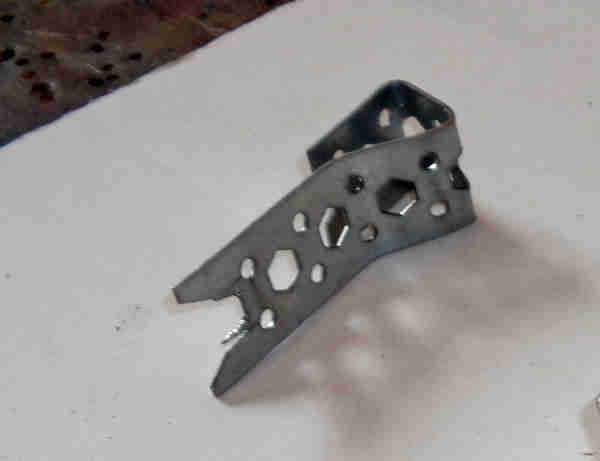 Worked out the shape using a bit of thin, pierced, easily bent metal to make a pattern, that I could reproduce in plastic. The other error I had made was folding the plastic before drilling and cutting the hole for the swivel stud, which meant cutting a large hole on the inside face of the 'U' piece to get the head through! Note to self - cut the hole before bending the plastic on the next piece.
But it would do for the next stage which was wiring it up to an accessories plug to go in the lighter socket. About six wires on the unit, some for the additional functions like 'wig-wag'. I'd be using 12v and earth of course, and one other wire which you touch to the earth connection when operating to step through the modes. It remembers the mode from one use to the next, so that's not something you have to do every time, only if you want to change it. I have several old mobile phone accessories socket charger plugs and cables, easy to open up and remove the existing electronics, and solder a new cable it. I could have the 'mode switch' down at the plug, but that would need a 3-wire cable, and I have a long length of black 2-wire recovered from a scrapped vacuum cleaner. I'll worry about a switch later.
Ran out a length of the cable to reach from the socket to the top of the raised drop-glass plus some extra, but really I should have done that with the door fully open outside rather than in the garage. As it is it's a bit short for that, but I'll live with it for the moment and maybe add on a piece at the plug end later on. I don't want to cut the unused wires off at the light unit so all the strain is on the remaining wires, and have some heat-shrink which is large enough for all of them plus the connections I need to make. The 'mode' wire I bring to the outside, plus an extra piece off the earth wire, so I can mount a small push-button switch up there if needed. Wires soldered and heat-shrunk, plus more heat-shrink over that area all the way up to the light unit, leaving just the 'mode' and earth wires exposed. I'll think about a strain-relief for where the wires exit the light-unit, which uses set sealant, and I hope is water-proof. Plug in and away it goes, tapping the two external wires together to step through the modes.
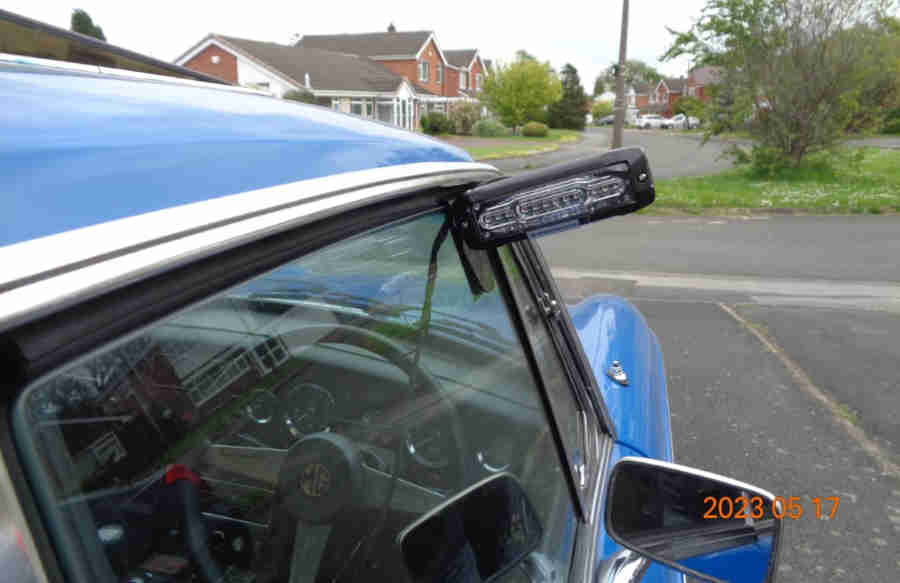
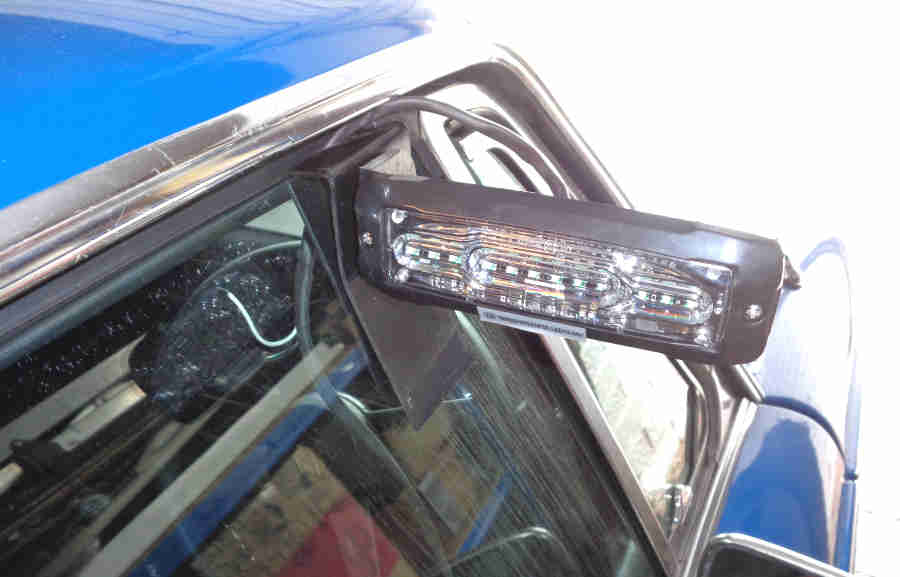
Multiple bends got complicated and I had to use odd bits of metal clamped in a vice to hold the plastic outside the jaws, but got there in the end. Assembled, fitted, and being horizontal looks much better:
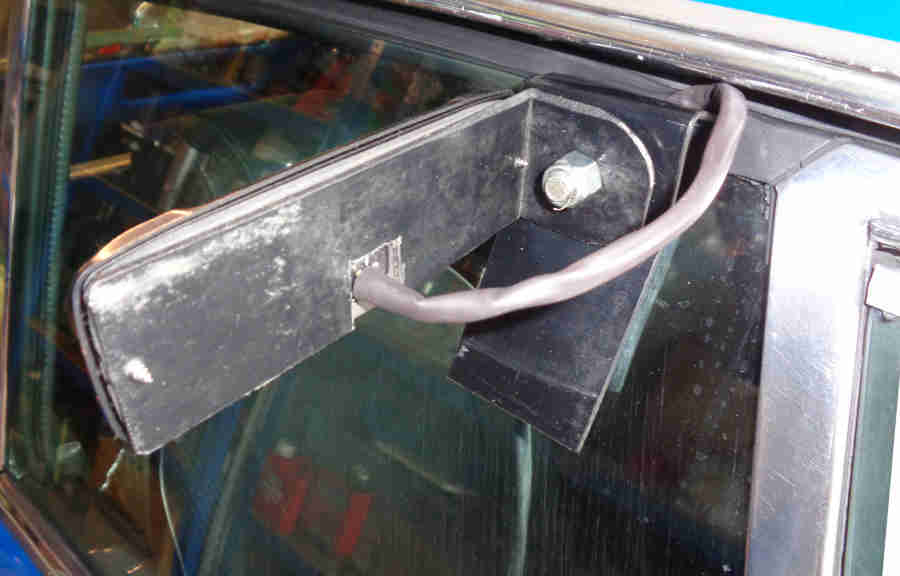
Need to cut down the screws a bit, and think about a strain-relief. That obviously needs to be able to cope with being turned either way round on the window bracket.

As said it is very bright, you certainly wouldn't want to look directly at it close up. I tried to get photos but the result has far less differential between supplementary light and standard hazards than perceived by eye, because my compact camera cannot stop down far enough which makes the supplementary light seem dimmer than it actually is. This is about the best I could get: