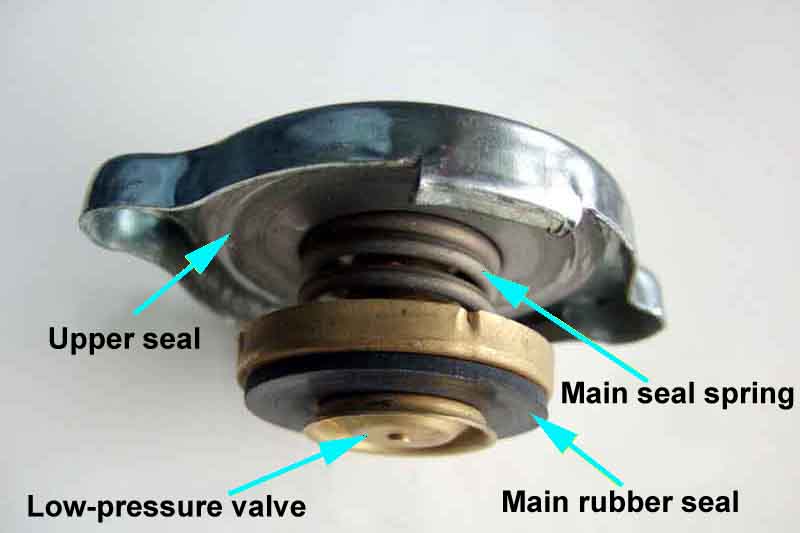
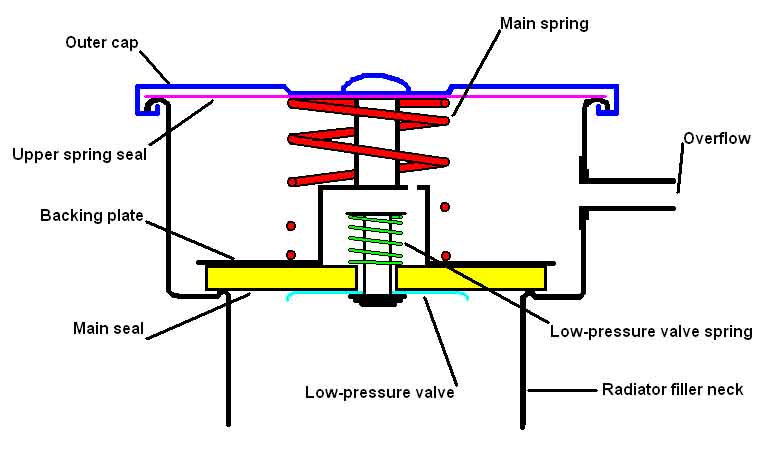
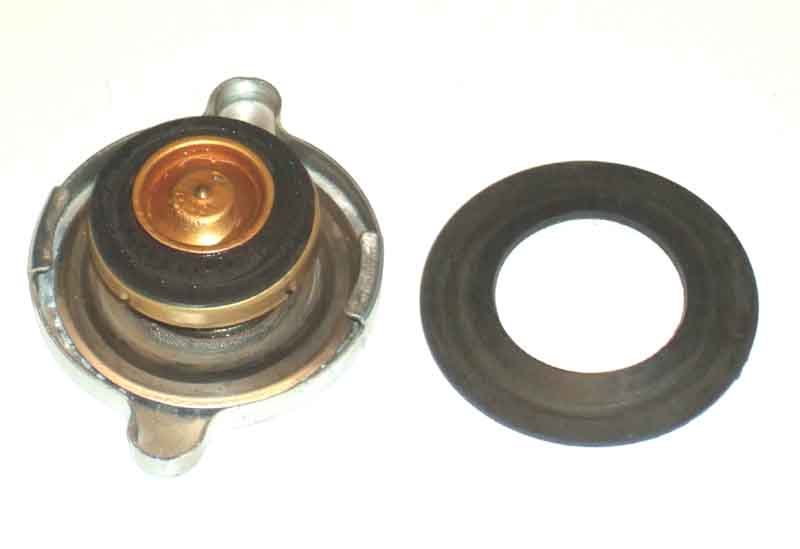
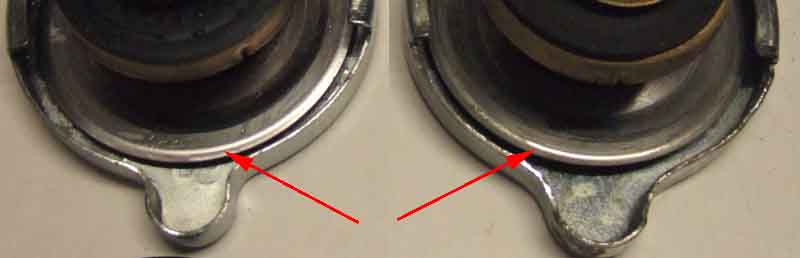
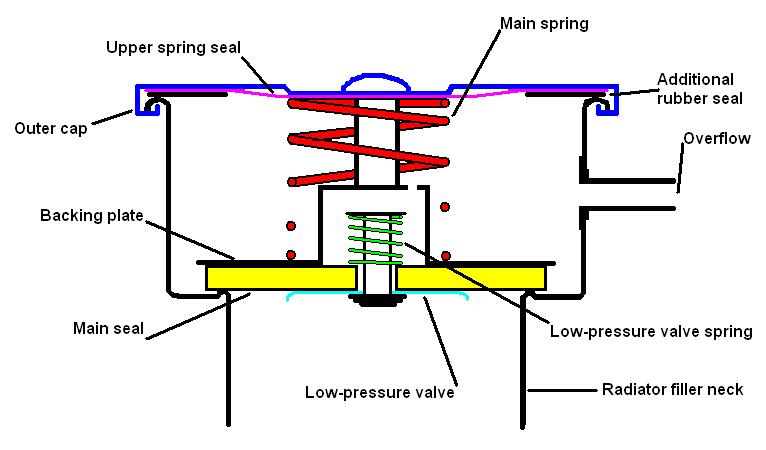
The component parts of a typical radiator cap. The main seal must make good clean contact with the lower part of the filler neck or the system cannot build pressure and is likely to boil. For the same reason the low-pressure valve must make good clean contact with the main seal. The upper (recovery) seal should make a good contact with the upper part of the filler neck to contain any steam or coolant expelled during excess pressure, and must make a good seal if lost-coolant recovery is to be employed. It seems that some caps in the USA have the upper spring seal but do not have the low-pressure valve and so cannot be used for lost-coolant recovery. There is also a risk with these caps that on cool-down after venting excess pressure or coolant, the system will be at negative pressure, so will not reach normal pressure the next time the engine is run which could result in boiling. Another source indicates that there are caps with the low pressure valve to prevent a partial vacuum developing, but without the upper seal so coolant recovery from a catch-bottle cannot take place.
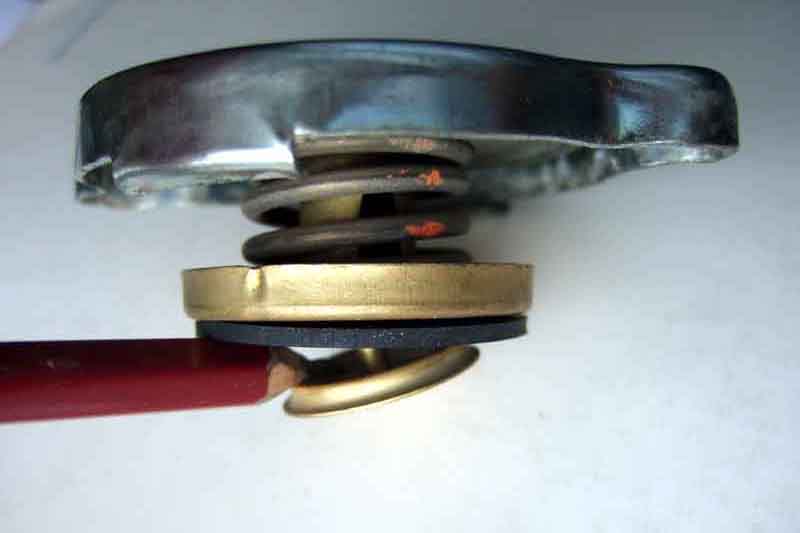
The low-pressure valve shown lifted. This is on a very light spring, unlike the main seal spring, and can be lifted with finger-tips. Note also the paint on the spring that denotes it strength i.e. cap pressure. This should ensure that it is mated with the correct cap during manufacture, which shows the pressure in lb and k Pa, but I did purchase one cap which had an incorrect (weaker) spring. I noticed it seemed easier to press down and fit than the old cap, and when I put the two caps 'front to front' and pressed it was the new cap which gave way and not the old, the opposite of what one might expect.
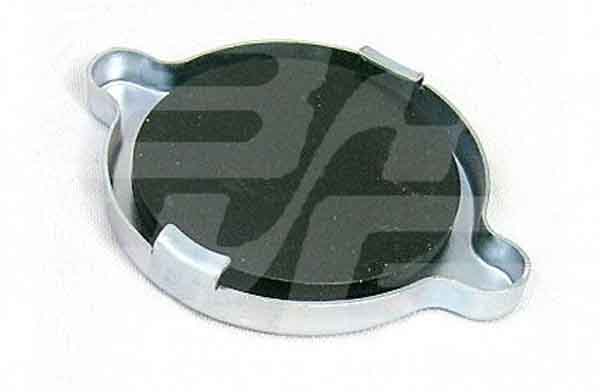
A typical UK cap. This is a 20psi cap I was using while trying to resolve the cooling system on the V8, note that after a few months of use the bottom hose exploded in spectacular fashion shortly after switch-off one day, so I can't recommend its general use! See the main text for the correct pressure caps.
A typical UK cap and radiator filler neck in context.
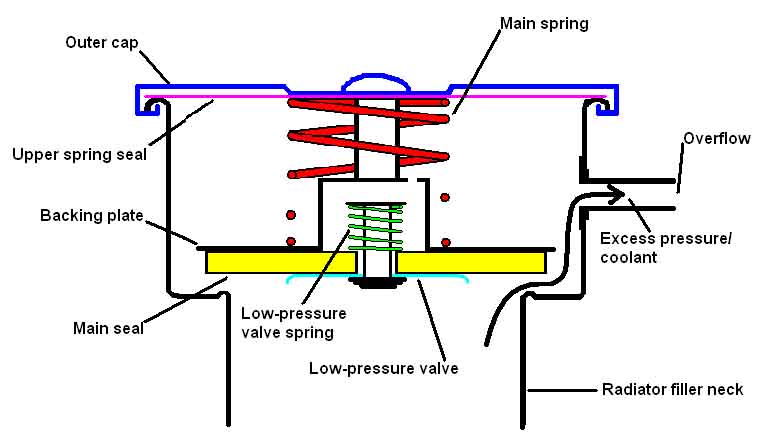
Excess pressure raises the main seal compressing its spring, allowing the pressure and/or coolant to escape via the overflow tube. The upper seal prevents it escaping from around the cap itself.
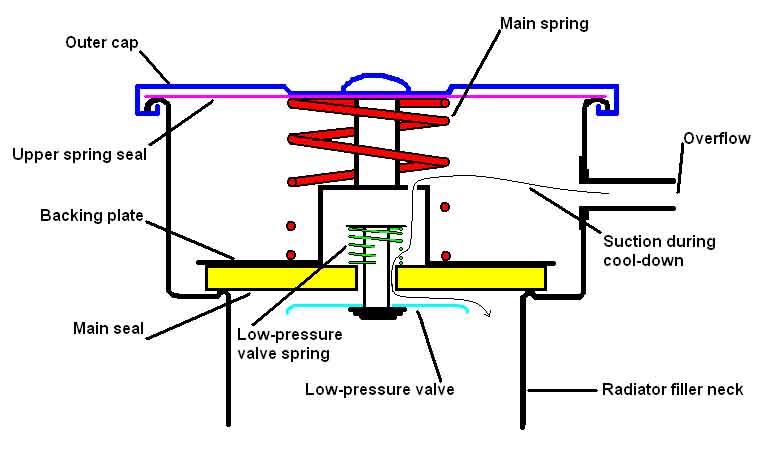
After excess pressure and/or coolant has been expelled and the system is cooling down. Only slight negative pressure is required to pull the low-pressure valve down, normally allowing outside air to enter the cooling system. But if lost-coolant recovery is in use and the end of the overflow tube is sitting in coolant in a catch-bottle, this will be sucked up and returned to the cooling system. The upper seal must make full contact with the upper filler neck for this to happen.
The new roadster cap with it's removable rubber ring, that sits against the spring-steel upper seal.
The spring-steel upper seal is exactly the same on the cap with the rubber ring as on those without.
Showing the additional rubber seal that made the cap so stiff to remove and replace, under the original spring-steel seal.
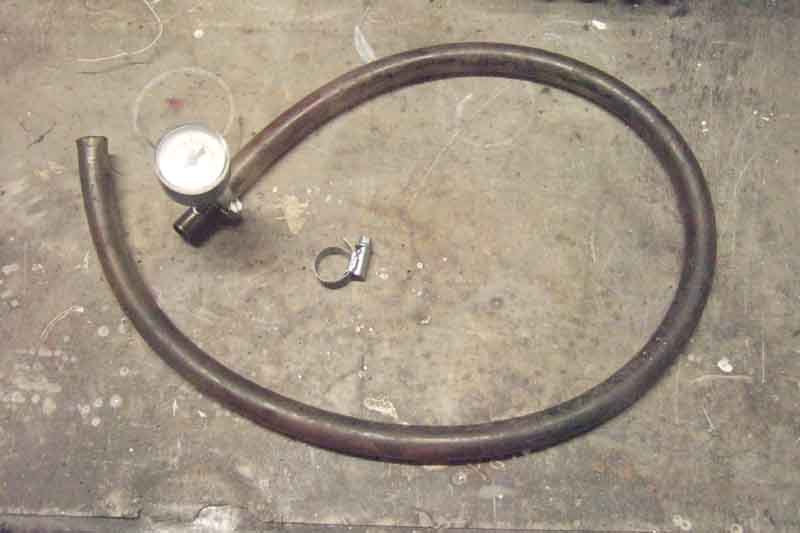
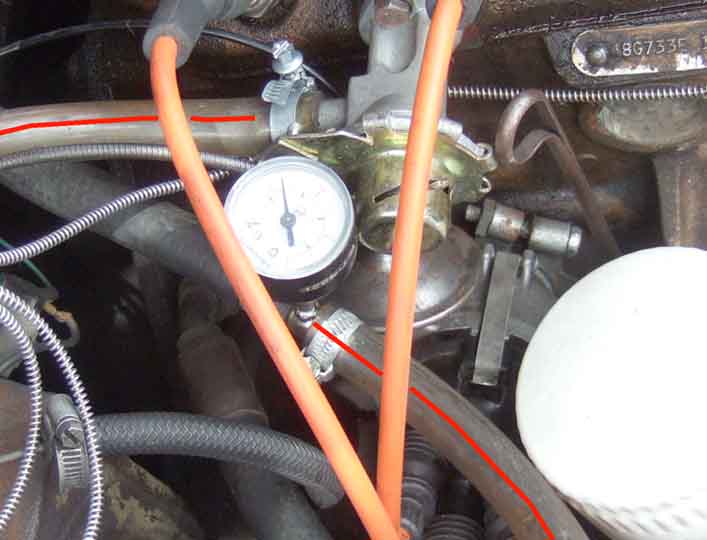
Pressure testing on a direct-fill radiator:
Gauge, Tee and hose ready to fit
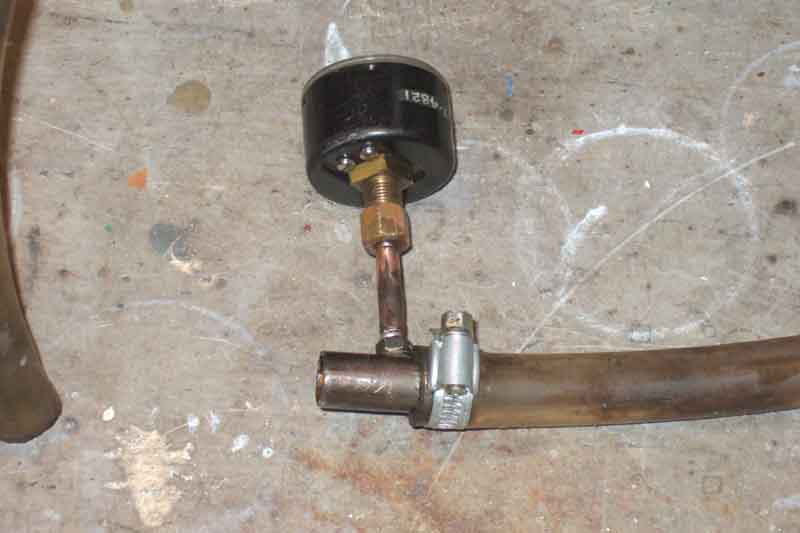
Installed between the cylinder head tap and its heater hose - red trace on the additional hose. Note that the heater tap can be on or off for the test, it is only measuring pressure - which will come 'backwards' from the bottom hose and heater outlet if the tap is off - and not flow.
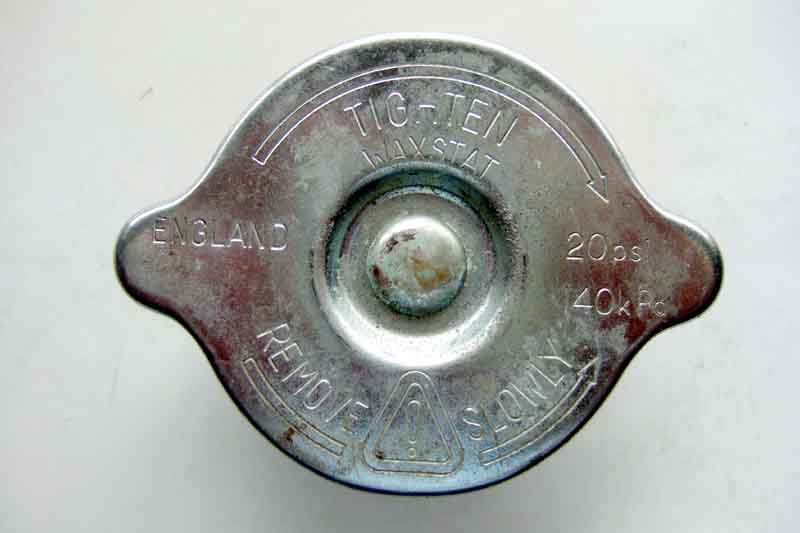
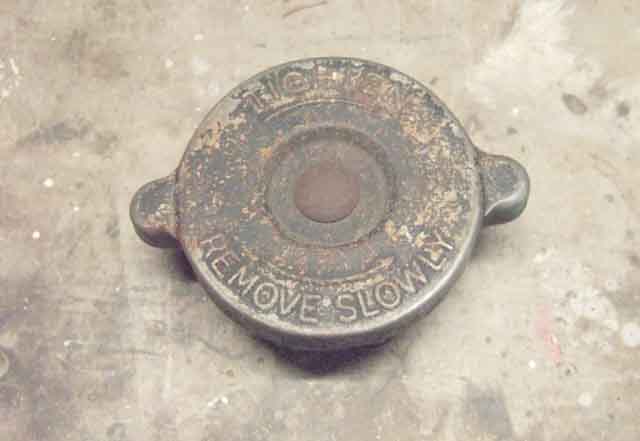
The old cap. It's looked like this for as long as I've had the car, i.e. 24 years out of its life of 40 years, so quite possibly original.
The 'flat' or banking cap used on the MGC thermostat housing in addition to a standard cap on the remote expansion tank: (Brown & Gammons)