
by Herb Adler 5243 3409
INTERLUDE
Fitting of a radio and accessories.
I had been thinking of this for some time, having a fairly modern 4 channel radio / CD player lying around. The problem I foresaw was where to fit two to four speakers. I would be happy to just use two, but it still left the problem of where to fit them. I was considering two speakers behind the seats and setting the radio to only use the front speakers, but it didn't sit well with me. Then I thought of a defunct TV I had that had 2 small oval speakers. Maybe I could fit them to the existing speaker surround.
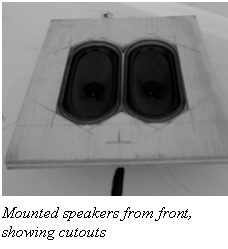
Out with the speakers and start to play with them and the spearker surround out of the car. Yes, it was feasible. Now I needed to make a speaker baffle to mount the speakers, as they had a funny mounting arrangement where the corners are bent back to allow screwing to a plastic pillar so the front was level with the front of the TV case.
Using a piece of 9mm plywood I cut out the appropriate shape and screwed the speakers to it.

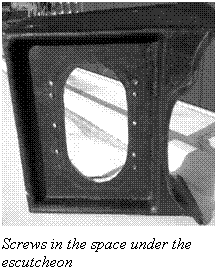
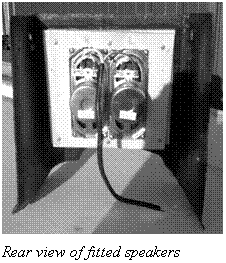
Now, how to mount the speakers to the surround? The escutcheon screws had been cut short, so I couldn't use them. I had to find a way that didn't involve screw heads being visible from the front.What I did was to remove the escutcheon, drill several holes in the surround, which would be covered by the escutcheon and make a second baffle which had clearance holes for the escutcheon screws and attach this second baffle to the surround with self tappers with very small heads.After fitting this second baffle I refitted the escutcheon and grill, then screwed the first baffle to this baffle.
Now that the speakers were sorted out it was time to consider the fitting of the radio and aerial.
First the aerial. This posed somewhat of a problem since the doors weren't aligned well with the body and I needed to correct this before fitting the self extending / lowering aerial, as I might need to access the door hinge bolts for adjustment reasons, and these would be inaccessible once the aerial was fitted. For this reason I kept putting the aerial fitment off, and I wasn't going to the trouble of fitting the radio before the aerial was fitted, in case things just wouldn't work.
Off with the front wheel and find that there was a hole for an aerial that had been bogged up. Remove the bog and fit the aerial with a bit of fiddling. Drill a hole for the wires to go from under the mudguard into the engine bay and utilise an existing hole into the cockpit.
Now for the radio itself. First remove the blanking panel, from the dash. This has a chrome surround around it which I wanted to use to neatly cover the gap between the radio and the dash itself. Using the good old favourite, Tarzan's Grip, I glued this to the radio. To secure the radio I made a bracket out of 25mm aluminium angle and screwed it to the firewall using the screws that hold one of the hinges of the heater control flap. An L shaped bracket was screwed to the back of the radio and with lots of contorting and removing both the radio and the aluminium bracket I managed to mark and drill holes so that a screw through the two brackets would fasten the radio to the firewall.
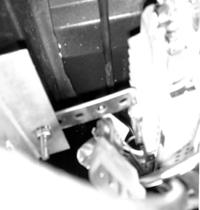 This picture shows the brackets under the dash.
Connect all the wires and try. Works perfectly, up when the ignition is turned on, down when it is turned off, depending of course on whether the radio was turned on.
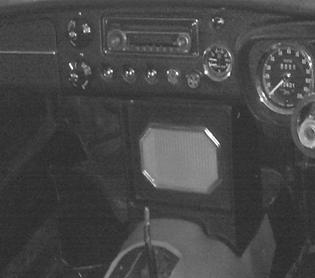 This picture shows the final installation, rather good, I thought.