
by Herb Adler 5243 3409
BANG BANG BANG!
That's the sound of my head banging against the wall.
FLOAT
Remember that I had fitted a fuel pressure regulator to stop fuel gushing out of the carby overflow and cheered when the flow was stopped.
Wellll it's the next weekend and I ‘m off to tune the carbys. Turn on the ignition and lo and behold there's fuel gushing out of the overflow again. Hence the head banging. At about this point I felt like chucking a match in with it and walking away.
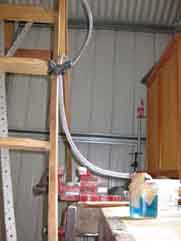
OK let's be serious, what can it be? I've replaced the jets, set the float level, the needle valves looked new. The only thing I can think of is some problem with the needle valve. How to test? Reconstruct my pressure testing rig, but so it provides a head of pressure. Out with the ladder, plank, plastic tubing and blue water. Remove the float cover and tape it to a glass jar, for visibility. Pour the water in at the top till the jar fills and the water rises several feet in the tube. Damn! The water keeps flowing, the float is completely immersed. So the needle valve is no good. Never mind there were new valves in the carby rebuild kit. Fit them and then re-test. Same story. Maybe the float doesn't (float that is).
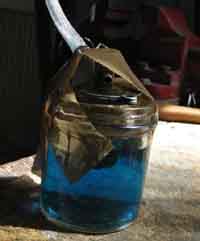
 Remove the float from the cover and with a bit of wire as a pivot place it in the water. Well only about one third is below the water, so the float is OK.
Bugger! two new faulty needle valves. Lucky I had bought a couple some time ago, whilst trying to solve the float level problem, but never used because they have a little spring in them and the method of adjusting the float by turning it upside down just didn't work because the spring allowed the float too much freedom. Anyway, dig them out and fit and test. Bingo - the water only comes up part way on the float and maintains the head. Over half an hour or so the water head only dropped by about 1 cm. Maybe not quite perfect, but better than any other. Fit the second valve to the other carby and get ready to run the engine and tune them.
Remove the float from the cover and with a bit of wire as a pivot place it in the water. Well only about one third is below the water, so the float is OK.
Bugger! two new faulty needle valves. Lucky I had bought a couple some time ago, whilst trying to solve the float level problem, but never used because they have a little spring in them and the method of adjusting the float by turning it upside down just didn't work because the spring allowed the float too much freedom. Anyway, dig them out and fit and test. Bingo - the water only comes up part way on the float and maintains the head. Over half an hour or so the water head only dropped by about 1 cm. Maybe not quite perfect, but better than any other. Fit the second valve to the other carby and get ready to run the engine and tune them.
STEERING
Somewhere along the way to here I found that the steering box cover was leaking and decided to fix it. Simple, I thought, just take the cover off, clean all petrol from the surfaces use silicon gasket goo and refit – all done. HA HA! For some reason I put a straight edge across the surface and found that there was nearly a half a millimetre bend in it. No wonder it leaked.
 The photo gives some idea of the bend, after I had filed it some.
When I went to reassemble the cover to the casing I discovered that the ball bearing was proud of the casing by about a half mm. Crawl under the dash, again, and loosen the steering column bolts so that the bearing could be pushed fully into the casing. No go! The bearing stubbornly refused to move, even with some heavy persuasion, ( for some reason I picked up the reputation that if it doesn't fit or move use a bigger hammer ). Solved this problem by making some gaskets to fit around the bearing and thick enough to make up the gap. I don't know if this is correct or if the bearing should actually be level with the casing. Now I only need to realign that steering column, it doesn't seem to be an easy job – bugger!
The photo gives some idea of the bend, after I had filed it some.
When I went to reassemble the cover to the casing I discovered that the ball bearing was proud of the casing by about a half mm. Crawl under the dash, again, and loosen the steering column bolts so that the bearing could be pushed fully into the casing. No go! The bearing stubbornly refused to move, even with some heavy persuasion, ( for some reason I picked up the reputation that if it doesn't fit or move use a bigger hammer ). Solved this problem by making some gaskets to fit around the bearing and thick enough to make up the gap. I don't know if this is correct or if the bearing should actually be level with the casing. Now I only need to realign that steering column, it doesn't seem to be an easy job – bugger!
ENGINE AGAIN
Having had this little diversion I started the engine, having set the distributor to a lower value of advance. The engine started OK and I let it run till it was at operating temperature. Still lumpy and still showing signs of running rich. Another worrying factor became apparent, which I had previously dismissed as too much advance. At idle (800- 1000rpm ) the engine runs reasonably smooth, but at 1500 rpm it shakes considerably. Double checked the ignition timing, cleaned the plugs yet again ( thank goodness for pa-in-law's cleaner ) and even checked the valve timing. All checked out OK. Reset the valve clearances, just in case, removed the plugs and did a pressure test on all cylinders and got a shock. I had tested the pressures previously to determine if I had a high or low compression engine and had a reading of 130 psi ( low compression ). Now I had 170 psi. I have since found out that I actually have a high compression engine, from the engine number, high compression engines have an H in it, whilst low compression engines have an L. Anyway explaining the increase could be due to the rings having bedded in with all the running the engine has done and the 10 psi over specification could be due to a build up of carbon – remember I've had petrol literally pouring into the cylinders with all the fuel problems I've had. To get some idea of whether there is a lot of carbon in the cylinders I brought a piston to top dead centre and poked a screwdriver in through the plug hole and when it came out there was black sludge on the end. Oh well, the next thing to do is remove the head. In one way this will kill two birds, since the cooling system has copious quantities of rust in it, so I will run it with radiator cleaner before draining and reverse flushing it.
That's where it's at till next weekend, I hope.
INTERLUDE
JACK SUPPORT
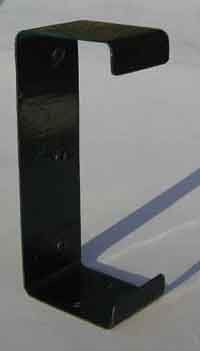
During the week and between major works, I found a bit of time to make a bracket for the scissor jack that came with the car. I didn't relish the thought of it rattling around loose in the boot.
The brainwave I had was to use a piece of C section steel. Off to the local metal merchant who happened to have a short section of just the right profile. Cut off about 45 mm, clean up the edges and test. Found that it was “springy” so pop riveted a piece of 12 mm aluminium angle to the back to stiffen it up.

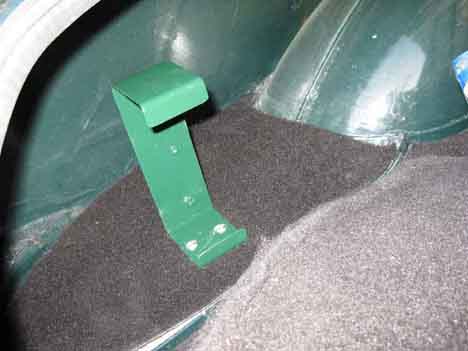
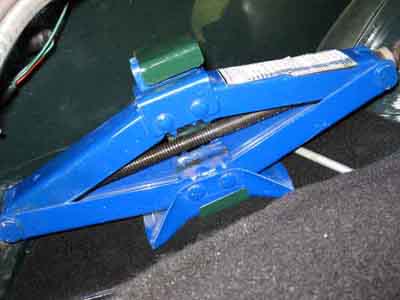 This worked well. Now drill two holes to screw it down and then paint it . When the paint is dry (next day) bolt into the boot and also install two little clips for the handle, fit jack, admire finished result then photograph.