Deep in the recesses of the chrome rim there were areas of black that seemed to resist elbow-grease and Solvol Autosol, a so-called chrome cleaner that I would never normally use on chrome as I consider it too abrasive - I keep it for the alloy parts. It even resisted a wet Scotchbrite pad (although heavy use of a wet pad will eventually wear away the chrome, use of a dry pad results in visible scratches almost immediately). So I took a small screwdriver to a patch and scratched away at it fairly gently to see what happened. Amazingly it came away, and with a wet Scotchbrite used after the screwdriver left a tiny pimple in the chrome in place of what had been an area of black perhaps 1/2" by 1/4". So that became the first step in the process, to be followed by a session with Solvol Autosol and a great improvement in all the rims.

Next came removing the existing black paint. A 'pencil' wire brush in a drill proved very effective. Even though quite a lot of the paint remained most of it had very poor adhesion around the cut-outs in the outer part, although it was a bit harder work in the central section. I completely stripped the front but just the areas round the cut-outs on the back. A short-cut I know, but since the end-result was hardly going to be pristine it didn't warrant the extra effort to completely strip the rear as well.

What paint to use? Although the spare (which I have only ever used once for a puncture as about 1/3rd of the chrome in one large area has peeled off and been painted silver) looks like it has been repainted in gloss, that on the wheels on the car looks like satin, and I think the satin is preferable. I had previously used Hammerite Special Metals primer (brushing) and silver (aerosol spray) on the Toyota Celica wheels with good results so opted for the same again but in satin black. The problem is all those cut-outs in the alloy with polished facets, and the polished ring round the nuts. I tried masking off the central ring but it proved impossible, let alone the cut-outs. Laying masking tape past the edge then shaving it off with a sharp blade may work but I didn't think of that at the time. I had seen liquid masking tape in Halfords so thought that worth a try, but wouldn't you know they had sold out and didn't know when they were getting more in. As I was on a tight timescale there was nothing else for it but to go for brushing top-coat as well as undercoat and no masking - what was I thinking of!
The primer is very easy to apply, being thin but with good coverage, and able to be top-coated within a couple of hours. I used a 1/4" flat brush (last used for painting Airfix kits with my son) and it didn't take too long. I made sure I painted right up to the edges which meant that there were some streaks onto the polished facets, but I immediately wiped along each facet with a thumb or finger which left a nice sharp edge.

The top coat was a different matter - it is quite thick anyway, has to be applied thickly or the coverage is poor and the red primer shows through badly, it needs two coats anyway, and they must be applied at least two hours apart but within seven hours of each other. This was very time consuming with the 1/4" brush and a 1/2" proved better for the larger areas with the 1/4" being reserved for the groove between the cut-outs and the ring and the inner faces of the cut-outs. One thing I was concerned about was brush-marks in the paint, but even though it has a thick consistency it flows very well and all the brush marks vanished. The can warns against too-thick application causing sagging and runs, but I didn't get any. For the back of the wheel round the cut-outs a spray version of the same paint was OK as there was no masking required, and this saved some time. While waiting for each coat to dry I cleaned up the (previously removed) hub centres with Solvol Autosol and the wheel nuts with a wet Scotchbrite pad to remove the rust staining on the chrome and Solvol Autosol to polish. The MG logo came out of one of the centres while removing it from the wheel with a mallet, Araldite has proved very good for sticking them back on.
The results are really quite good (this was a refurb, not a restoration) and well worth the eight hours or so of effort per wheel it took. They still don't bear close examination of the chrome or nuts, but they are a lot better than before. Some of the nuts are hardly marked whereas others have lost quite a bit of chrome and the substrate has rusted. I did consider replacing the nuts with stainless now, but at Ł74 for sixteen that can wait for the new wheels.

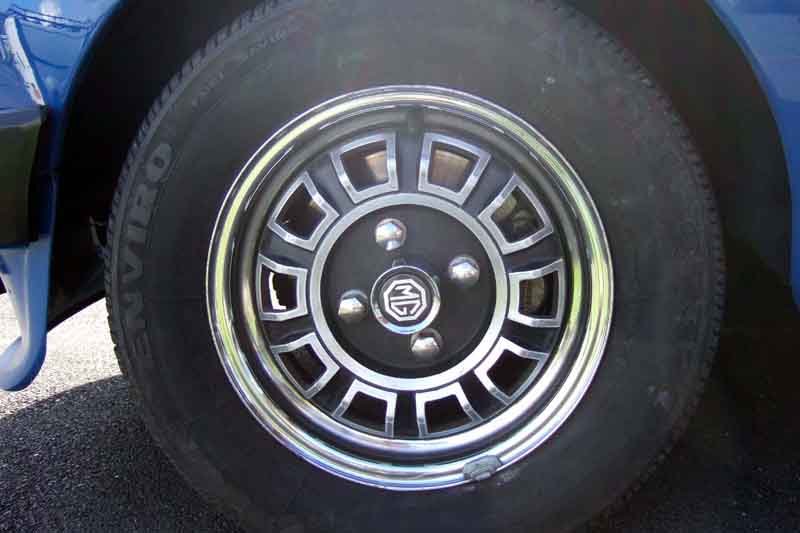
September 2017 and they get another much needed 'clean'. The black centres were still sound after the previous refurb, the facets came up well with Solvol Autosol similarly the chrome centres, but the chrome rims needed a lot of work with a pan-scourer and Solvol Autosol, and even a blunt flat-blade screwdriver to get the worst of the crustiness off from round pin-holes in the chrome that had allowed corrosion to leach out. I'd already replaced the nuts with stainless in 2010, although half of them started rusting and turned out to be magnetic i.e. ferrous steel! Some argument with the supplier got them replaced - eventually.