
Harry describes it as 'the main Calais-Gravelines road', but I think he must have meant the road leading to Calais and Gravelines, not the road between those two places as implied.
Comparing the roads shown on the map drawn in captivity from memory by Capt. E Jones of the 2nd Glosters (taken from his diary) with modern maps the D11 leads out of Cassel towards the west, with a double-bend to negotiate a steep hill, leading to Calais and Gravelines. Shortly after the double-bend the D52 splits off to the right going north to Dunkirk, indicated as L'ANGE on this map. Another map in Capt. Jones' diary shows L'ANGE is where the D11 to Gravelines crosses the D338 from Wemaers Cappel to Haeghedoorne, this latter road being 'Route de l'Ange' on modern maps.
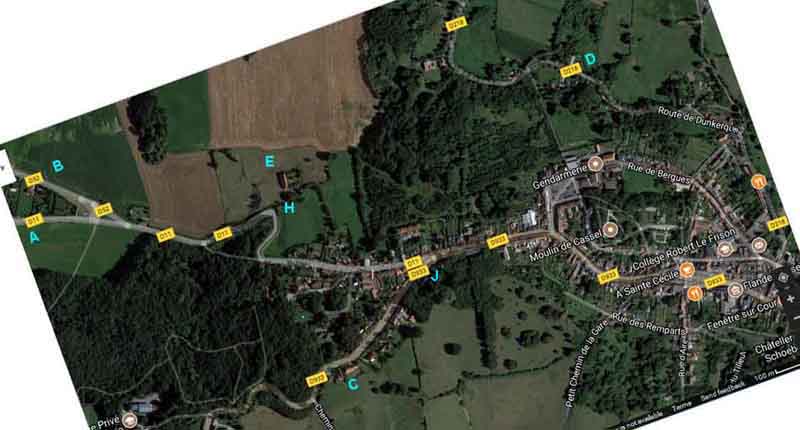
One thing on that map that does not tie-in with today is the reference to 'Villers Capel and Calais' heading left. This has to be an error and should be Wemaers Cappel (on the D11 modern maps), shown as 'Weimirs Cappel' on this drawing by Col. E. M. B. Gilmore of 2nd Glosters.
That aside, it puts the 'Villers Capel and Calais' road on Capt. Jones' map as A on the modern map, the branch to the right ('Lange') at B, the St Omer road at C, and the 'Dunkirk Cassel' road at D. The farmhouse occupied by 10 Platoon of 2nd Glosters will be at E. Immediately south and left of that, on the sharp left-hand bend, is shown an A/T gun at H, and a little further along the road from that a road-block before the fork in the road. Two more guns are shown at J where the D933 road to St Omer splits off from the D11 to Calais. Given that Harry makes reference to the road, a road-block, a ridge, and a farm that had been occupied by 2nd Glosters where he bagged his fourth tank, there is a distinct possibility that the A/T gun position on Capt. Jones' map - 'H' on the modern map - is where Harry was. Google Maps show it as a good defensive position on a ridge (centre of picture, shown up well by the low sun), with clear views across the plain for miles. It's true that the farm occupied by 10 Platoon would have been to Harry's right and not the left as he says, as would Dunkirk ("seen burning in the rear"), but the only other A/T positions marked are much closer in to the town, at J. This position would put Dunkirk and Calais behind them, but with buildings of Cassel blocking the view towards the coast, although maybe what they were seeing was the smoke above the buildings behind them. Today there are walls on the left (which Harry mentions) both before and after the junction through which one would have good views of the plain. The orientation table at the Wormhout massacre site shows German attacks from slightly east of South in the direction of Le Rietveld and Cassel right round to Esquelbecq in the North East, so Cassel could have been under attack from almost any direction, as indicated from the defensive positions on Capt. Jones's map which cover every direction apart from North-East. Harry mentions repositioning, and moving from being in the area of a second gun back to where they had previously seen action, which points more towards position H. He also mentions a French 75 and there seem to be two on Capt. Jones's map - one between the two A/T positions on the Calais/Gravelines road and only 100 metres from H, the other further down the St Omer road about 400 metres close to C.
June 2022: During a tour of several of the rear-guard locations that were instrumental in the successful evacuation of the bulk of the BEF, including Cassel, I came across 'Cassel and Hazebrouck 1940' by Jerry Mursland. This has detailed information regarding the disposition of forces at Cassel (as well as quoting more than once from Harry's memoir) and made interesting reading. Whilst it does not state where 209/53 AT were located I now think Harry was more likely to be south of the D11 Calais road.
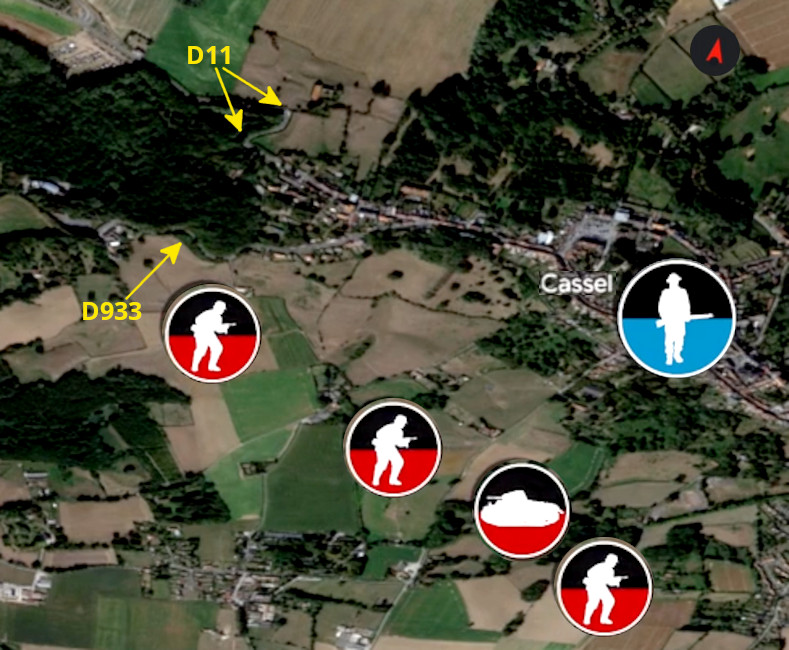
It's always puzzled me that he says he was on the Calais/Gravelines road and could see Dunkirk burning behind them. I felt sure he must mean the D11 Rue de Watten (as that is the only road out in that direction), which does have an embankment (he mentions) on the right of the double bend going down. But looking out over the plain from there Dunkirk would be at best slightly to the right, if not directly in front, the left of that road being thickly wooded in the present day. He mentioned the Gloucesters which led to his fourth tank, and the Murland book says that 2nd Btn 'D' Coy was on the south side of D11 in the grounds of Villa des Moulins which would put anyone there facing out across the plain to the south and west with Dunkirk more-or-less behind them. He writes that a stray tank managed to get into the Villa grounds which they ('D' Coy.) were unable to deal with, but shortly afterwards Captain Bill Wilson saw from one of the pigeonaires the tank abandoned and on fire "... the tank had fallen prey to an anti-tank gun, possibly from 53/Anti Tank Regiment". Walk 2 in the Murland book confirms 'D' Coy were on the left of D11 between that and D933, dug in to the left of a steep path that bypasses the double bend "now almost entirely obscured by trees and shrubs".
The Jones map does show a wooded area east of the Villa grounds but would be too close for the 600 yards when his first three tanks first came into sight. 16Pl would have been close to the D11 but facing east and north, so Dunkirk firmly on the right. 17 and 18Pl are perhaps more likely with Dunkirk behind him, but that would put him on the D933 leading out of Cassel. That has an almost 180 degree field of fire across the plain on falling ground, with a modern-day 'small wood' 4-500 yards south. With the fourth tank being to Harry's left behind the cottage but in view of Capt. Wilson, and inside the villa grounds, that would put it very close to the centre of Cassel. Alternatively ignoring the direction of Dunkirk 16Pl could have had a tank getting through the wood to the east of the villa just into the grounds between 16Pl and 17Pl, and a tank behind a cottage there could be out of view of Harry with 16Pl just off the D11, but in view of Capt. Wilson.
Harry also mentions carrying ammunition to the French 75s. The Jones map shows one on the D11 between 'B' Coy and 'D' Coy and another at the junction off the D933 and Chem. Ryckewaert in 'D' Coy territory so that doesn't help narrow it down.
March 2023: John West sent me information about an online battlefield tour from Battle Guide virtual tours - 1940 - Retreat to Dunkirk. It covers the build-up to the Nazi advance, and the defensive line that only gradually fell back to allow the bulk of the BEF to get off the beaches at Dunkirk, with a significant part on the defence of Cassel. At several points in the tour the Nazi advance is shown coming from the south east, and at 40 minutes in immediately before Harry's description of his action it clearly shows the attack coming from almost due south. I have reversed the Battle Guide screen-shot to line up with conventional maps:
I've labelled the double-bend on the D11 out of Cassel towards Gravelines/Calais and the D933 towards St. Omer, compare with the Google Maps:
So that source clearly indicates the attack was towards the D933, not the D11.
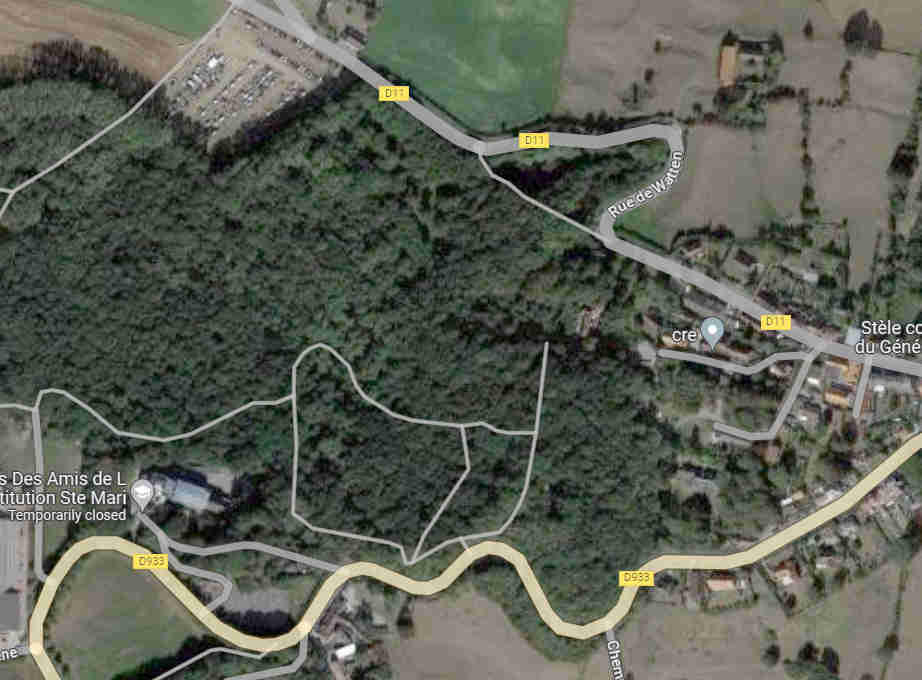
May 2023: More information from the Diary of Capt. E. H. Jones of 2nd Gloucesters and a 1940s map sent to me by Dave Hineson SSgt (6RIFLES-ACOY-QPSI). The former contains much detail about the attacks on Monday 27th May (not Sunday 25th as Harry wrote) and the latter shows the chateau grounds between the D11 and D933 complete with two windmills, and shows the wood west of the chateau grounds as being noticeably smaller than the present day.
The diary:
"10:00 'D' Coy reported an attack was developing on their front (centre company). Two tanks had come up the road towards company HQ (in a chateau) (D933?) and were shelling the chateau. Elements of enemy were seen in the forward edge of the wood below them and other tanks were approaching.
"About the same moment 'C' Coy reported an attack on their front. (South and left company) 4 tanks had entered the fields below the company's line.
"11:00 The South and West of the battalion's line were under heavier fire. (West as well as south, note)
"11:30 The two tanks on 'D' Coys front were joined by a third.
"14:00 About 1400 hours CC 'D' Coy phoned that they were still being extremely hard pressed: the three tanks are still in the chateau grounds - they appeared stuck. The company had many casualties.
"15:30 About 15.30 hrs a party from 'B' Coy attempted to dislodge the tanks on 'D' Coys front. ... Unable to make any further progress due to enemy fire the party withdrew. ( Available because there was no attack from the north west at that time?)
"16:00 CC 'D' Coy reported that ... the enemy were attempting to establish a post by the houses at the bottom of the chateau grounds. An immediate counter attack was recommended.
"Capt. Cholmondley led a party of 6 men. They worked forward to the houses, and while searching them saw a party of Germans digging trenches. The party charged with the bayonet inflicted casualties and the enemy fled. By this time two of the 3 tanks had withdrawn; the remaining one continued firing.
"16:15 Phoning from 'B' Coy HQ Major Cambell said that there were two A/T guns, wheel to wheel, at the road junction by 'B's HQ and one on the North side. (See map).
"He had ... asked if a .25mm (?) A/T gun could be sent to him.
"17:00 'B' and 'C' reported that the enemy were withdrawing on their fronts and the shelling had lessened. 'D' Coy reported that the enemy had been repulsed and were withdrawing. The stuck tank had got out and withdrawn.
"17:15 Major Campbell returned to Bn HQ. He said the A/T gun had been towed into position by a carrier. (Harry's gun?) It now covered the road junction near 'B' Coy. (Croix Rouge?)
A portion of Dave Hinson's map - two windmills in the chateau grounds between the D11 and D933, and a wooded area to the west. It's tempting to think that one can see part of the outline of these woods in the present day Google image:

So ever more information, but with both Major Cartland and Mr Hutton-Squire (who would have known the details of the dispositions) being killed in the breakout we are unlikely to know for sure.