Pondering another WW1 tour with Leger I was amazed to come across this tour specifically mentioning Cassel. It covers the rearguard action that took place over several days in May/June 1940, which were absolutely vital in getting more than 300,000 allied troops away from Dunkirk and the beaches. It's a part of the Dunkirk story that very few people know anything about and has been repeatedly ignored in pretty-well every documentary and film on the subject, being limited to just a couple of books.
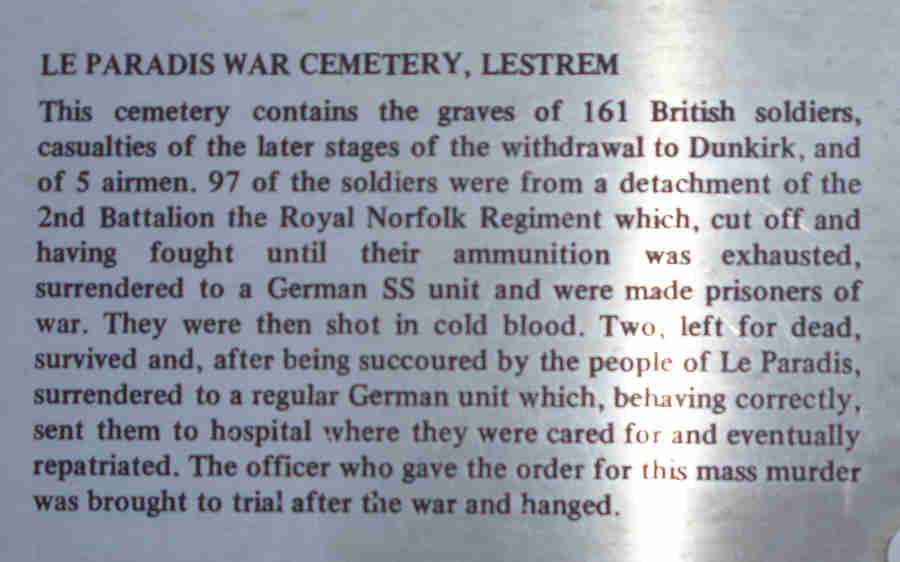
Starting from St. Venant on the River Lys and facing enemy approaches from the west at a number of strategic river and canal crossings and important road junctions in a line leading to the coast, the orders were to stand fast to the last bullet and the last man, only being released from that commitment one by one as the bulk of the BEF retreated towards Dunkirk. At a couple of locations a junior officer had decided it would be madness to continue defending and told their men to withdraw against orders. Senior officers had to threaten to shoot any that retreated and in one case did, the men returning to hold the line. Some of the defenders were themselves able to get back to Dunkirk by creeping through enemy lines at night when orders to withdraw were received, but many others were either killed or captured, the latter spending five years in harsh conditions in POW camps or as slave labour. At each location they held up the advance for one or two days, which so enraged the attackers that at several places POWs were murdered by the SS, Le Paradis and Wormhout being the most well known.
Dover: Check-in deserted, unlike the previous Friday before the 82nd Anniversary and football match! One of three Spitfires and a Hurricane that flew over while waiting to board:
Dover Castle:
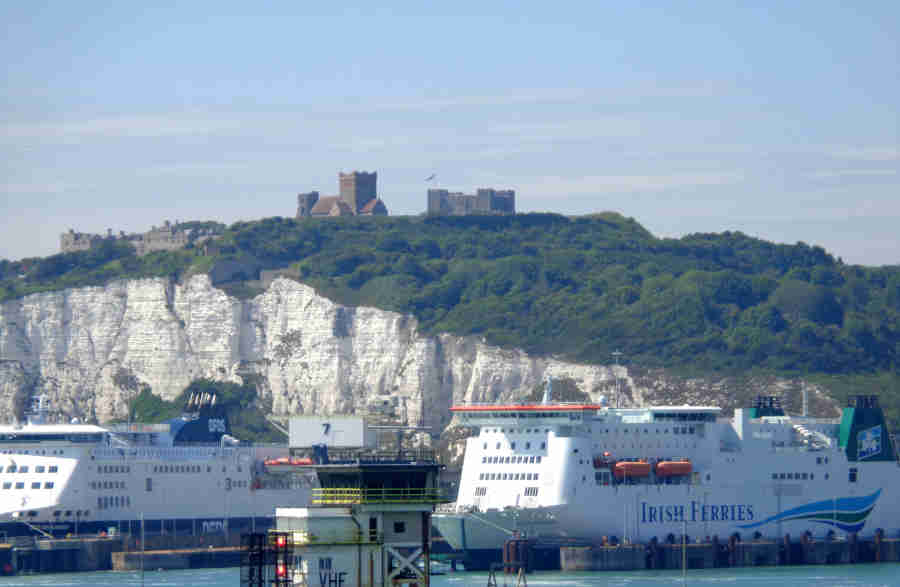
What would have been a very welcome sight 82 years ago:

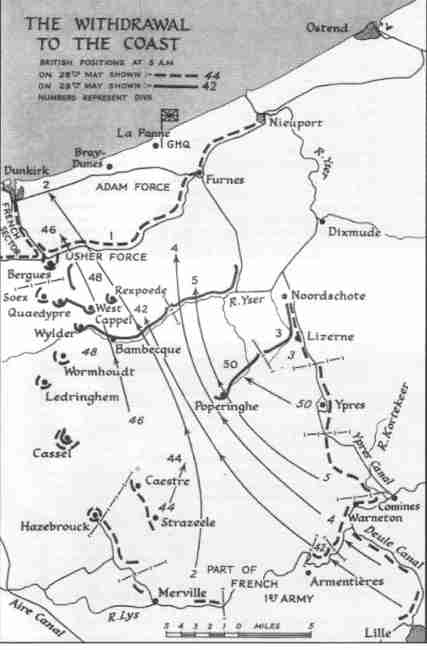
The situation on 28th and 29th May 1940, with the rear-guard holding a west-facing line from Merville up through St Venant, Le Paradis, Hazebrouck, Cassel, Ledringham and Wormhout: (Jonathon Ball, Leger tour guide)
St Venant: Catastrophically one of the officers had his men dig in on the enemy side of the river, which meant that the bridge they were defending could not be blown until they themselves had retreated across, and many died under heavy fire while attempting that, and the bridge was not blown. The CO got back to the UK, was given a gong for which the citation bears no relation to what actually happened, and put in charge of a unit responsible for a mined area on the east coast. Apparently he stepped on a land mine and was killed, and accounts indicate 'he was mourned by neither his former nor his latter units'.
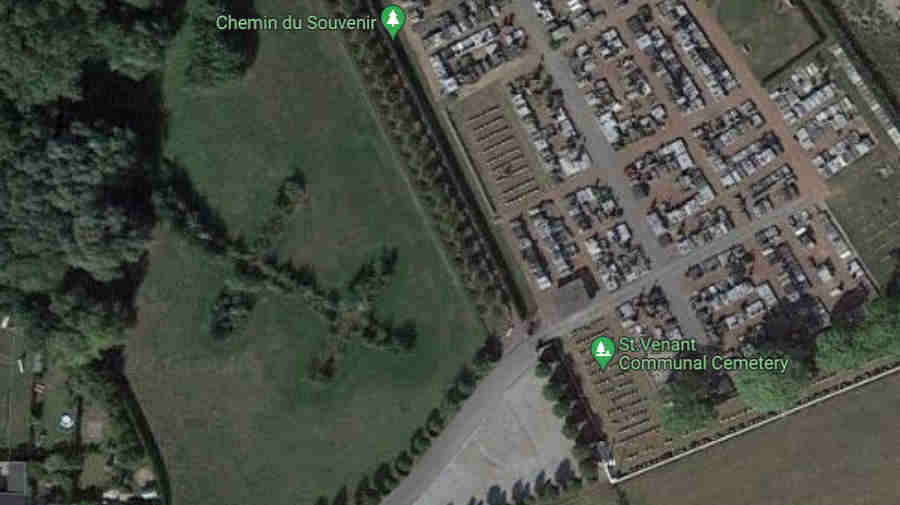
An aerial view from Google Maps showing the cemetery with trees planted in the shape of the Cross of Lorraine amongst which the bodies of British troops were buried before being disinterred and reburied in the expanded CWG section. It was during this time that many of the bodies were found to have been shot in the head or the skulls crushed:
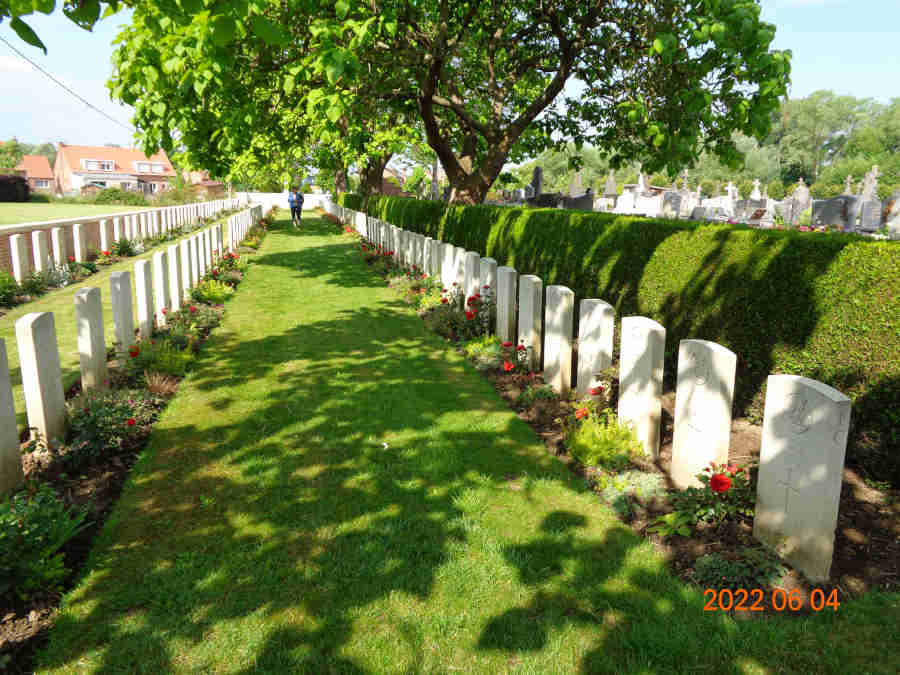
The CWG section of the cemetery:
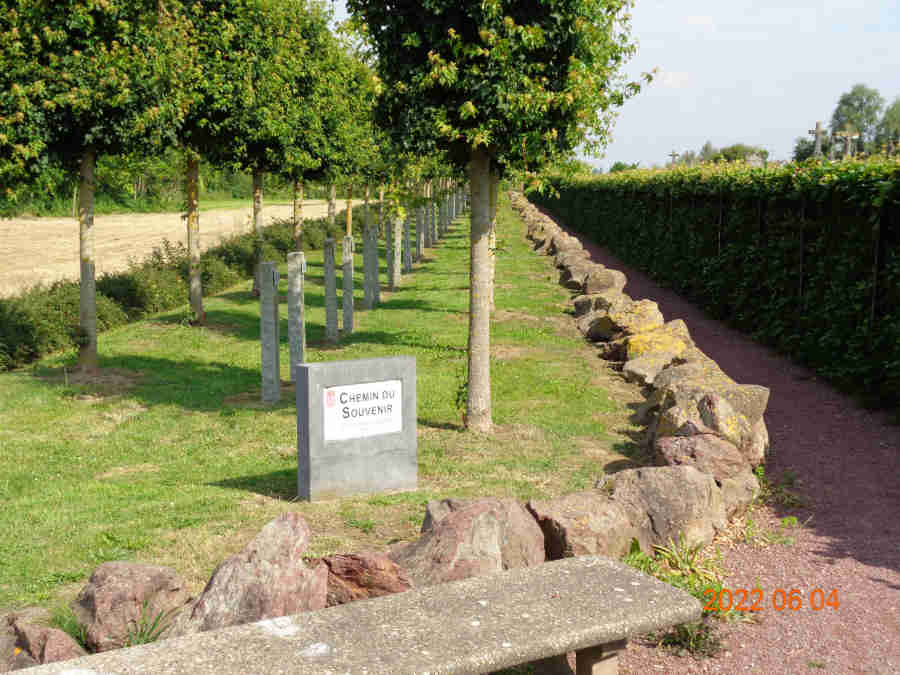
'Avenue of Memories' between the Cross of Lorraine and the cemetery, leading to the River Lys:
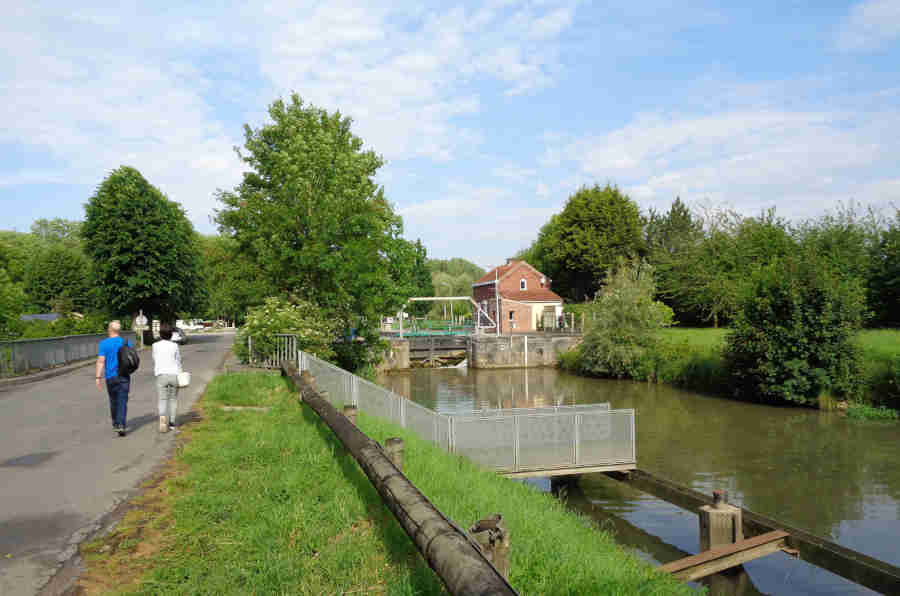
The west bank of the River Lys, where the Durham Light Infantry and Royal Welch Fusiliers suffered many casualties:

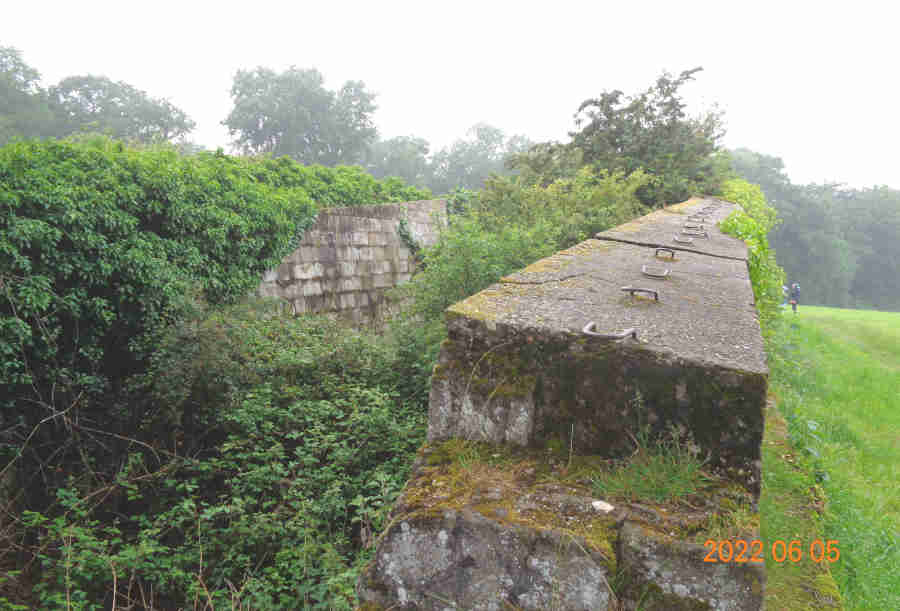
Lock gates where the original river crossing was situated:
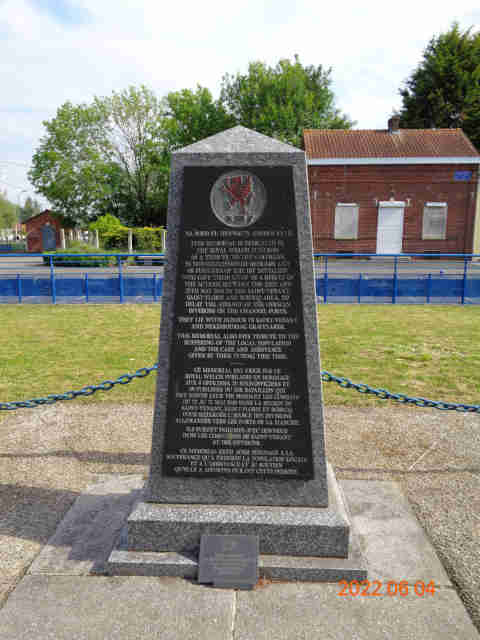
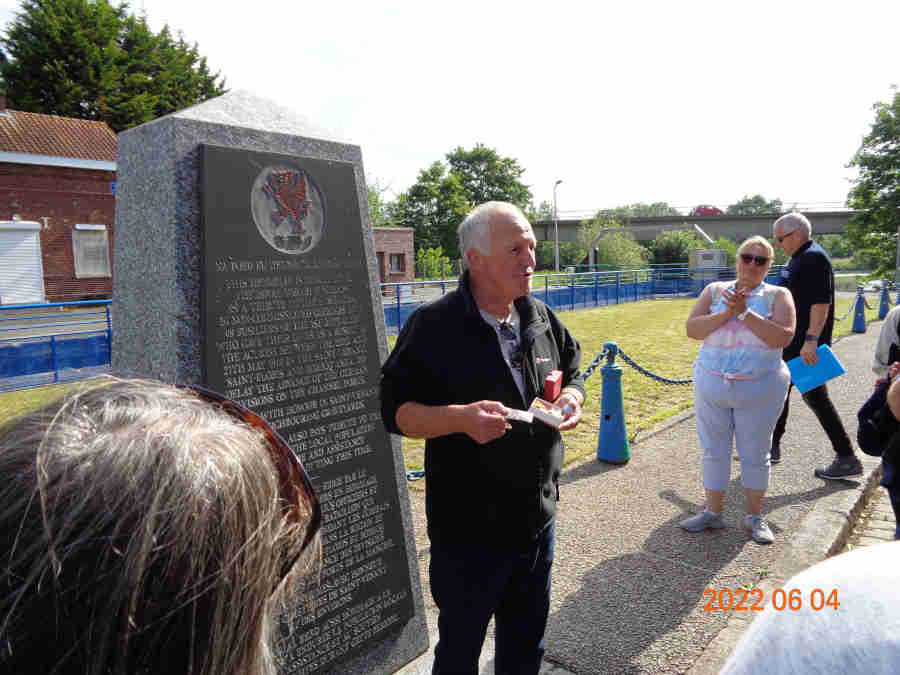
Memorial to the Royal Welch Fusiliers opposite the lock keepers cottage. The cottage shows much evidence of repaired bullet holes:
One of our tour whose father survived, with his medals including the Dunkirk Medal and his dog-tags:
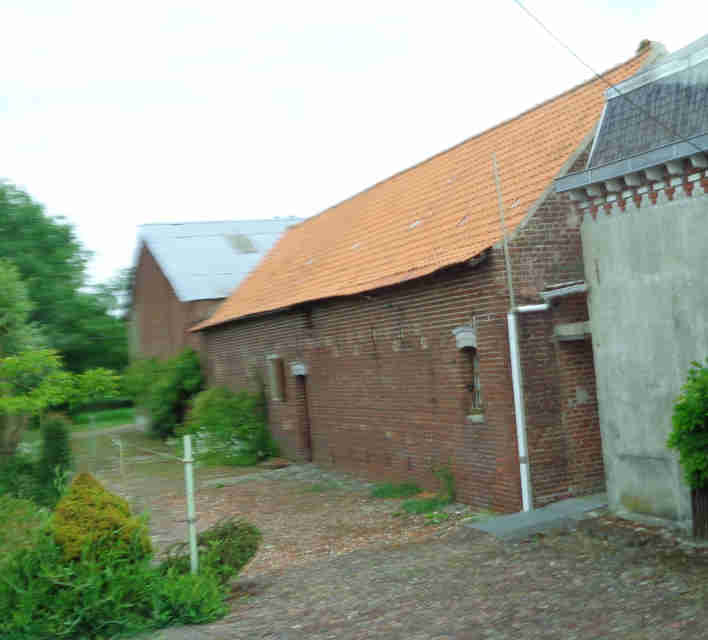
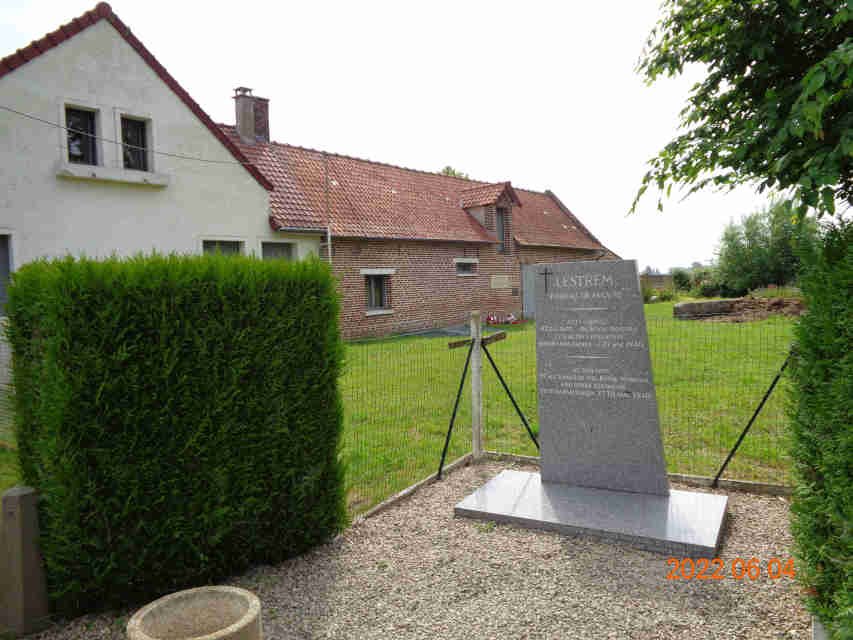
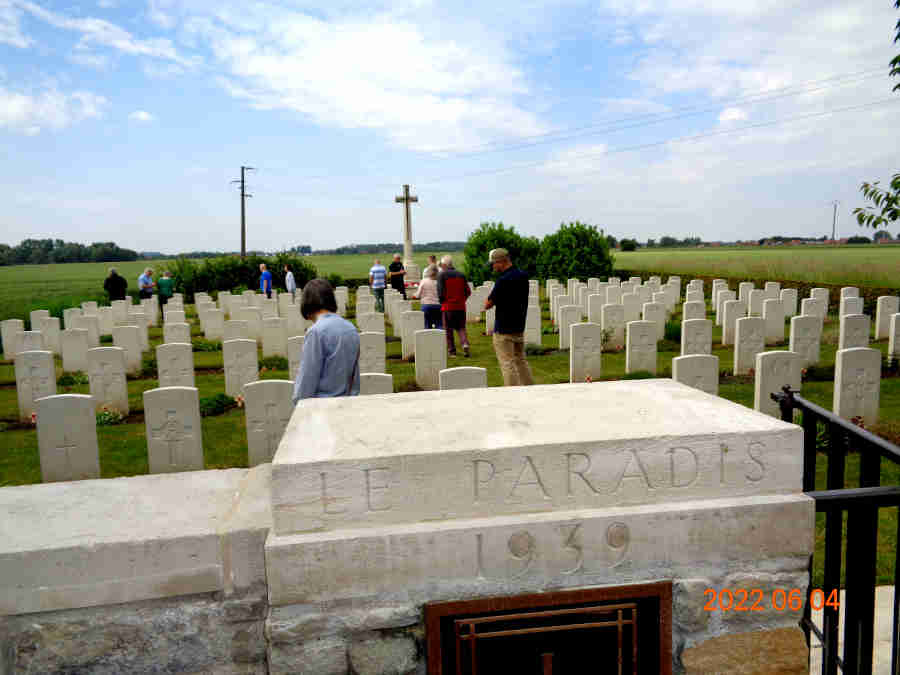
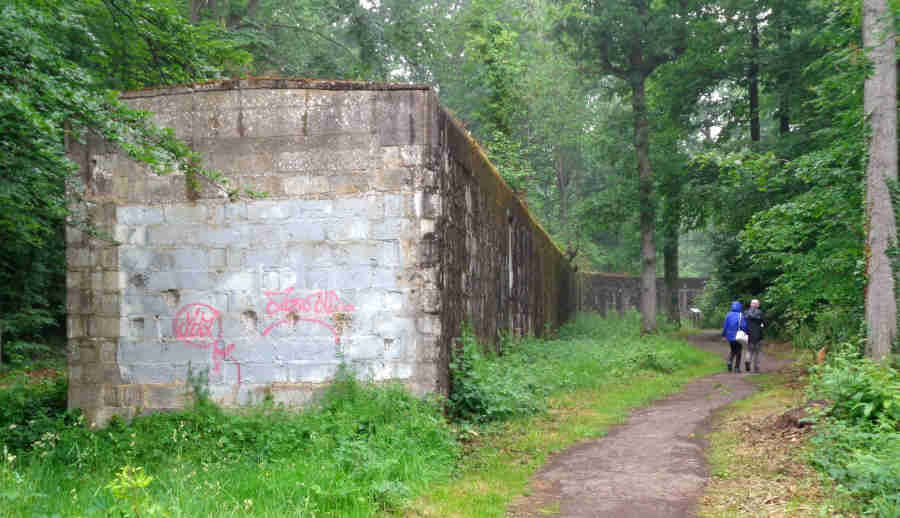
Le Paradis: Finally having to surrender after firing through loop-holes in the wall of a barn and running out of ammunition, some came out waving a white flag and were shot. Subsequently about 90 officers and men were marched down a track, lined up against another barn and machine-gunned. Two were wounded and lay under other bodies playing 'dead' as anyone showing signs of life was shot in the head. One of those reported what had happened on his return to the UK and was not believed. But he persevered, came back immediately after the war to gather evidence, and his account was eventually accepted. The SS officer who gave the order was arrested, tried, found guilty and hung.
The barn where men of the Royal Norfolk Regiment and other regiments held on until they ran out of ammunition, you can see the repaired loop-holes:
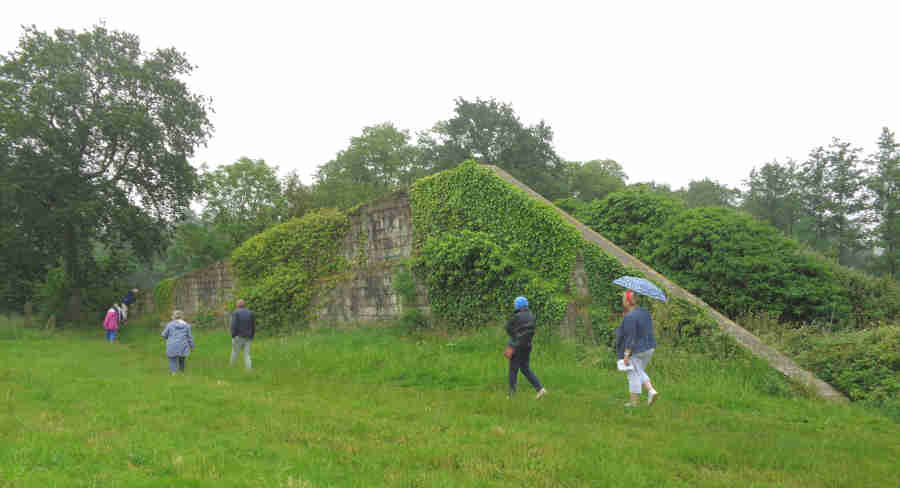
Panorama of their walk from capture just beyond the trees on the far left, to the barn on the far right:
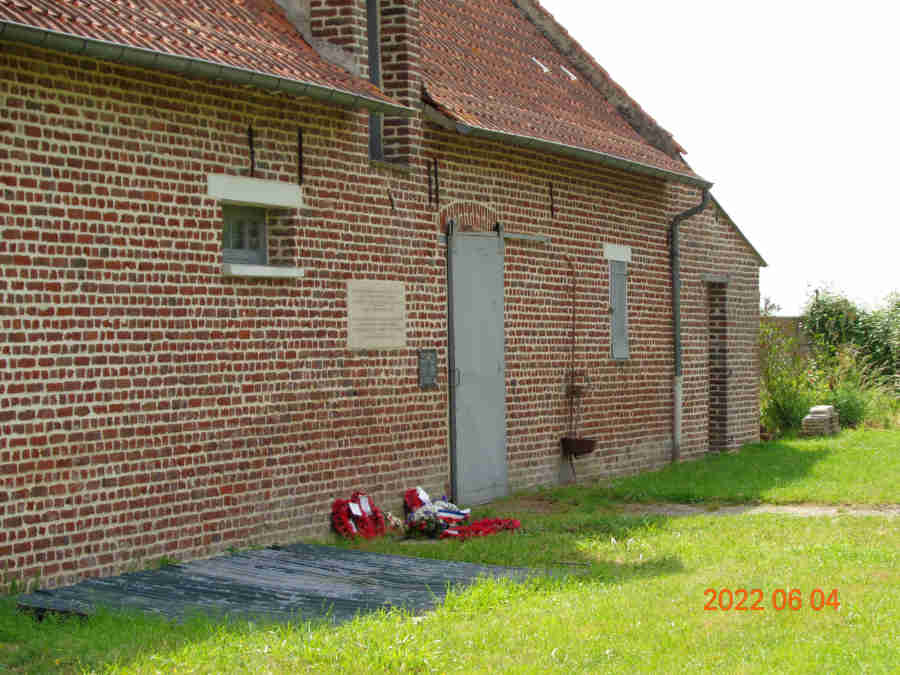
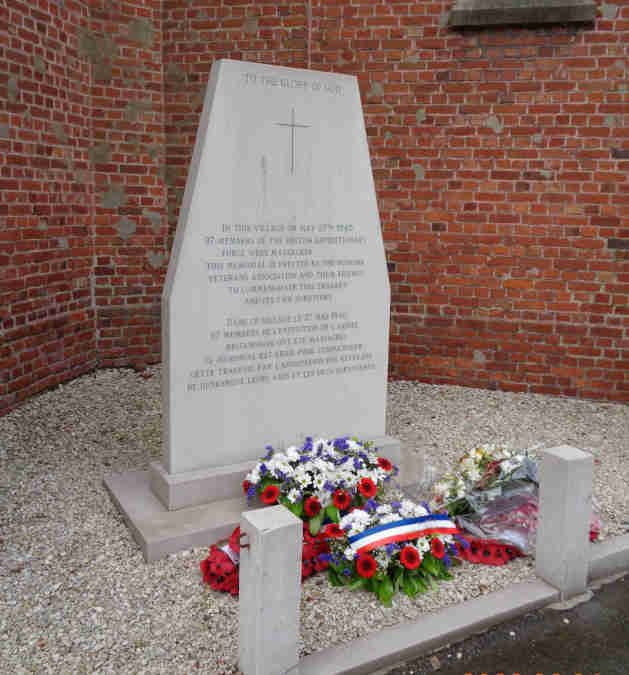
The barn and memorials:
Memorial at the church:
The cemetery behind the church:
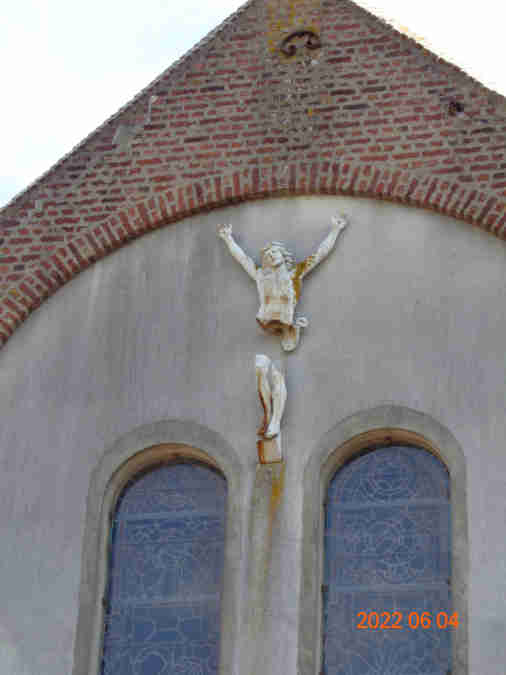
The churchyard was also the scene of fierce fighting, with memorials and this image of Christ showing damage:
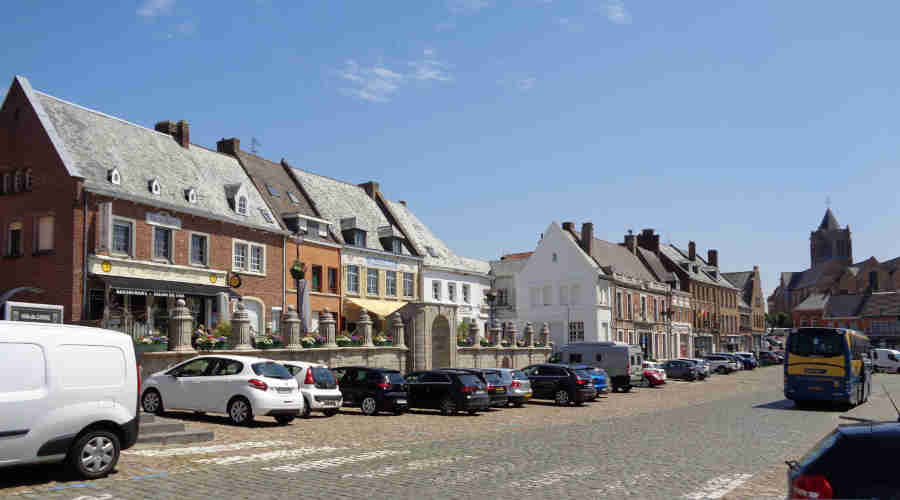
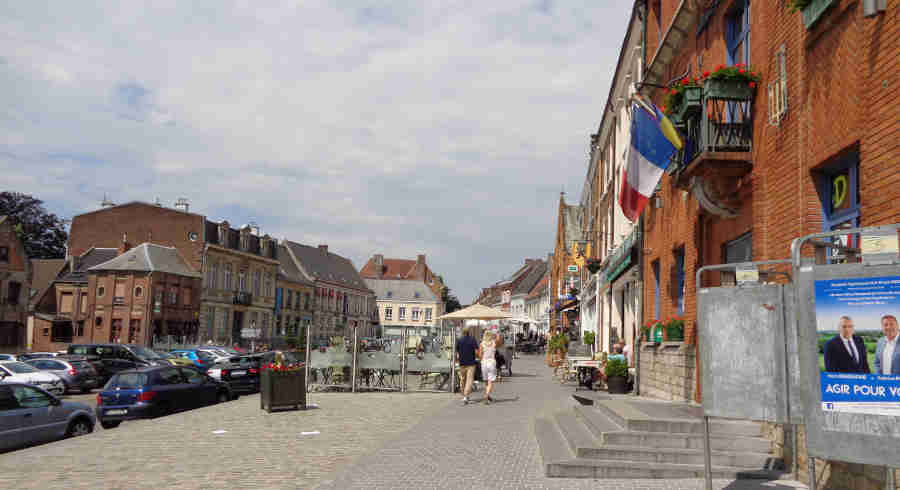
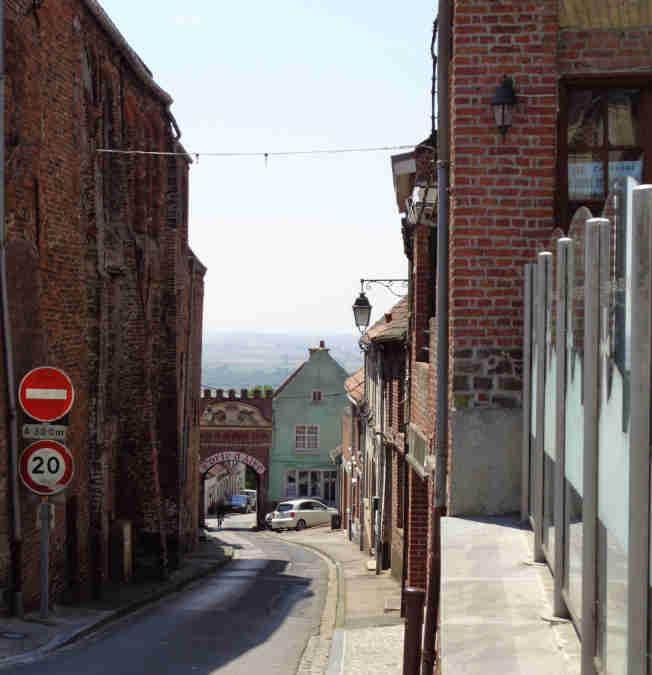
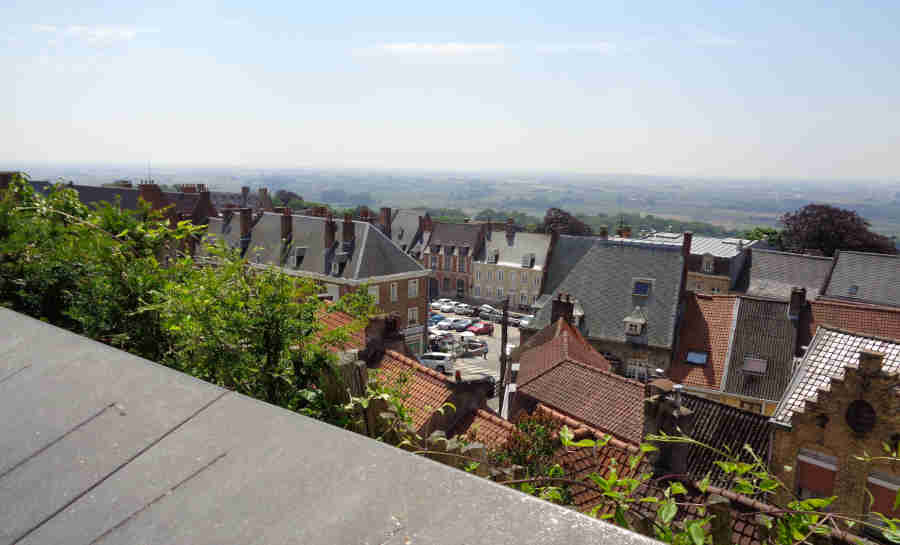
Cassel: A lot more on the defence of Cassel on the main page here.
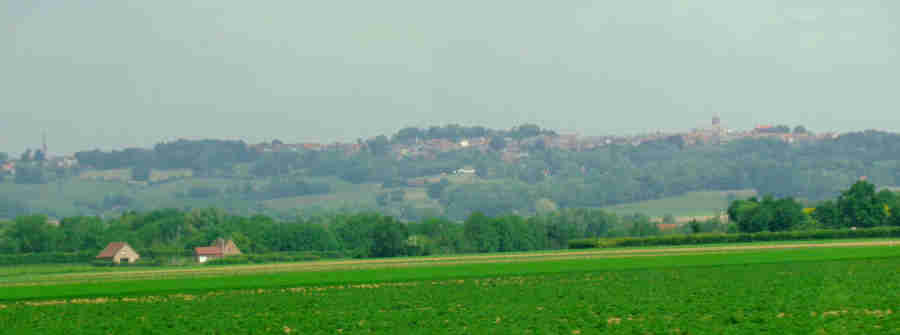
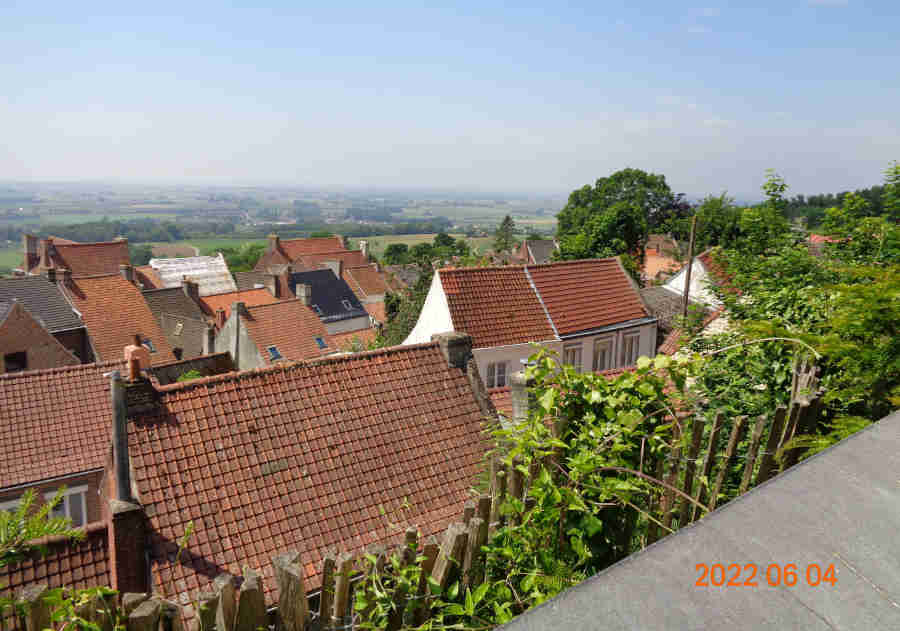
Approaching Cassel, visible for miles across the flat plains:
Many bars and restaurants, very busy on a sunny day, and very different to November 2017:

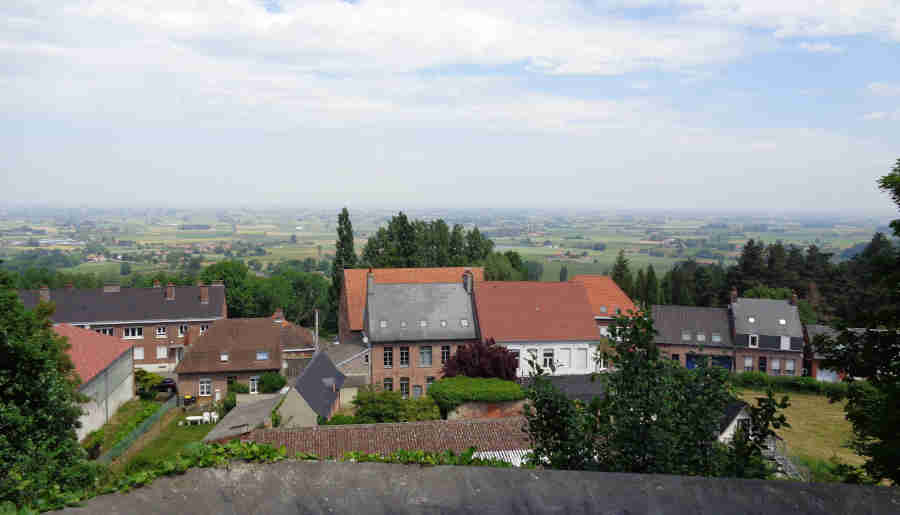
Views from the gardens at the highest point:
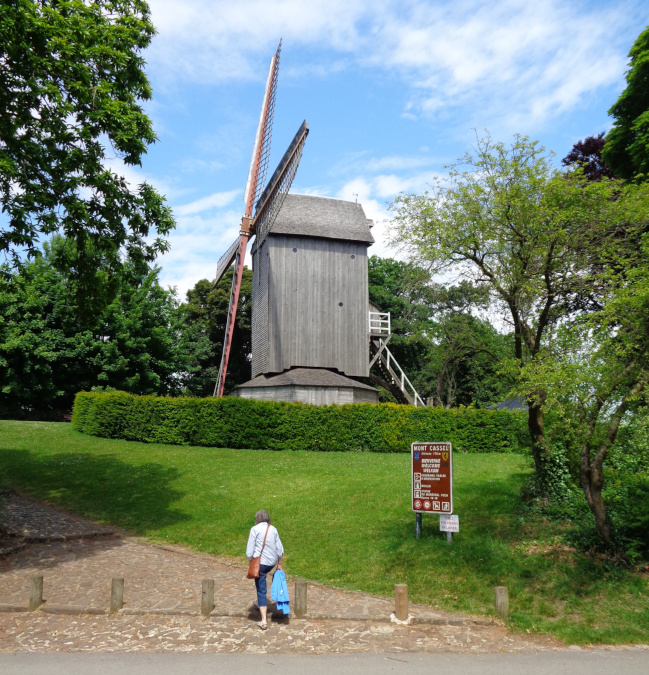
A windmill we hadn't seen on our previous flying visit:
During the tour Jonathon passed round a book 'Cassel and Hazebrouk 1940' by Jerry Murland, which gave more information on where Harry might have been when he destroyed his four tanks.
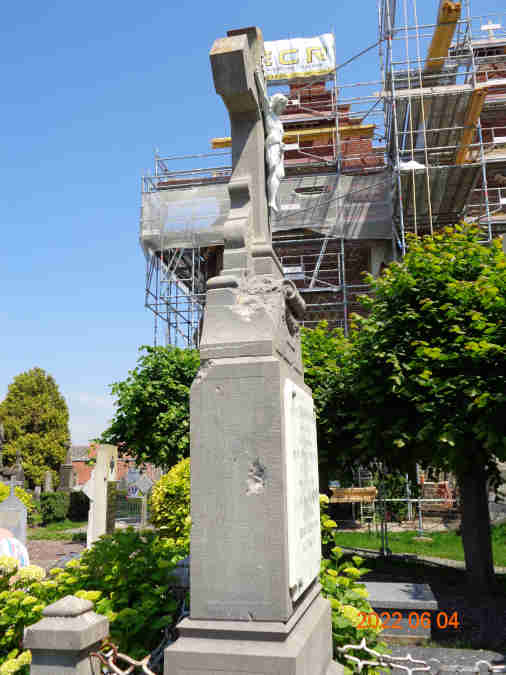
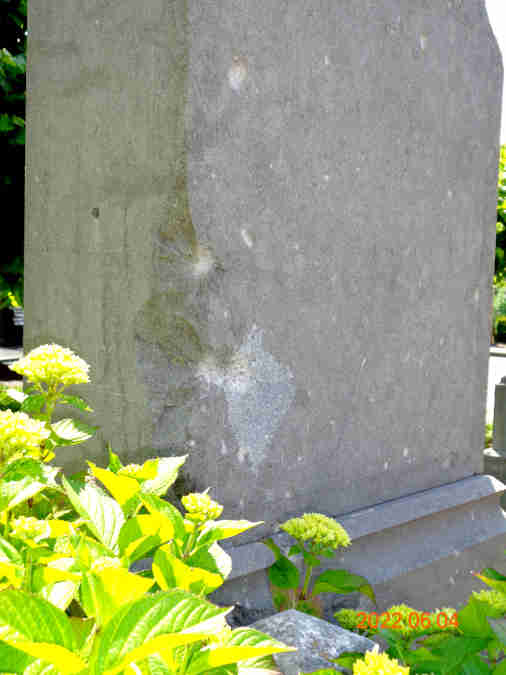
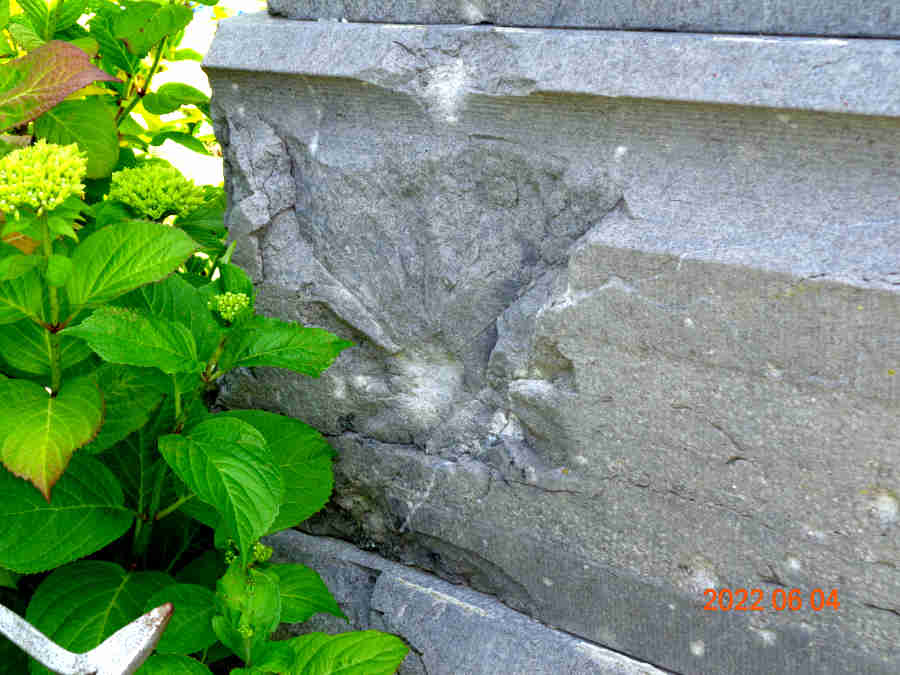
Ledringham: Hand-to-hand fighting in the churchyard at a road junction, with the Gloucesters repeatedly driving the enemy back with bayonet charges and full-blown hand-to-hand fighting including punching, kicking and even biting. Very peaceful now:
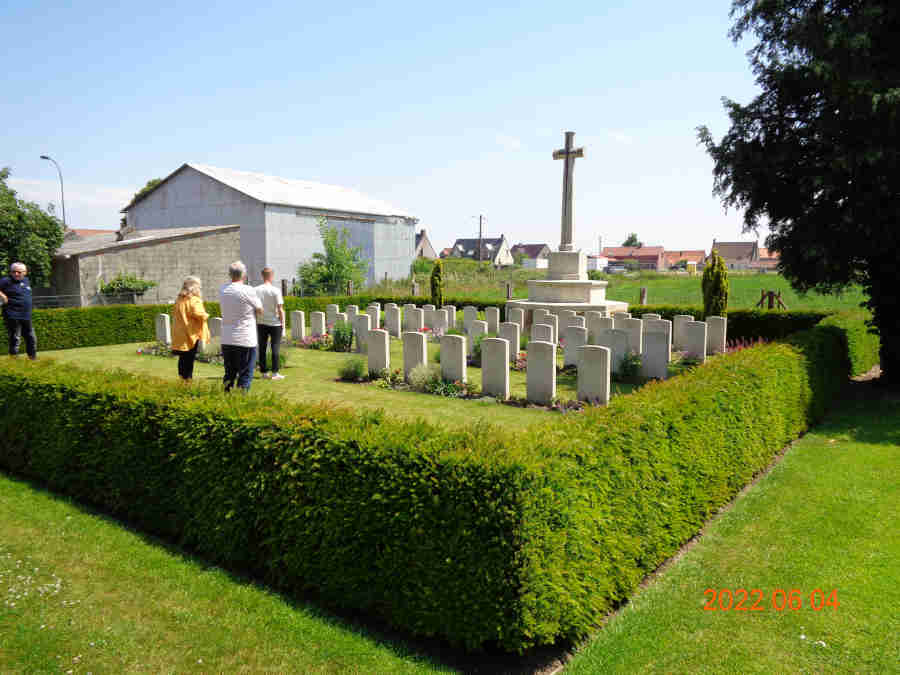
But a lot of the fighting was again in the churchyard as the damage to he monuments shows:
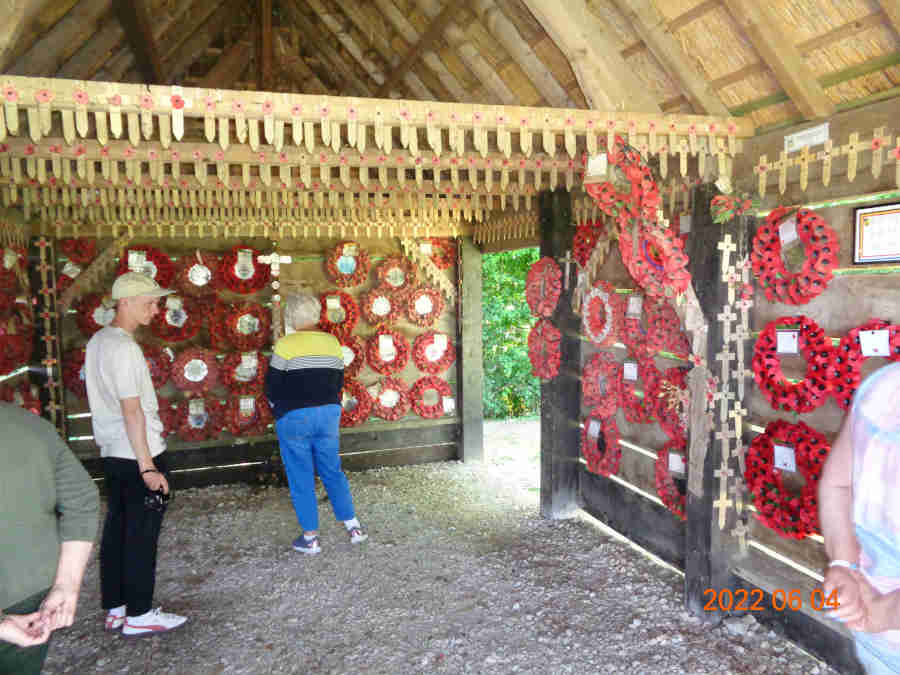
Wormhout: Another well-known massacre site, more information here. In this case despite several attempts over the years the SS officer involved could not be tried as none in his units would speak against him. As the ultimate insult added to 'injury' he continued to receive his German Army pension until his death in 2001. A lovely day to visit a poignant place:
This pollarded poplar dates to before 1940, the cowshed where the massacre took place was immediately adjacent:
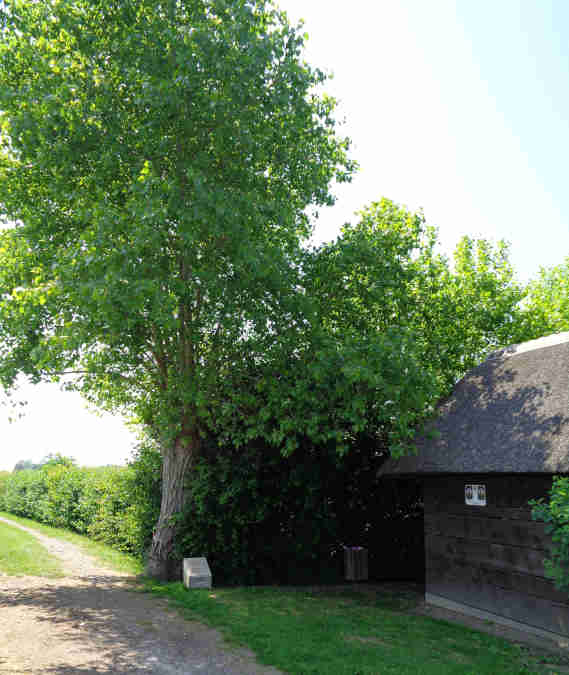
The Sacred Tree:

The original cowshed was demolished in 1960:
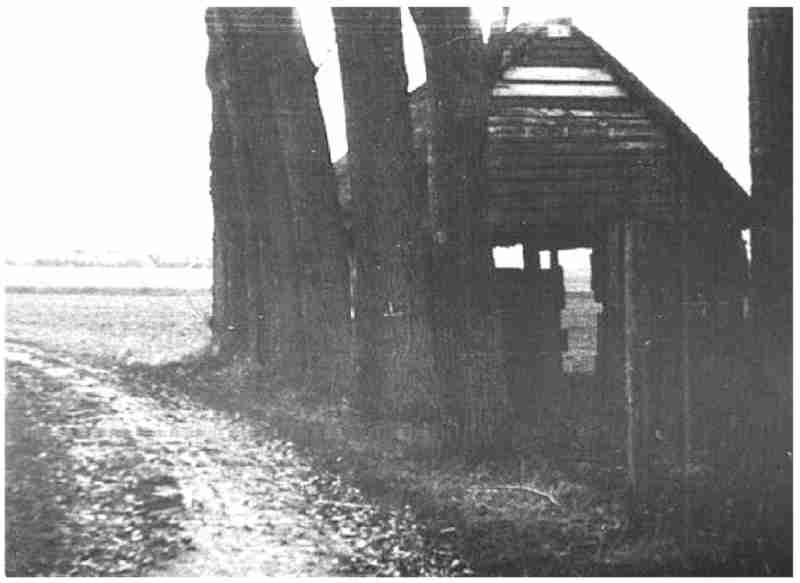
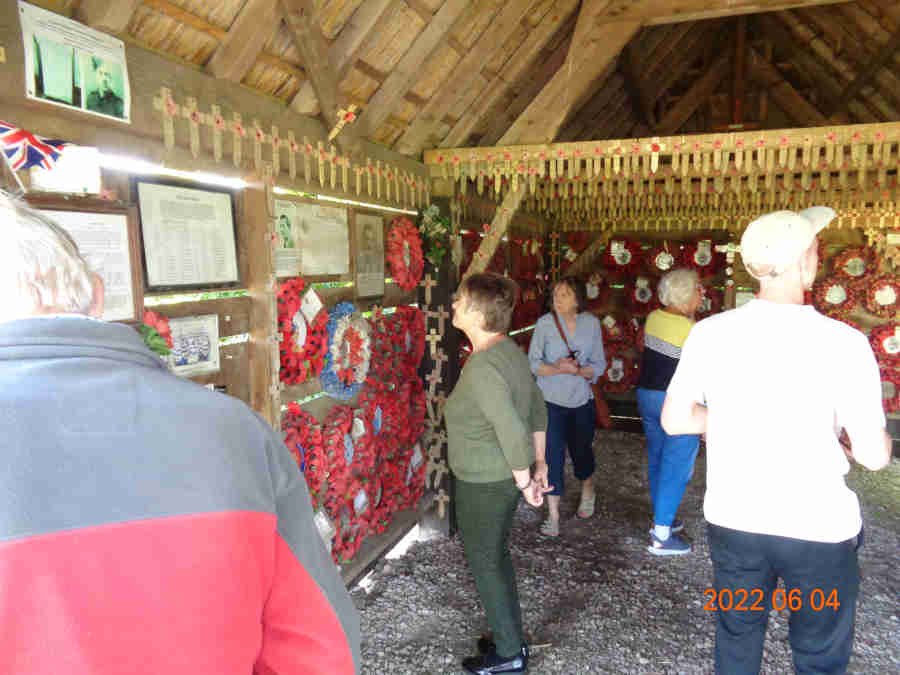
Veterans who fought in the area returned in 1972, rediscovered the site and laid memorials at what became the Sacred Tree, the new barn to house them being built in 2001 as part of a memorial park:
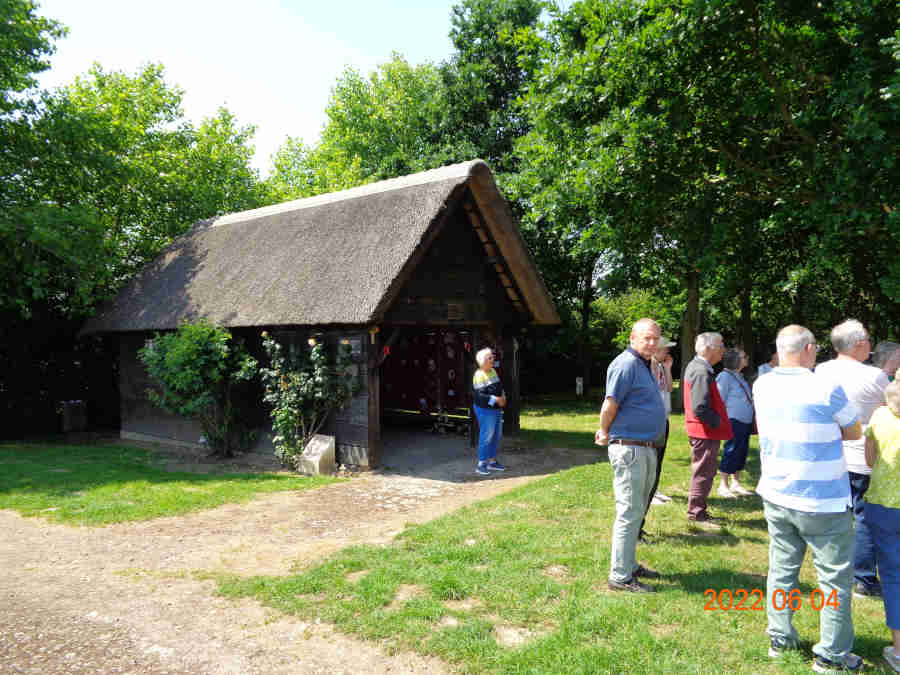
Very many memorials to those who lost their lives here:
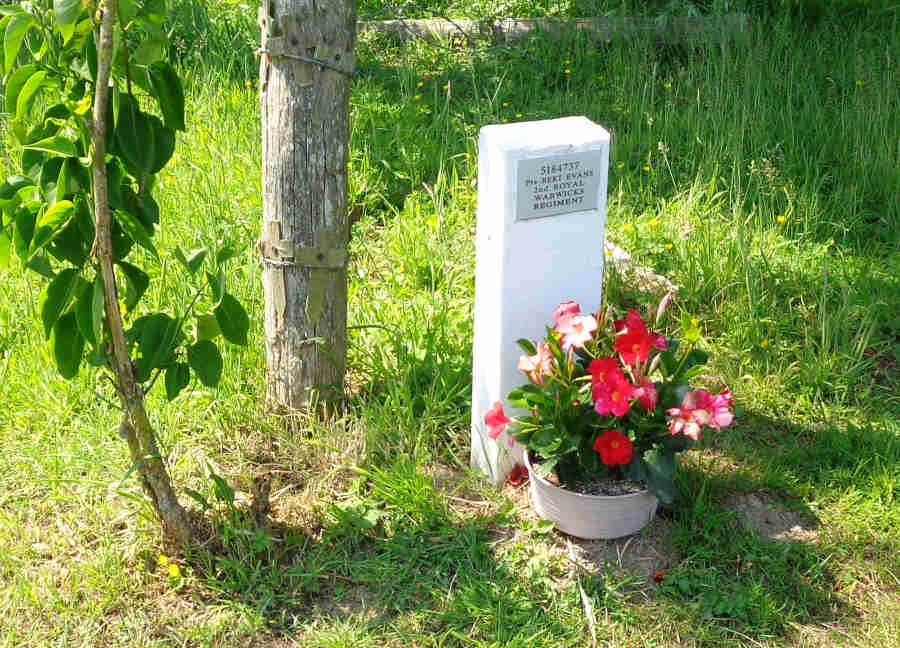
A memorial to Bert Evans, one of the few survivors, by the pool where he was shot and left for dead. Placed after his death in 2013, and after our previous visit in 2017:
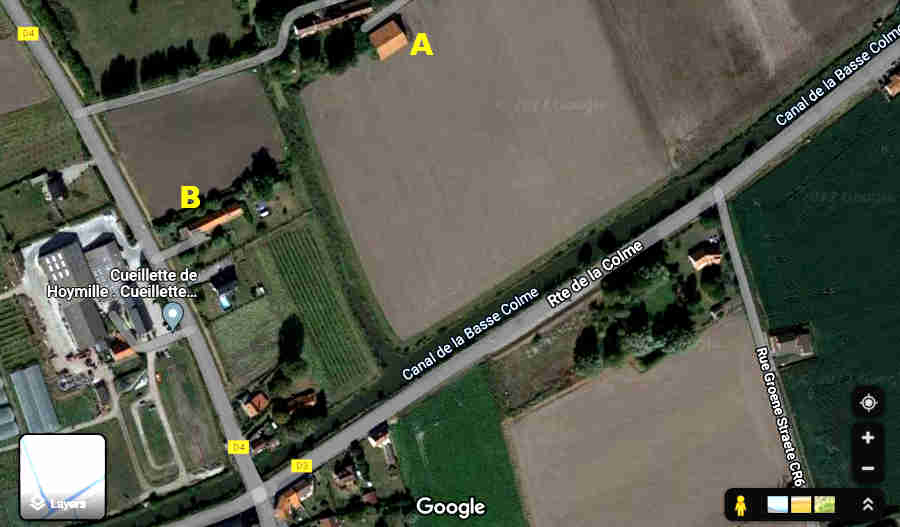
Dunkirk perimeter: A number of units along Canal de la Basse Colme on the D3 just north of Warhem were one of the last lines of defence on May 31st keeping the enemy from reaching Dunkirk itself and the beaches. Probably the most famous action is that of Captain H.M Ervine-Andrews who was awarded the VC for his action in holding up the enemy after they crossed the canal, but still succeeded in getting himself and his men out under cover of night. Descriptions of where to find this action today are very confusing with Canal du Chats, Canal de Bergues and others being mentioned that are incorrect. The site is at the junction of the D4 and D4, Benkies Mille, on Rte de la Colme alongside the Canal de la Basse Colme, just north of Warehem. Travelling west on the D3 with the canal on the right just before that junction there is an embankment (unusual in this pancake-flat landscape) on the left with a parking area. Ervine-Andrews main force were in the barn set back across the canal from there, and the house where he got through the thatched roof with a Bren gun and his rifle is alongside the D4 about 100m from having turned right off the D3, now with solar panels on the tiled roof. Occasionally the owners of the property will let a couple of people in where they have a number of artefacts and you can see the scorch marks inside from where the thatch burned.
The open barn where a number of Ervine-Andrews's men were placed, canal in the foreground:
A little to the left is the house and barn where Ervine-Andrews punched though the thatch and from just behind the ridge shot 17 of the enemy with his rifle after they had crossed the canal and an unknown number with the Bren gun:
Solar panels on the roof of the barn part of the modern-day house immediately in front of where Ervine-Andrews was firing from:
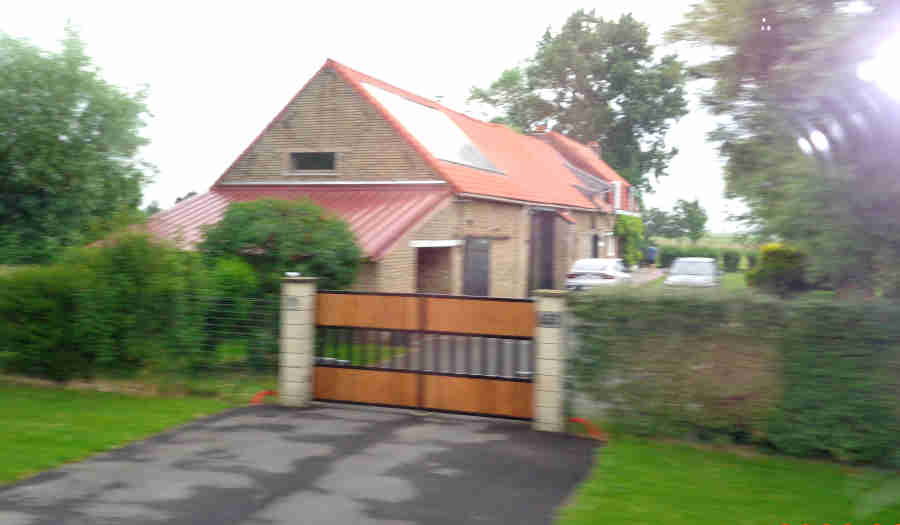
'A' is the open barn and 'B' the cottage and barn:
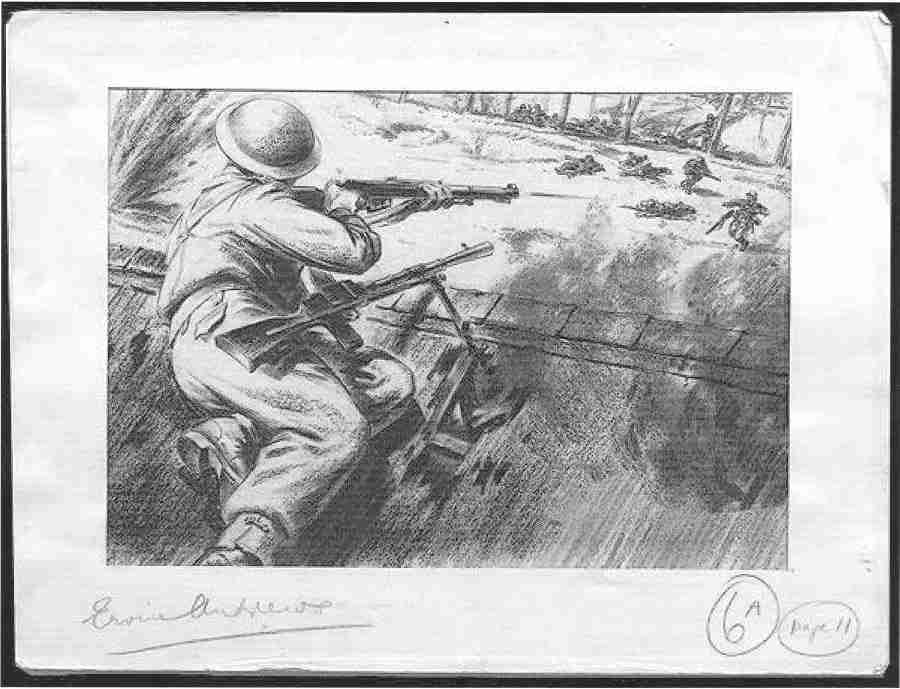
A drawing, signed by Ervine-Andrews, depicting the action: (Jonathon Ball, Leger tour guide)
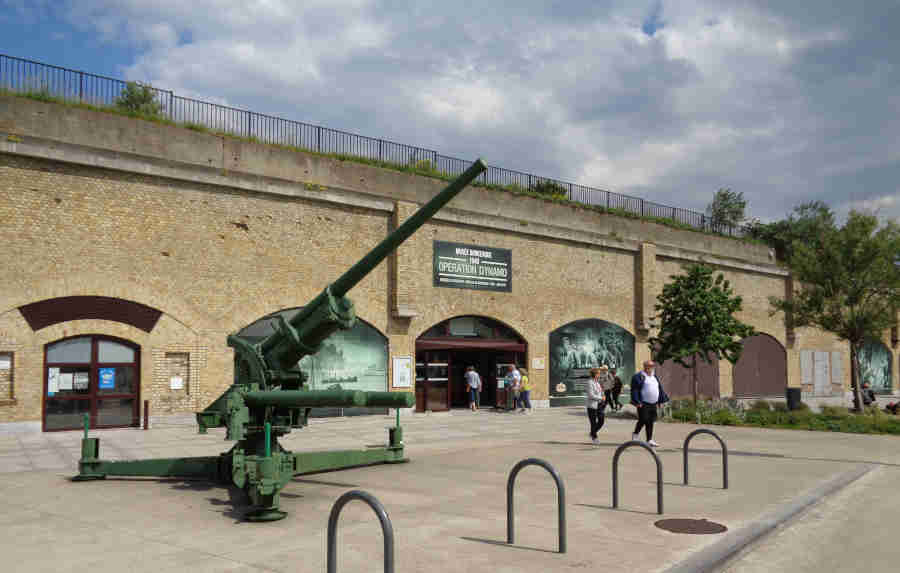
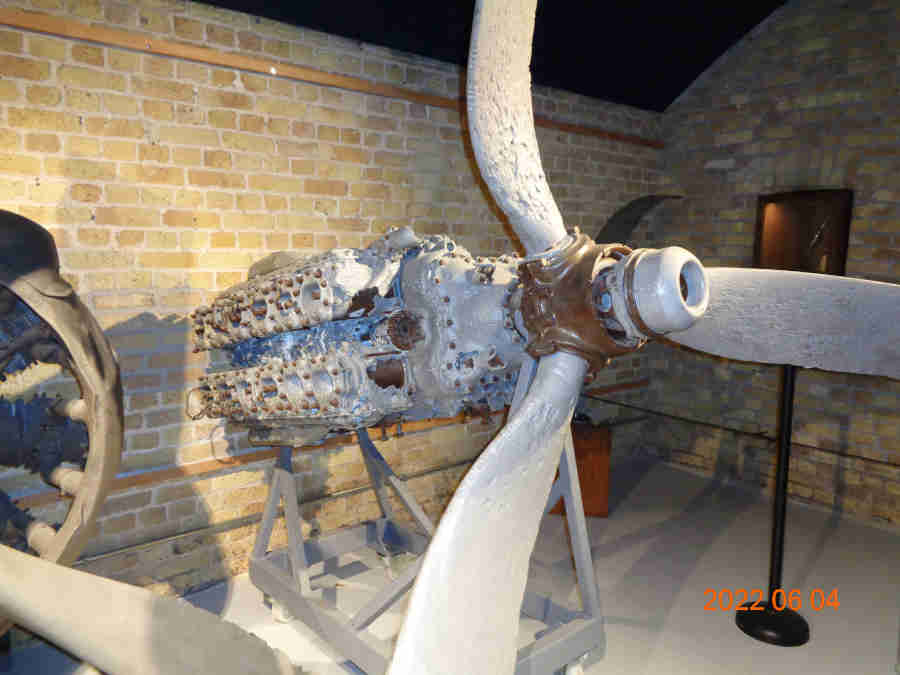
Dunkirk and beaches: Many sources for more information on the actual evacuations. Operation Dynamo museum, near the East Mole:
Lancaster Merlin engine that appeared out of the sand:
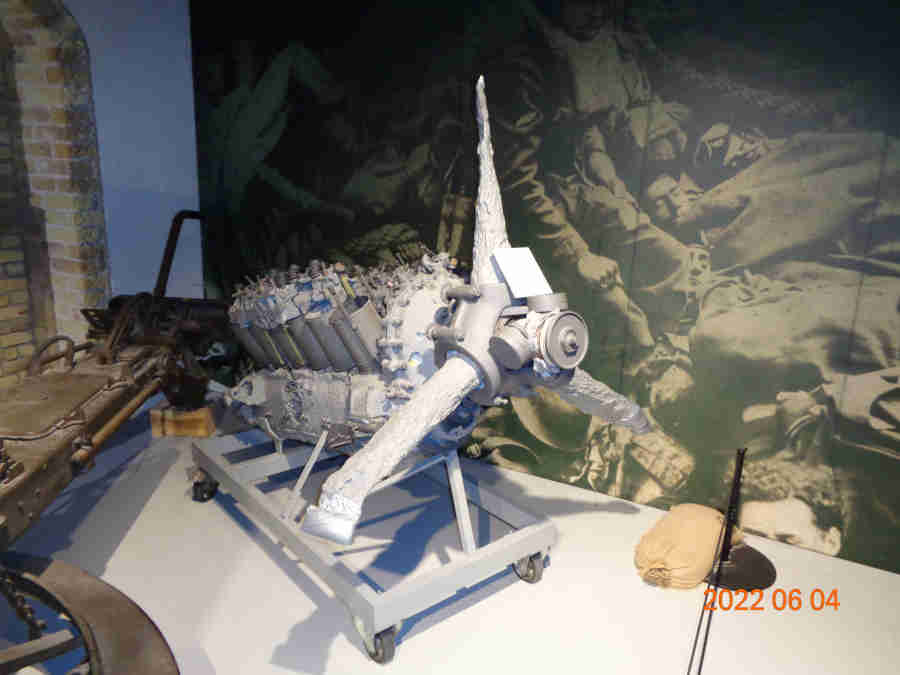
Ditto Spitfire:
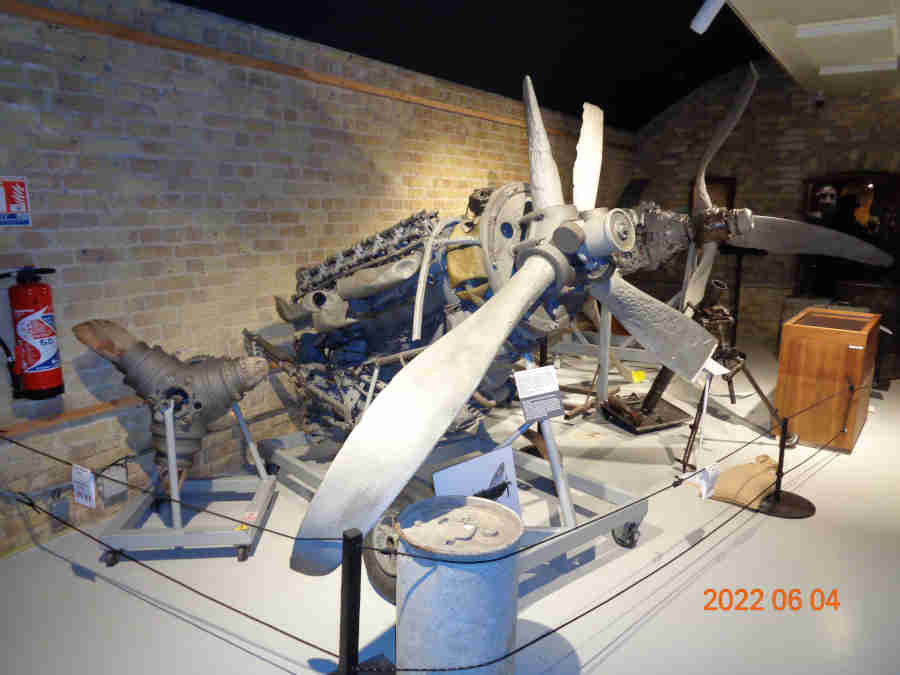
And Hawker Typhoon Napier Sabre engine:
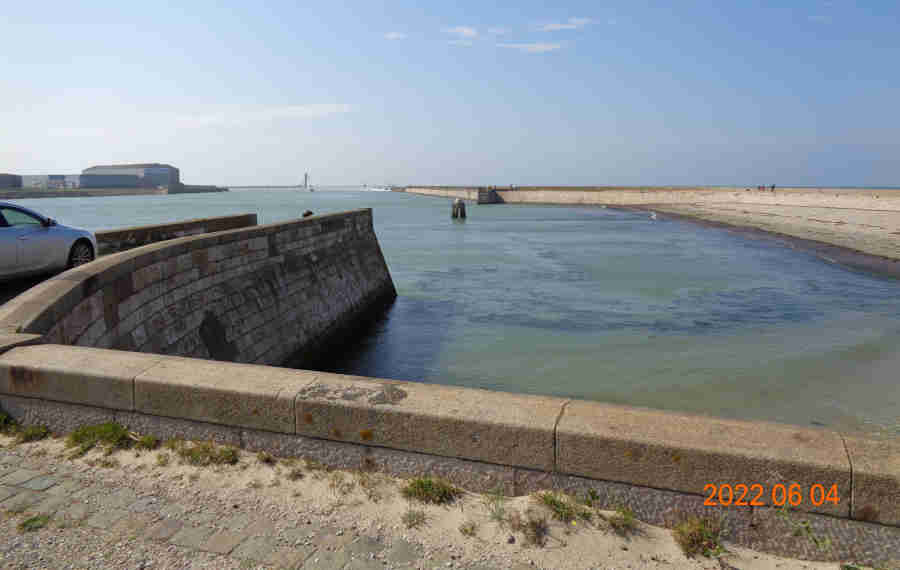
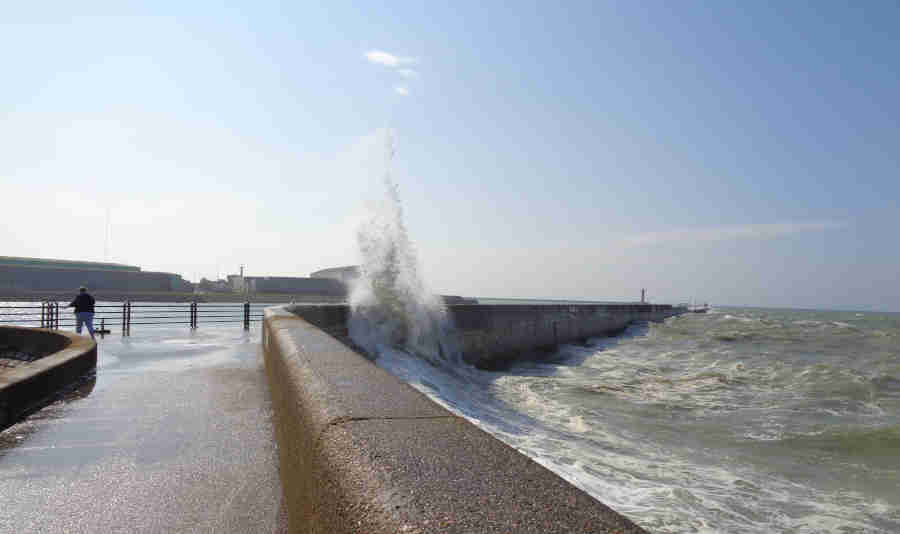
The east mole:
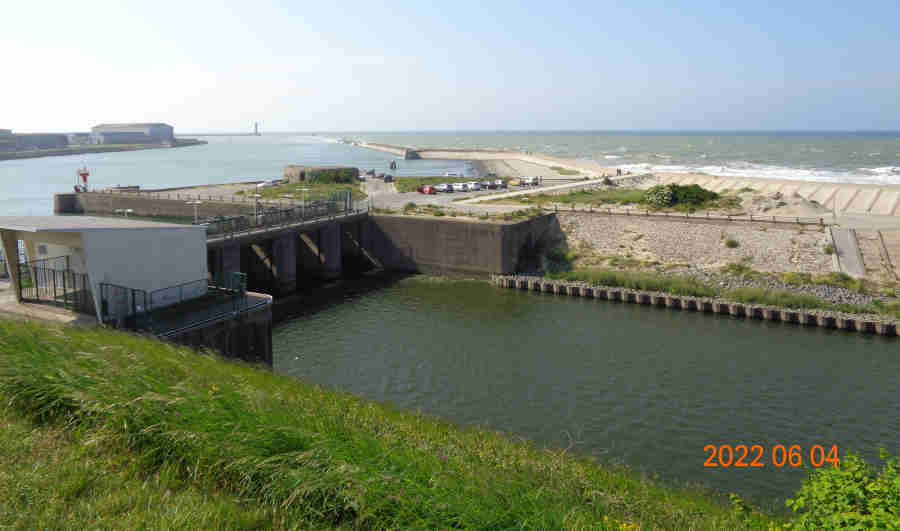
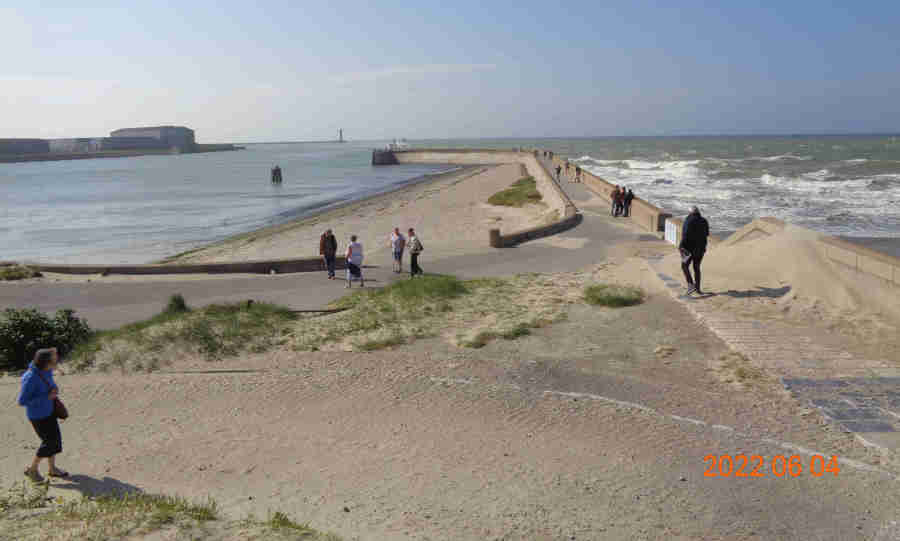
The end of the west mole with the tall lighthouse:
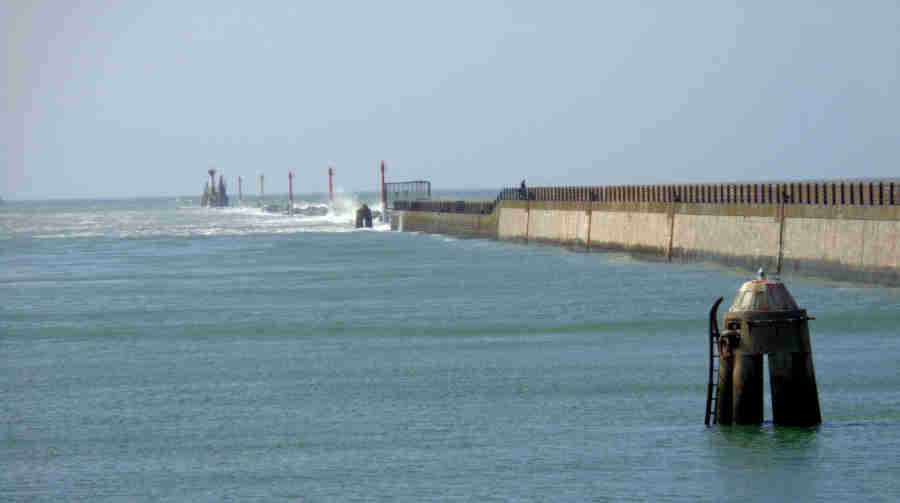
The very end of the east mole:
Despite the sunny weather it was very windy blowing against the right-hand side of the mole so very choppy:
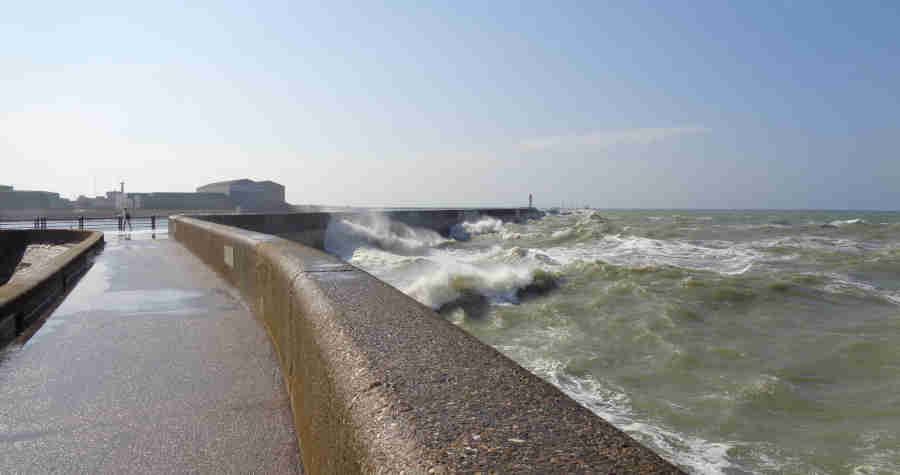
A good soaking for the unwary:
Looking along the mole, the ships would have tied up on the left:
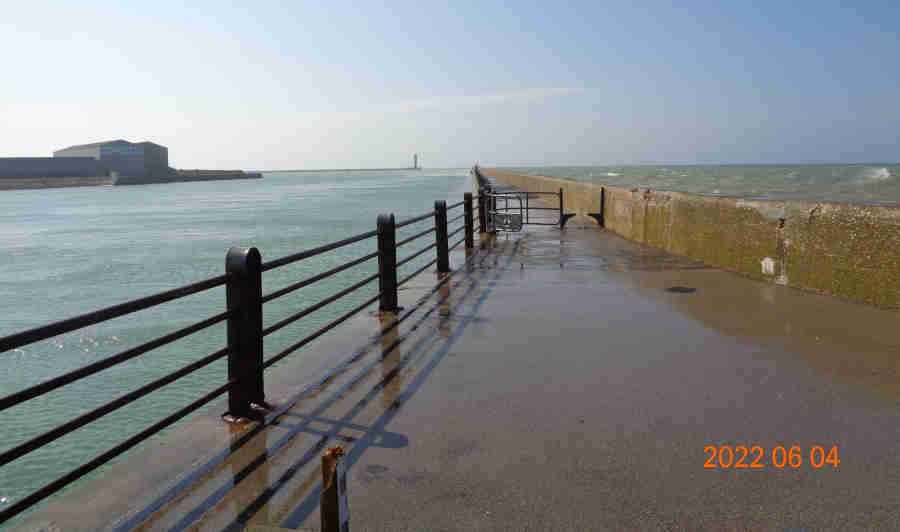
Looking back to Dunkirk town and the beaches:
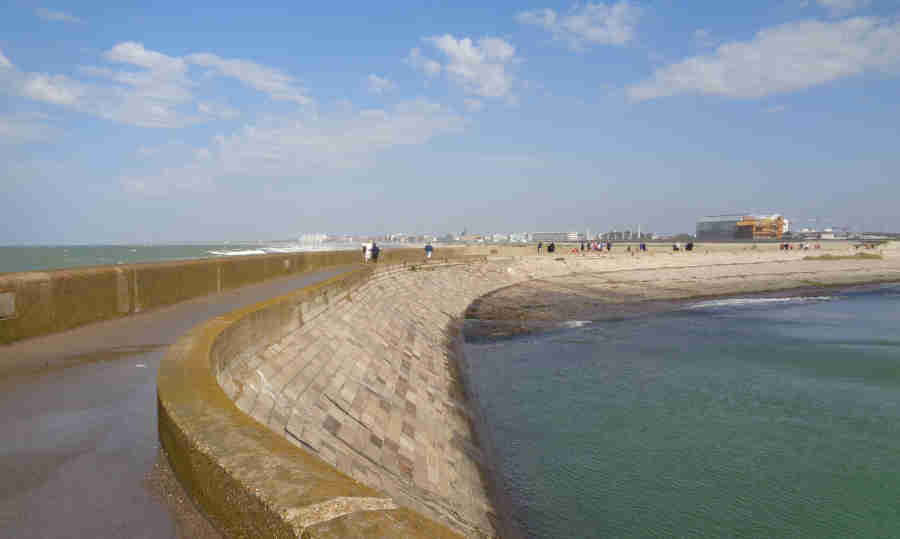
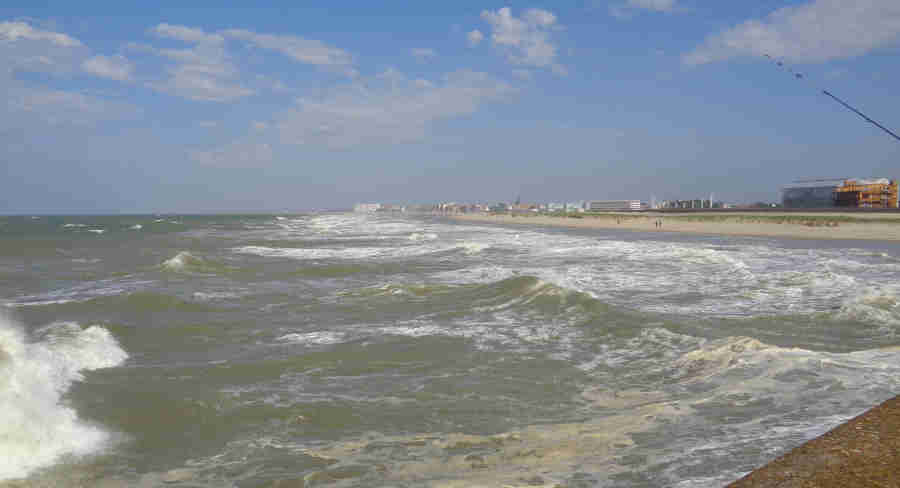
Bray-Dunes beach: Eight miles long:
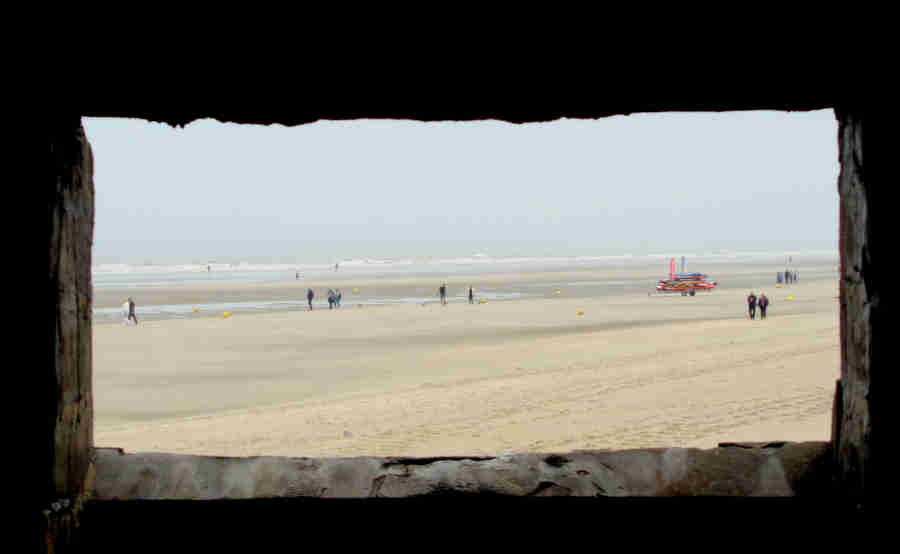
Part of Hitler's Atlantic Wall built after the Dunkirk evacuation:
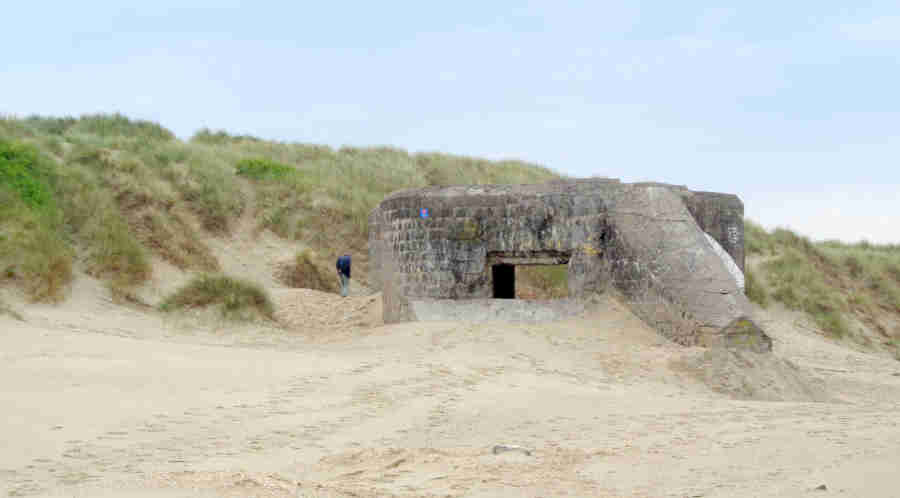
View from the bunker:
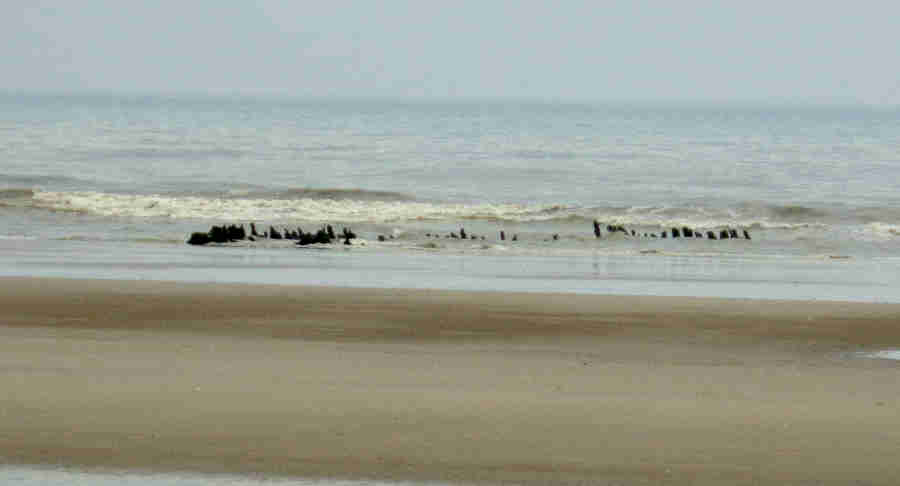
The wreck of the Devonia paddle-steamer bombed during the evacuation, exposed at low tide. HMS Crested Eagle is nearby:
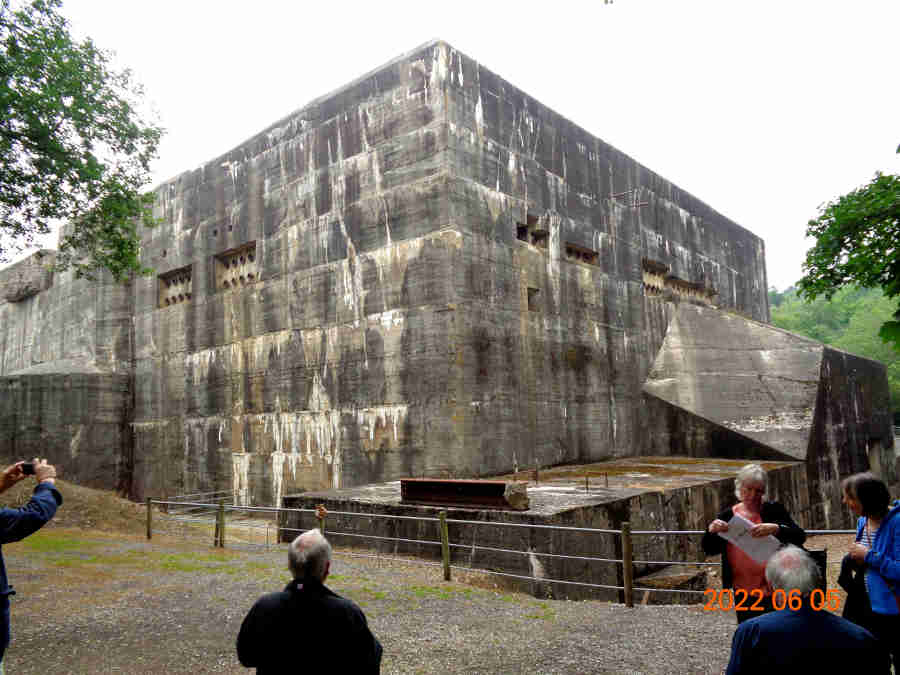
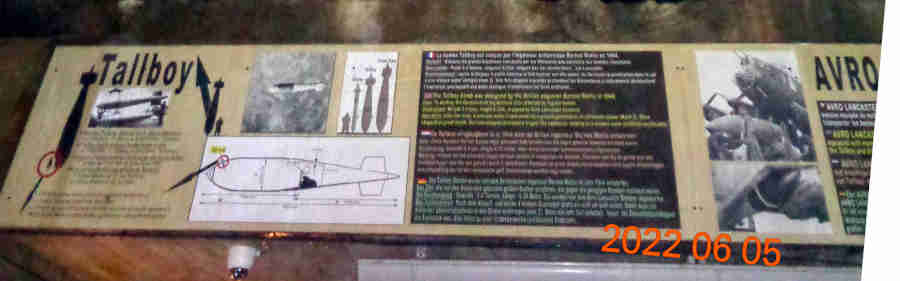
V2 blockhaus Eperlecques: Not quite completed and never used, this enormous concrete edifice still stands despite being hit by two Tallboy bombs. Others landed alongside and damaged outer areas and foundations to render it unusable. Includes a full-size replica of a V2 rocket outside as well as a transportable V1 launcher and V1.
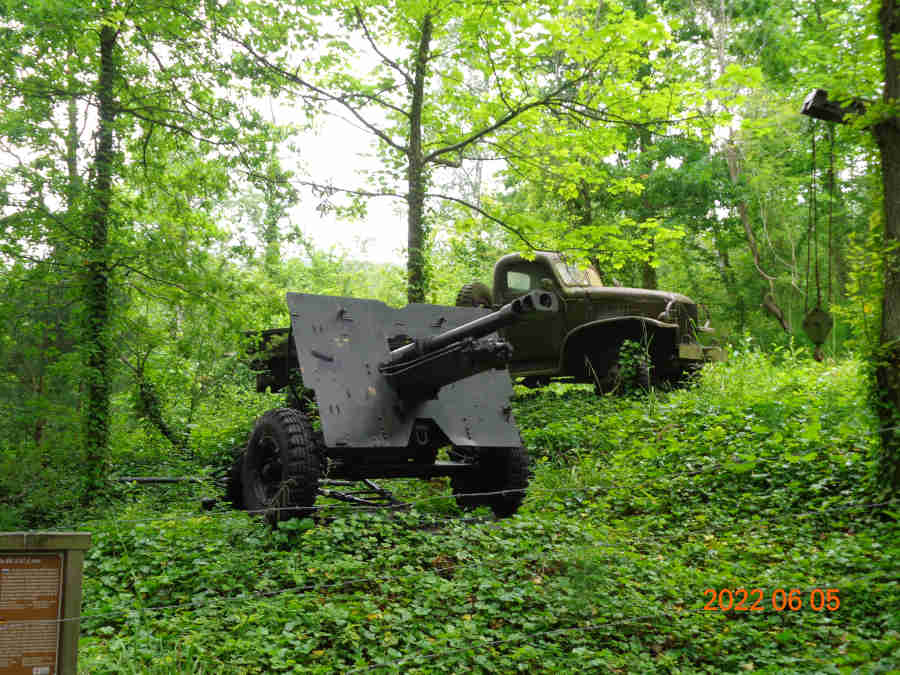
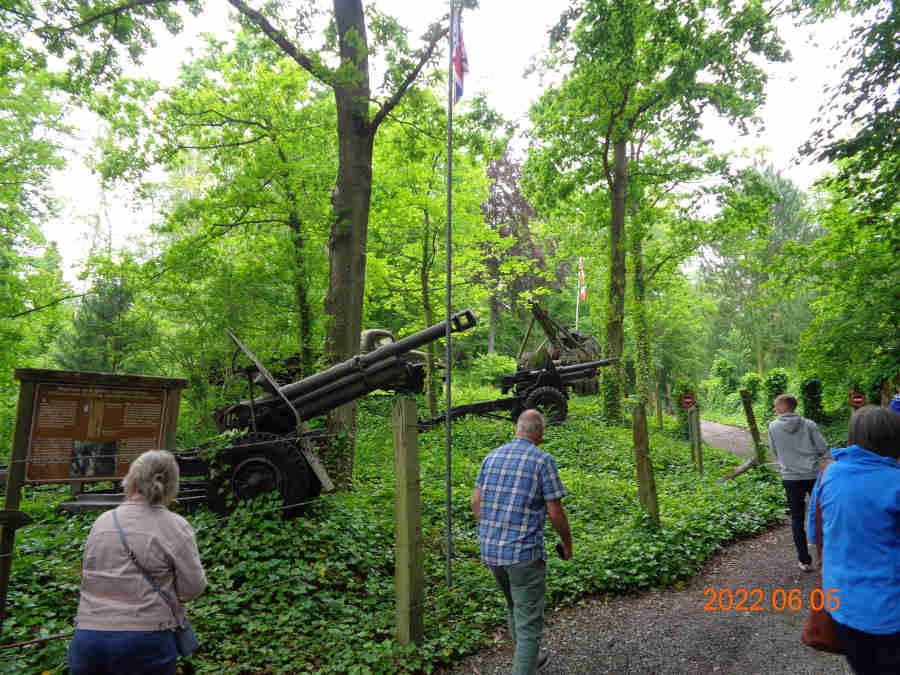
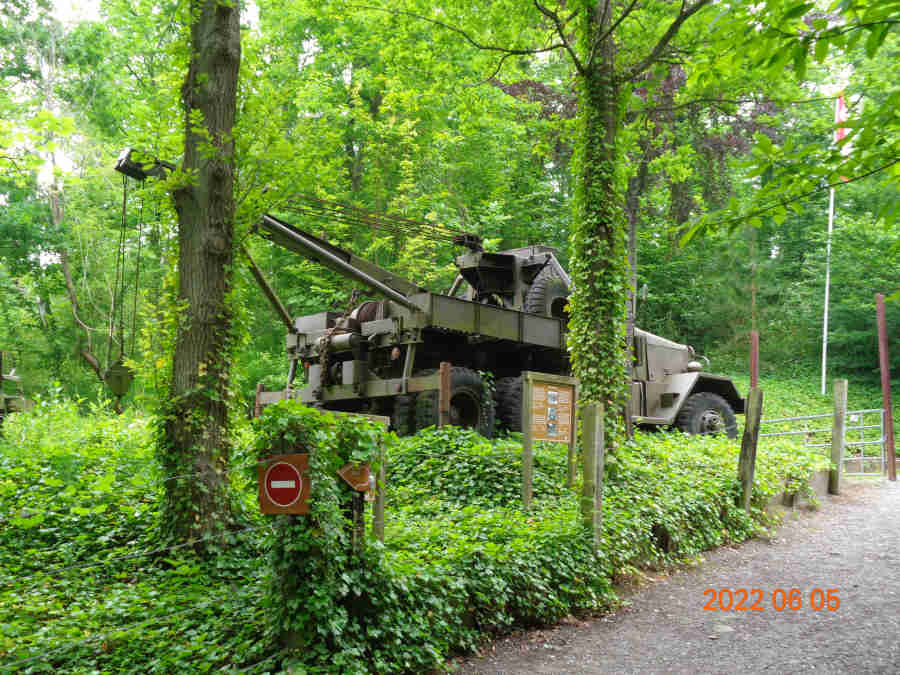
Sundry WW2 equipment in the forest walk up to the blockhouse:
First sight of the blockhouse - it's enormous:

But this does!
Showing bombing damage inflicted to one part of the roof and the smaller 'goods inward' buildings on one side that rendered it unusable:
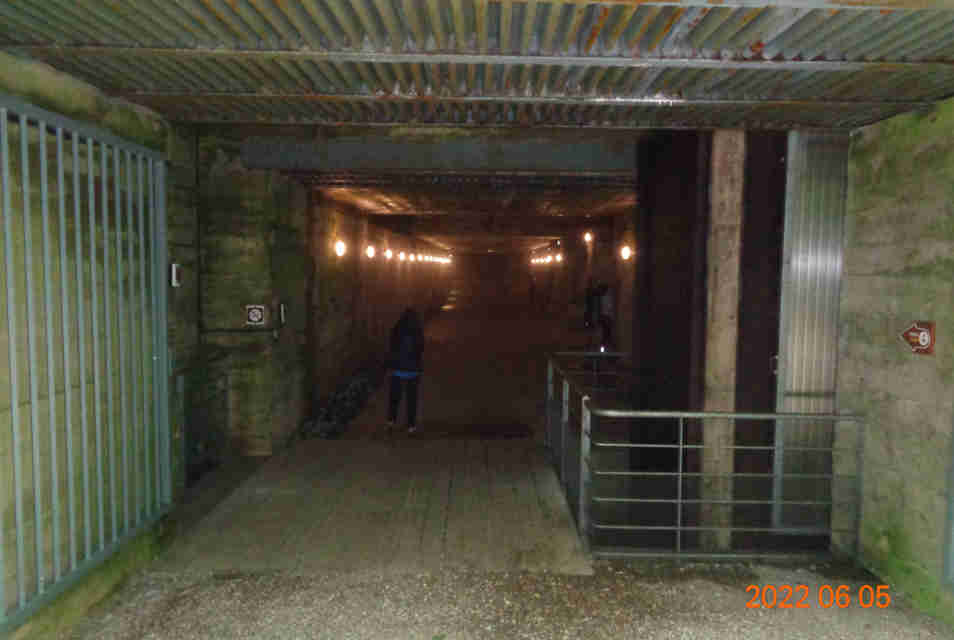
Entrance through five meter thick steel and concrete doors. Very cold inside and the air was slightly misty to the eye, and flash pictures looked like they were taken in fog:
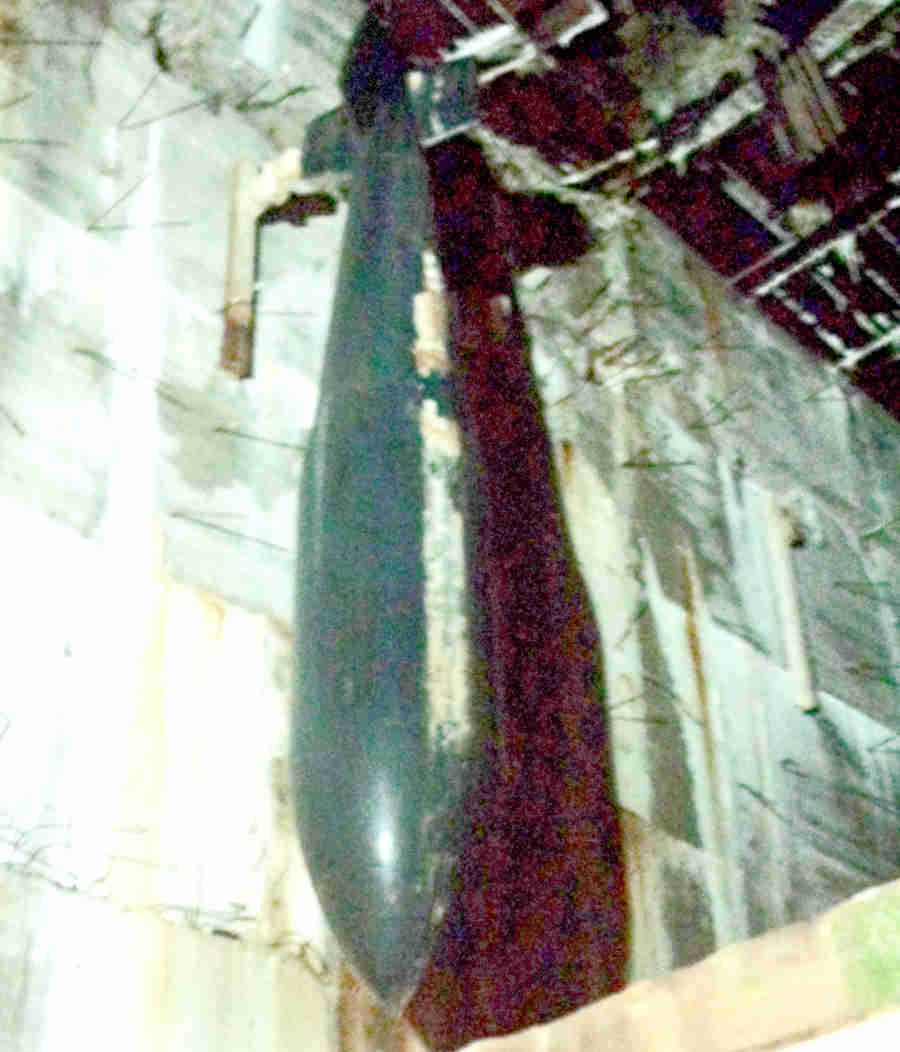
Mock-up of a Tallboy bomb, taking up about half the available height of the interior. Despite two hitting the blockhouse they did not penetrate and the damage was relatively easily repaired. They were far more effective if they struck the ground alongside a building where they had a massive 'earthquake' effect which damaged the foundations:
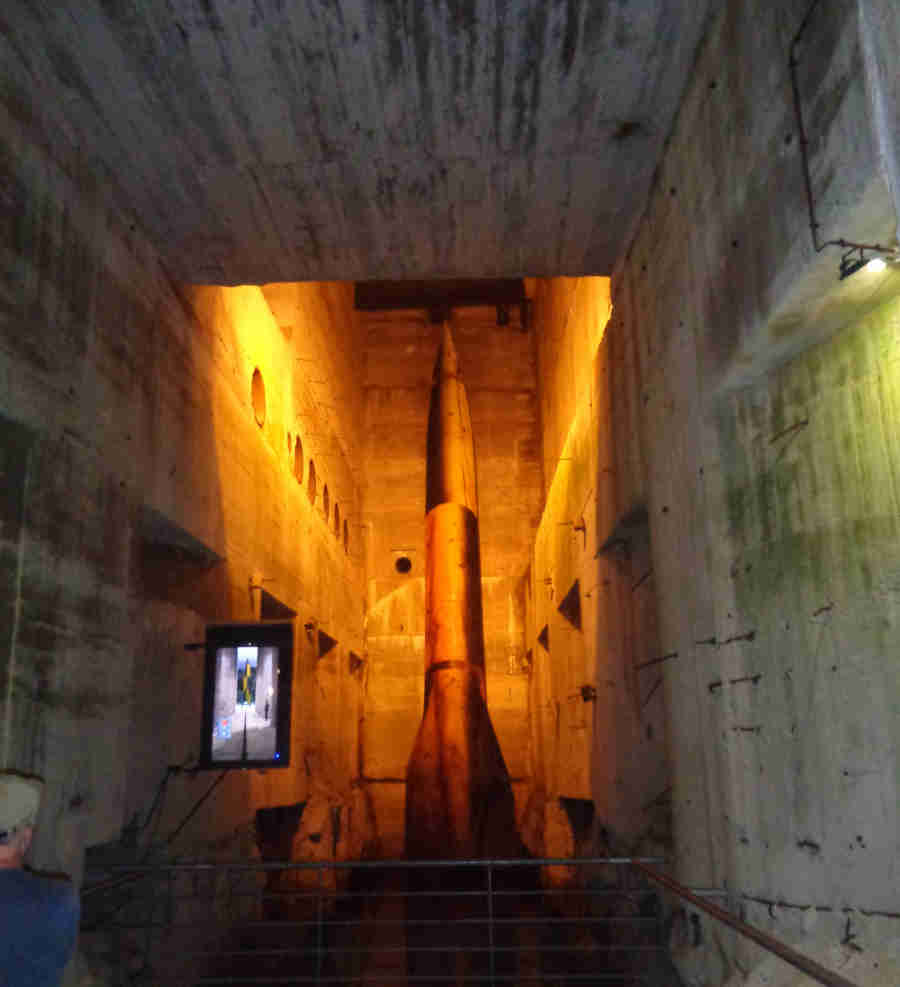
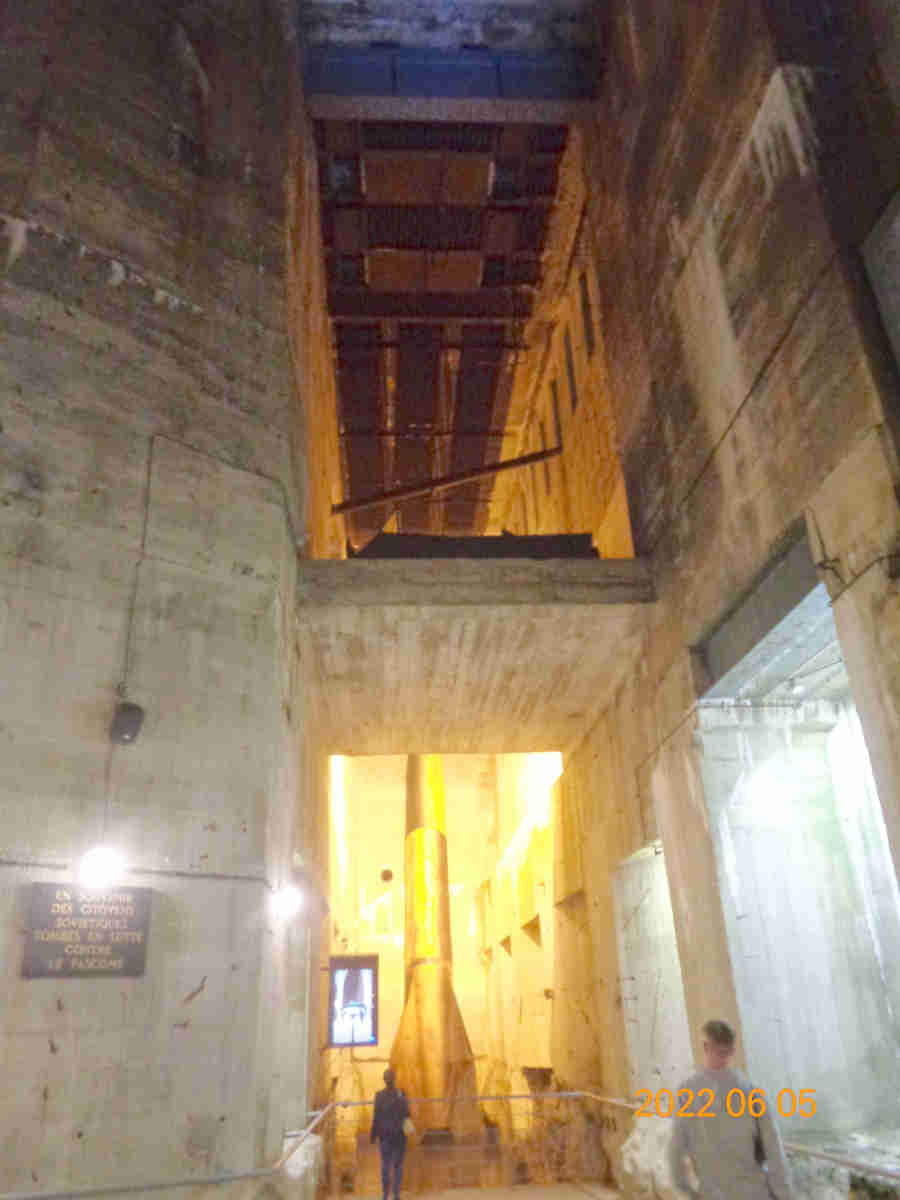
A mock-up of where the rocket would have been raised and prepared for firing. Information is that a 17 metre door would have been installed behind the mock-up for the rocket to be transported outside for firing:
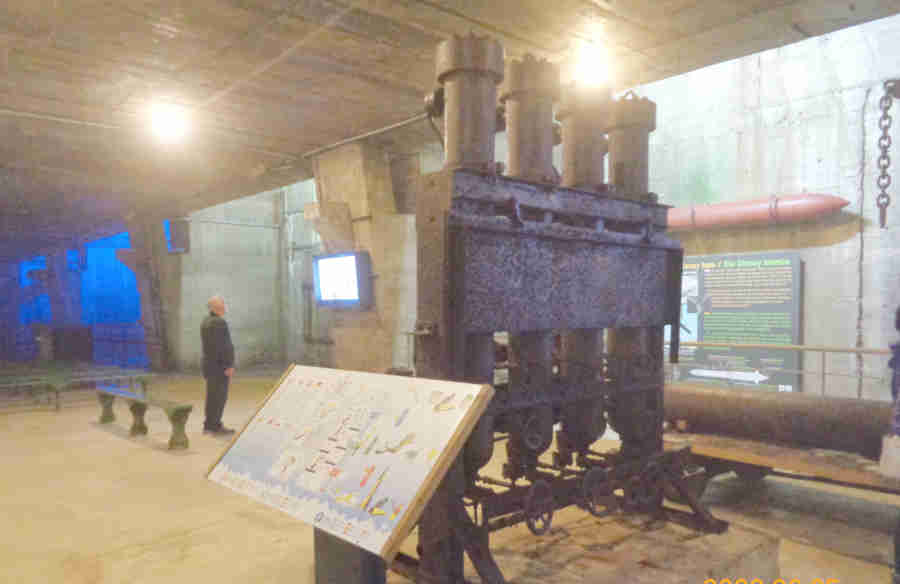
Assembly hall with liquid oxygen generator. Some accounts indicate this site was only ever intended for liquid oxygen production, but the Todt organisation (military engineering organisation) building it decided to go further. After all, no one was counting the cost and slave labour was readily available:
The full height of the interior space:
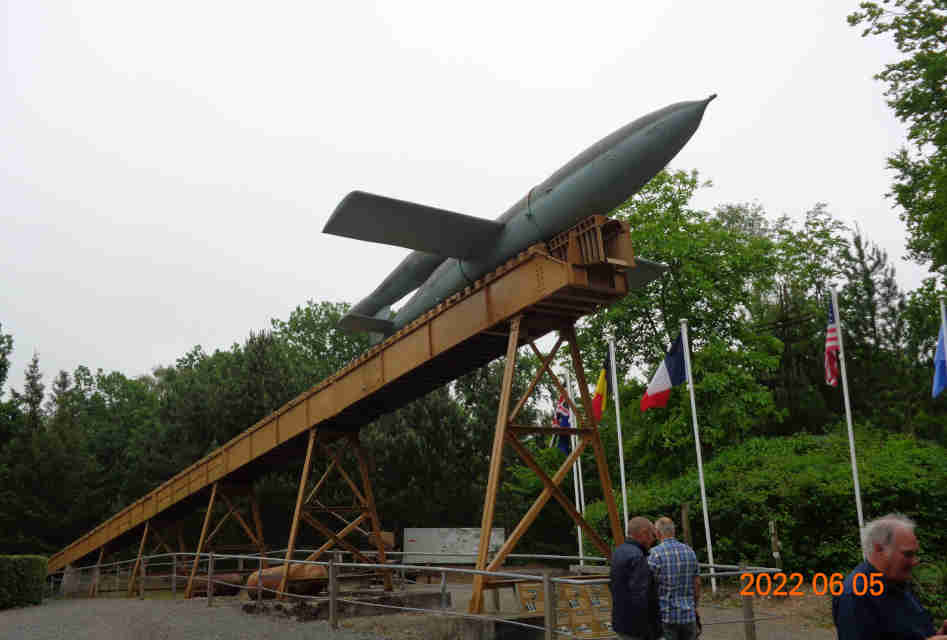
Full-size replica depicting the instant after launch. The first time I saw this in black and yellow which is how I'd always seen them in period film and photos, I thought it must have been the monochrome image and they had always been black and yellow. But apparently they could be either, and in a camouflage paint scheme:

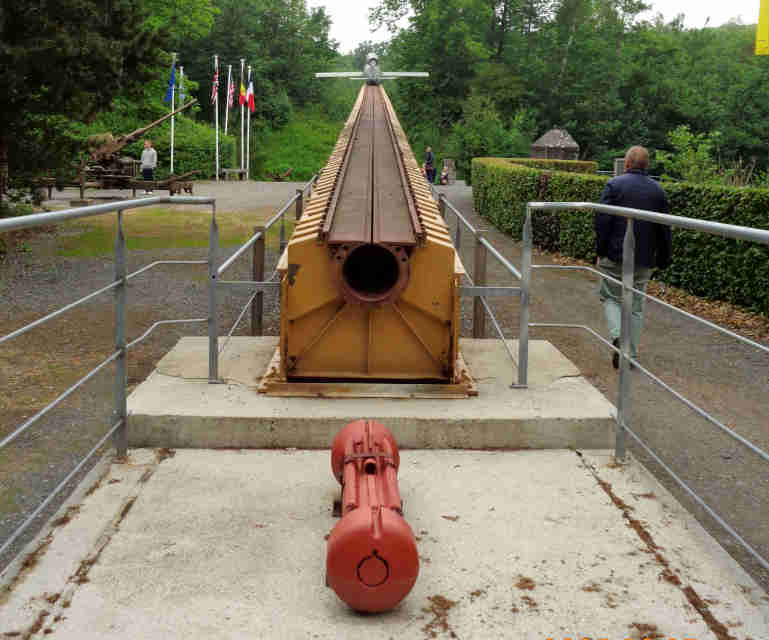
Transportable V1 launcher adjacent to the blockhouse:
The rocket was launched up a track with a narrow slot. The red 'piston' ran in a circular tube under the track with a hook projecting through the slot engaged with the rocket. A combination of steam and chemicals were injected behind the piston after the pulse-jet engine had been started to accelerate the rocket up to flying speed:
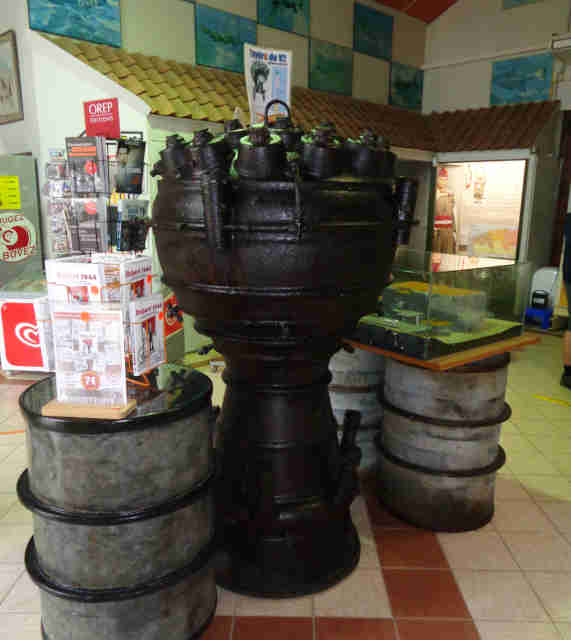
An actual V2 rocket engine:
V1 launcher Morbecque: Again never used as it was repeatedly bombed being so easy to spot from the air from the long assembly buildings that were curved towards one end like a ski lying on its side, they reverted to mobile units that could be moved from place to place. Unfortunately they continued to use French and other forced-labour to continually 'rebuild' it to distract the Allies from bombing somewhere else with more strategic value.
Quite a bit shorter than the transportable launch ramps, for some reason:
Pointing at London! Only the blast walls remain now:
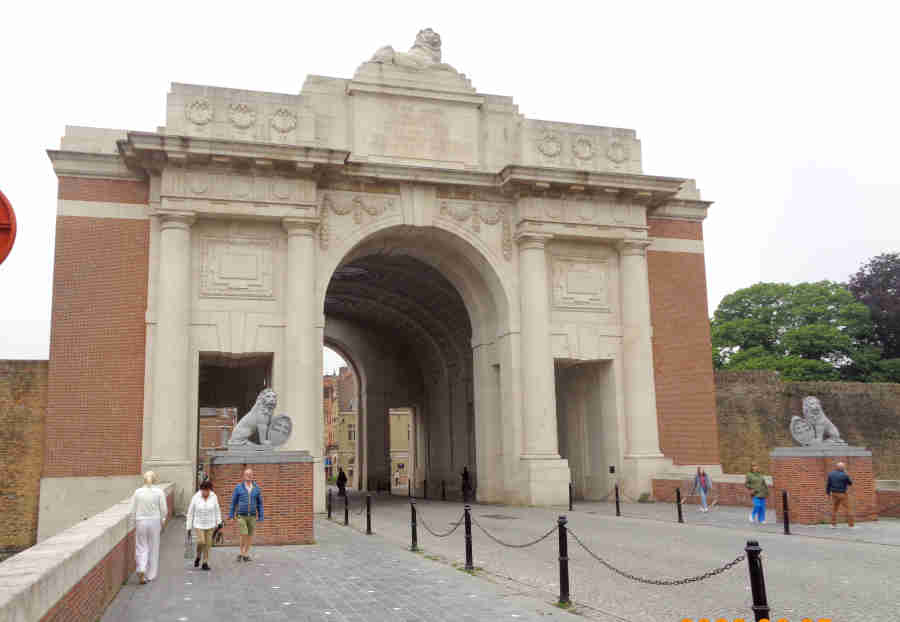
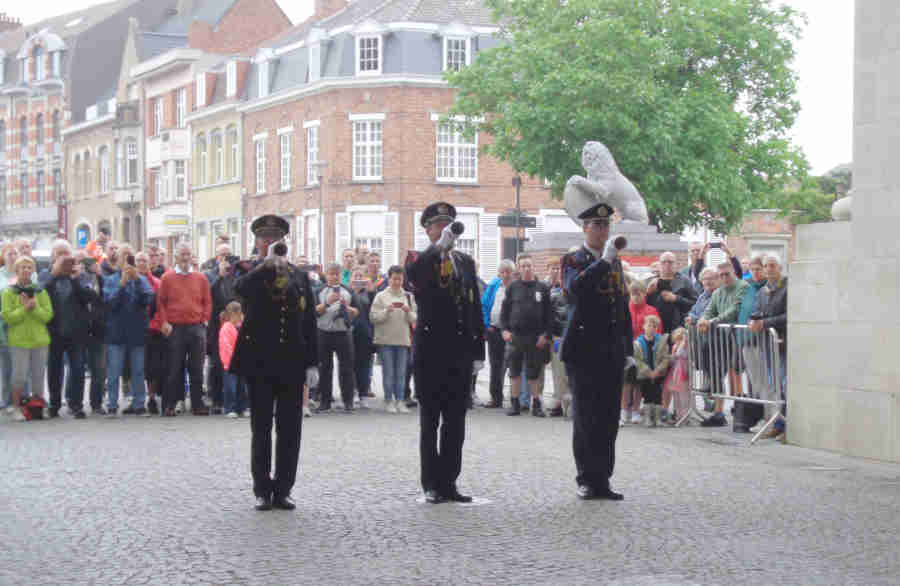
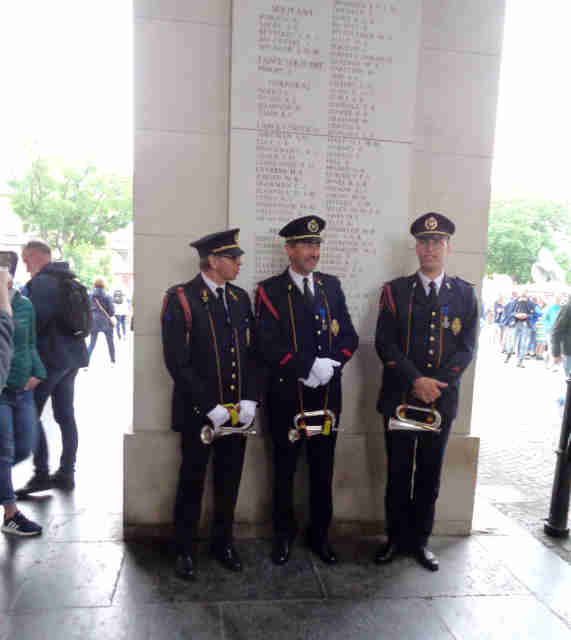
Ypres Last Post: Again many sources of more information elsewhere. Three buglers on this occasion, with one old chap from Australia or New Zealand reciting Laurence Binyon's 'They shall not grow old ...' poem, and a young lad and girl laying a wreath.