
Initial searches revealed two possible sources for an H3 conversion - BB Classics with a 35W kit at Ł26 but out of stock, and Auto Bulbs Direct with 35W at Ł70 and 55W at Ł80, so hang the expense, go for the 55W. Note that Bi-Xenon are needed for H4 dip and main beam headlights as used on the MGB, more on this later.
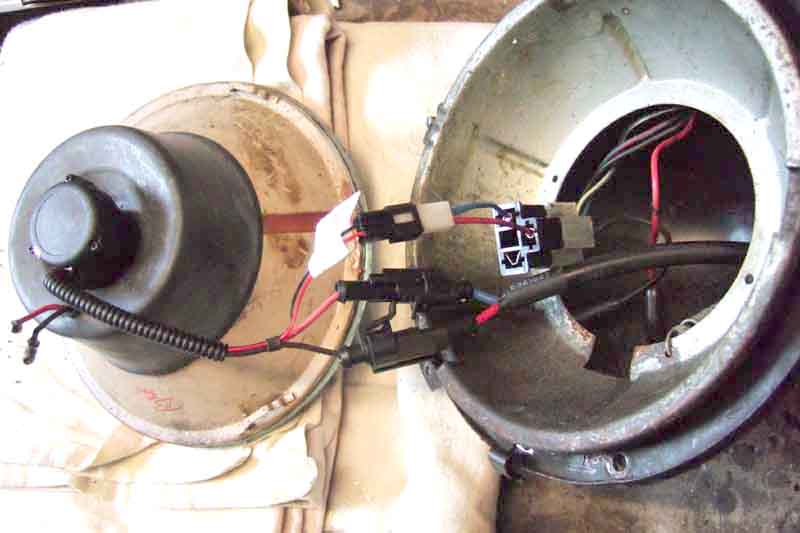
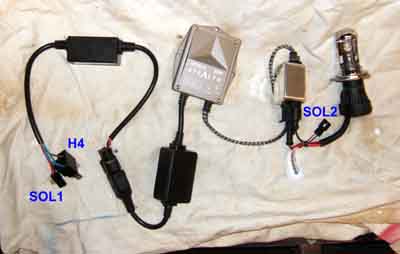 A rather large box arrives with two bulbs in a small box and two rather large sub-harnesses in the rest, each with four modules 'chained' together. Also there is a 2-pin connector at each end - by the H4 connector and on the bulb connector and it's not clear what they are for, the instructions don't really cover it as they also cover the H7 single beam kit. It's designed to be a 'plug and play' conversion, but in order to do that in the MGB the sub harness with its four modules, plus the original H4 plug, would all have to fit in the headlamp bowl - no-way, Jose! So much pondering as to modifying the bowl to attach a large box to the outside i.e. in the wheel-arch, or mess about with the wiring so that the existing sub-harness is pulled back into the engine bay so that only the minimum number of the new modules are in the bowl. But even with just the igniter module on the bulb the headlamp assembly cannot be reattached to the bowl. But I'm really keen to see just what they are like after the disappointment with LEDs. The bulb is in two parts with the HID part and a shield, which produces the correct H4 dip and main beam patterns. Initially to check they both work I use a couple of test-leads to connect power ... but all I get is repeated clicking and no light. the instructions make me wonder if this is something to do with low voltage, and running the engine to boost the voltage and trying again gives a couple of clicks then a very bright light - do not look directly into it!
Next step is to try them in the lens/reflector. The shield clips in exactly the same as an H4 bulb, and the HID bulb fits into the shield turning to lock it. However the bulb base is too short to protrude through the rubber gasket (that sits on the back of the reflector and holds the rubber-bumper pilot bulb in position) to fit the connector, so I leave that off for the time being, something else to ponder. I hook one side (leaving the other as a comparison) up with the sub-harness modules hanging out from behind the reflector, with the reflector/lens assembly attached to the bowl with three long screws. And the result when dark is truly astonishing, very like the OEM installation on a John Cooper Works MINI I had the opportunity to drive a while ago. With a street light immediately opposite the halogen side adds virtually no illumination despite relays and fuses and a 20% uprated bulb. But the HID side bathes everything in front of the car in a very bright white light and illuminates two white cars a couple of hundred yards down the road, so it will definitely be worth progressing. Dipped beam is flat-topped as per modern lights i.e. no up-kick to the off-side, so no need for conversion if driving on the other side of the road.
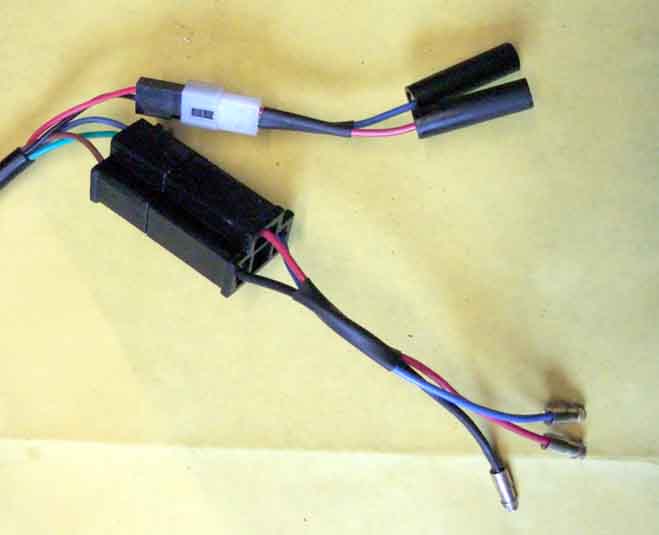
 However no change in illumination between dip and main on the HID side, whereas there is on the halogen side, and the 'universal' instructions not clear. So enquire of the supplier wondering if it's something to do with the pilot light, and they say the small 2-pin plug and socket need to be connected together for the 'solenoid', and that turns out to be how they switch between dip and main. The plug with shrouded pins SOL1 is at the H4 end, and the socket SOL2 at the bulb end. The bulb only has one HID chamber producing the light, and a solenoid physically moves the chamber from one position to the other, which with the shield, reflector and lens produce the correct beam patterns. So rejig things so I can connect the two together and I now have main and dipped beams. But that puts the HID H4 connector right next to the bulb and I still need the pilot bulb 12v and earth, and the wiring to the bulb itself, so possibly three sub-harnesses leading from the engine compartment to the bowl!
 First thing is to enquire whether ABD have an extender sub-harness for the solenoid wires, they don't but say their 'sister site' HIDs4U (I know ...) may have. In fact that is the high-voltage extender from the igniter module to the bulb which I will need anyway.
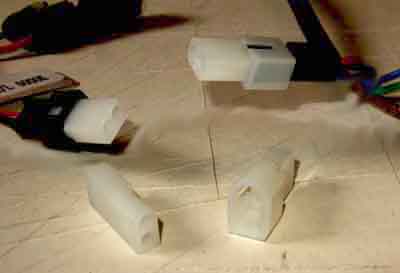 They don't have a solenoid extender, and neither can they tell me the connectors they use so I can make up my own. So I embark on a long session of browsing Google images to see if I can spot them. Eventually Molex male and female halves look to be the right type, but the only source seems to be Mouser 538-150178-1020 and 538-150176-1021 with pins 538-150180-1016 and 538-150181-1016. Ł1.49 for the parts and Ł12 P&P, but what choice do I have? The reason for the high P&P becomes clear when a delivery van arrives with them rattling around in a cardboard box too big to go through a letter-box, when a small padded envelope through the post is all it needs. I'm annoyed to find that despite my 'careful' research I have managed to order 3-pin socket housings and 2-pin plug housings. But at least the 2-pin plug fits inside the 3-pin socket, it wouldn't have worked the other way round. I also have to wait for one set of pins as they are out of stock, and another cardboard box and delivery van arrives a couple of weeks later. But with that delay I've contrived to mislay the 3-pin socket housings, so have the 'opportunity' to order the correct 2-pin ... with another Ł12 P&P!
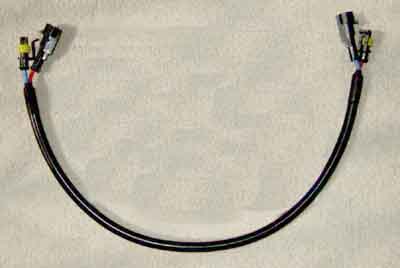
Back to the high-voltage extenders I order a pair, and when they arrive one is 540mm and the other 1040mm! So back to the very helpful HIDs4U who say the sizes have just been changed, which one would I like? I say the longer one ... but another 540mm arrives. So back to HIDs4U and they say the one I have received is the longest they now do, their short one is only about 270mm. So where my long one comes in I have no idea. But they are bright (!) enough to say I can join the two shorter ones together to make a long one, which gives me the option of using just the two shorter ones if they are long enough, or the long one one side and the two shorter ones joined together on the other, if needs be.
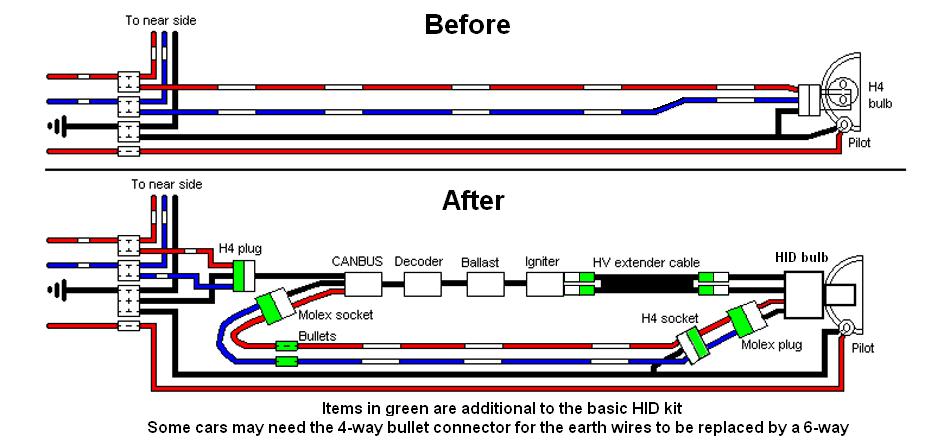
I'm still pondering what to do about the HID H4 connection to the cars wiring. I don't want that in the bowl as it would mean the original H4 sub-harnesses going in, the H4 HID cable going out, then the HV cable from the igniter to the bulb going back in, and would still need one module to be accommodated in the bowl as well as two additional harnesses entering it. But if I make the HID H4 connection in the engine bay at the bullets on the main harness, that removes two of the cables from the bowl, but still leaves me needing 12v and earth for the parking pilot bulb and the solenoid connection to the bulb. The existing headlight sub-harness with its original pilot light wires solves the first question, and the solenoid connection can use the now spare dip and main beam wires, so just one extra sub-harness to enter the bowl - the HV cable to the bulb:
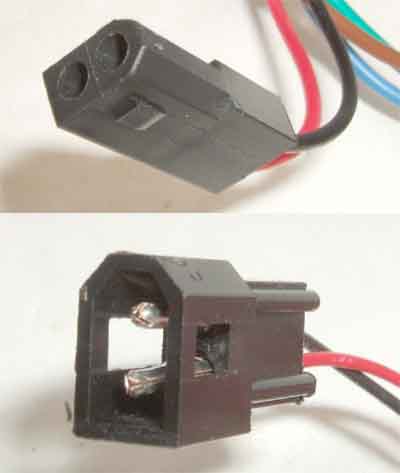
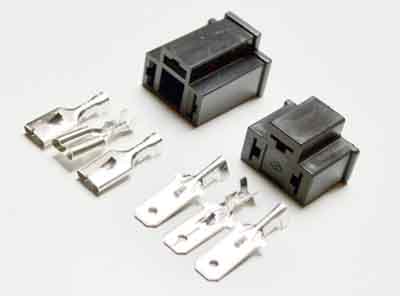 So how about the detail of the connections? With the HID H4 plug behind the grille I can pick up the dip, main and earth wires at the main harness bullets, so as a minimum I need female spades to connect to the HID plug. I find some, but no male spades for the H4 plug in the bowl. Then I wonder if H4 plugs and sockets exist, and they do, including a matched pair also from eBay at Ł2.35 for a pair and of course I need two. With those it will simply be a matter of putting three wires in the sockets to pick up dip, main and earth for the HID H4 connector behind the grille, and using a Molex socket and bullets to extend the solenoid wires to the old headlight harness dip and main wires.
At the other end of the old headlight harness in the bowl the H4 socket connecting the dip and main wires to a Molex plug to connect to the bulb solenoid connector. The pilot light will use the same red and black wires and bullet connections in the headlight sub-harness that it did before:
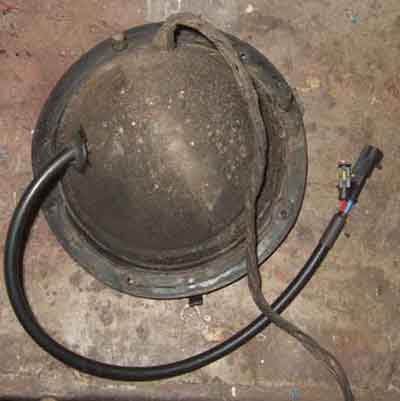 In theory that only leaves one thing to consider - and that is drilling an extra hole on the bowl, and more importantly sealing it. I use my stepped drill in a piece of scrap body panel to find the minimum-sized hole that the two HV connectors can be fiddle through, and it is 20mm. Then a moments work finding a pack of eBay 20mm blind grommets at Ł1.75 for 5 - only needing two but you can never have enough spares of stuff like this. In the event the next size up might have been a bit easier to fit the plugs through the grommet. I cut slots in the grommet in a star shape so he flaps close back down onto the sheathing, but you will still need some kind of setting sealant round the edge of the hole in the bowl and the flaps in the grommet. On mine the original sub-harness goes in at the top, make sure the hole for the HV cable is on the side and facing the hole in the inner wing that the existing wiring goes through!
Along the way the off-side trim ring retaining clip gives up the ghost, but replacements are available and easily fitted.
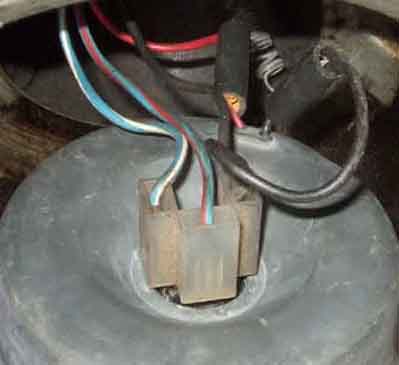 Before wiring the connectors make absolutely sure you know which wire has to go where based on how the existing H4 socket connects to the halogen bulb, and use appropriate colours.
I used an H4 plug to extend the white/red and white/blue wires from the existing sub-harness to a Molex socket to connect to the red and black HID bulb solenoid wires. Being a rubber bumper with the pilot light in the headlamp assembly the original red and black wires with bullet connectors would be reconnected:
The H4 plug and socket are a little on the large size but they do just fit tucked to one side as you feed the rubber gasket round the bulb and reflector into the inner bowl (note that LED conversions have one of these plus a module inside the bowl). Bullets, and especially splices, would have fitted easily but would need the existing H4 socket to be cut off the sub-harness, and I wanted to leave it reversible. Insulated male spades on the end of wires would take up less space, but would need to be reconnected correctly if the headlight were subsequently removed and refitted.
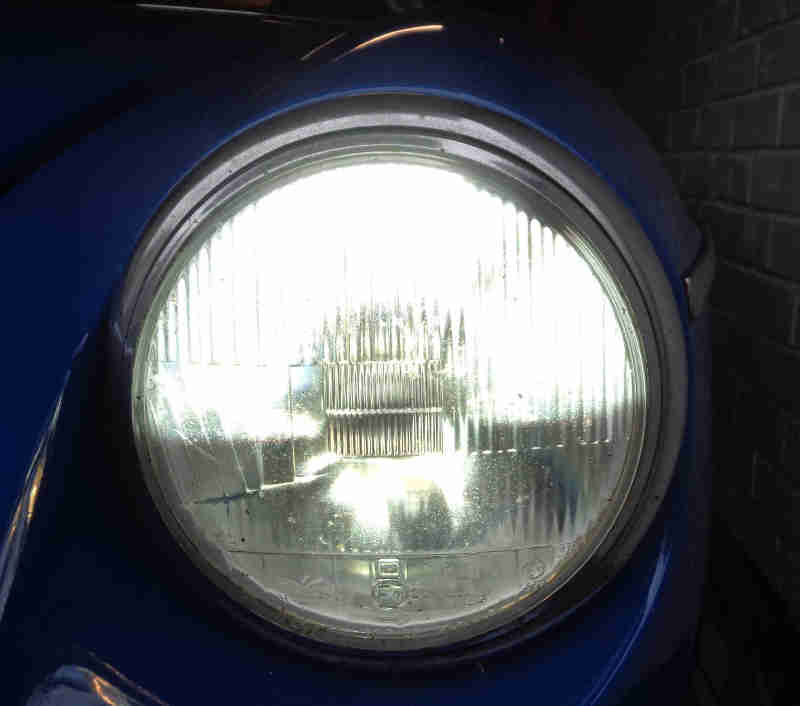
Engine running so normal voltage, relays for both headlights, uprated halogen on the right, photoshopped together from the same image for comparison. HID massively brighter, look at the pattern on the glass. Exposure had to be stopped down or the HID would have been 'burned out' even more than this:
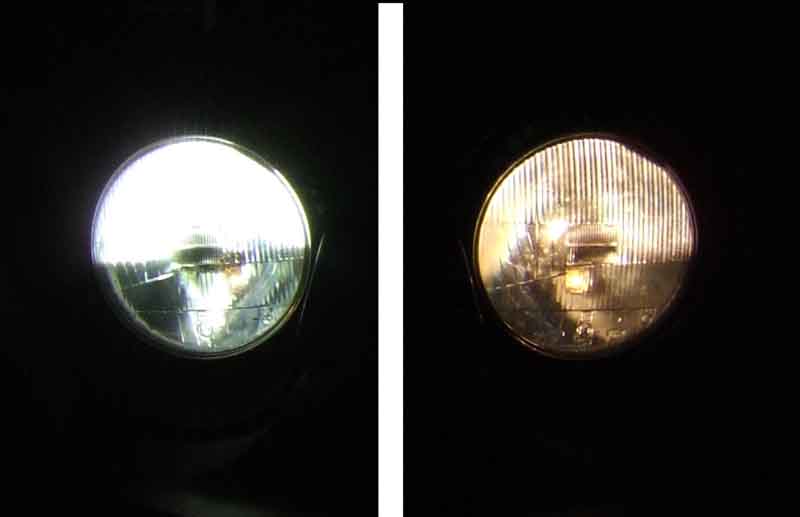
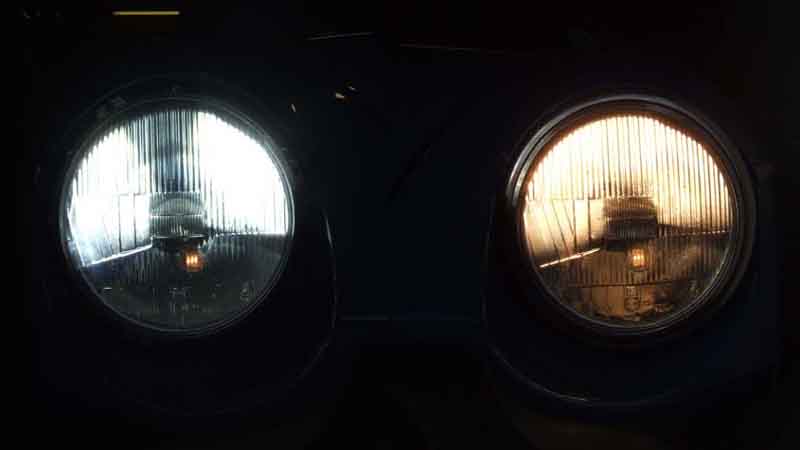 Compare with LED where the ribs on the glass can be almost as clearly as on the halogen, as well as the 'dead' area in the middle of the LED. Notice how both HID and halogen have a splash of light in the lower half of the glass on dipped beam but none with LED, which raised a question at the MOT probably to the splash with HID being so much brighter compared to halogen and especially sealed beam.
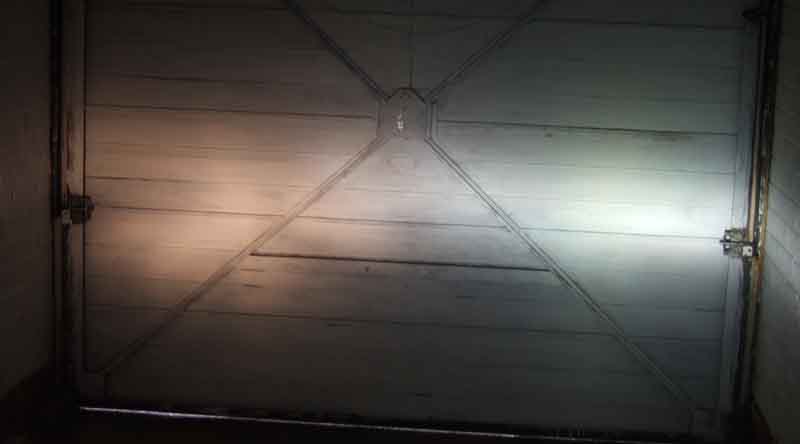
HID Dip - exposure stopped down or the pattern on the garage door just burns out. Prior to adjustment of the beam, which just needed moving down a bit:
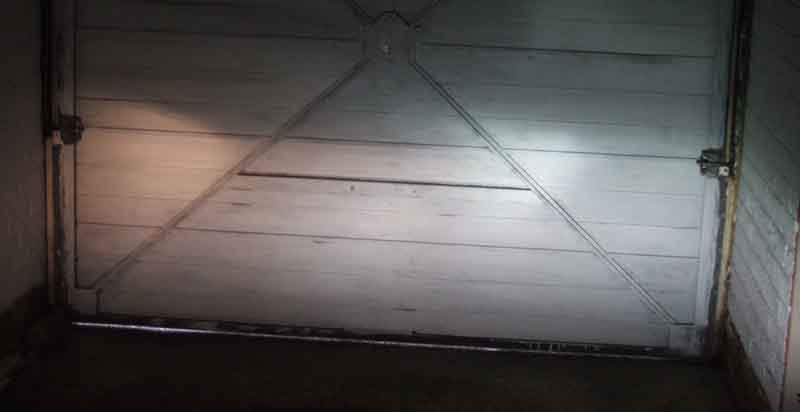
Main beam:
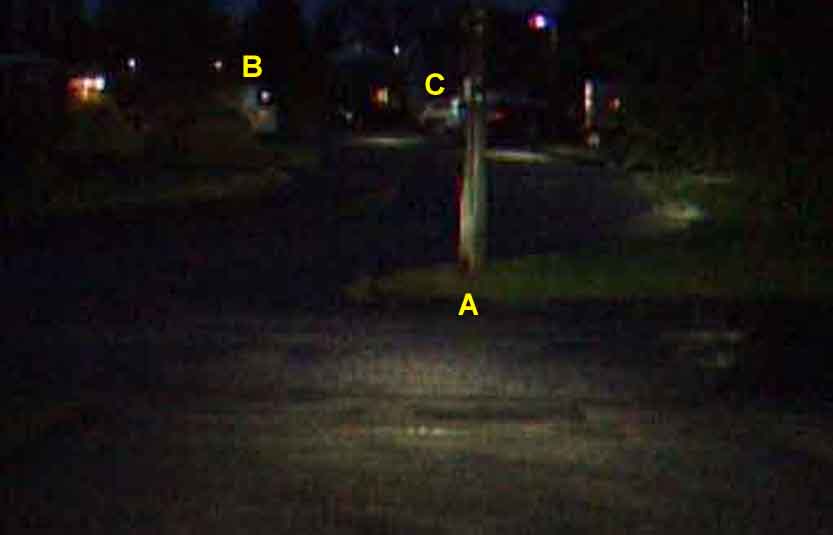
I tried to take a video with the lights pointing down the road covering first the HID then the halogen, but being hand-held got the angle wrong and it didn't show the difference I was seeing. Also by that time the nights were getting lighter and the next opportunity was way too light even at 10pm for a better attempt. There is also a street lamp right opposite the house on a bend in the road where it turns away, the best I could get were these two stills of the main beam. The first is the HID and the clearest difference to the halogen is the light shining on the lamp post (A) almost in the middle of the picture. Looking down the road there is a white van about 250 yards away below 'B', and a white car about 400 yards away below 'C':
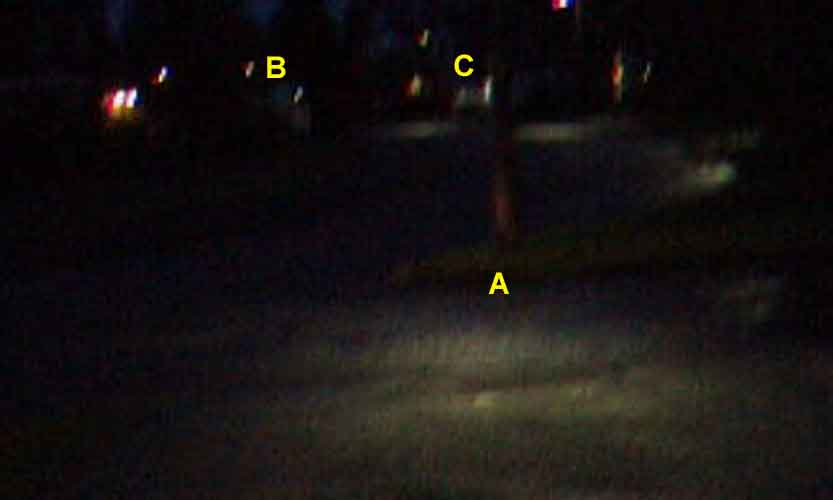
With the halogen the lamp post is just perceptibly red/orange. The white van under 'B' is not visible at all, and whilst the white car under 'C' is slightly visible that illumination is from another street light at the end of that drive:
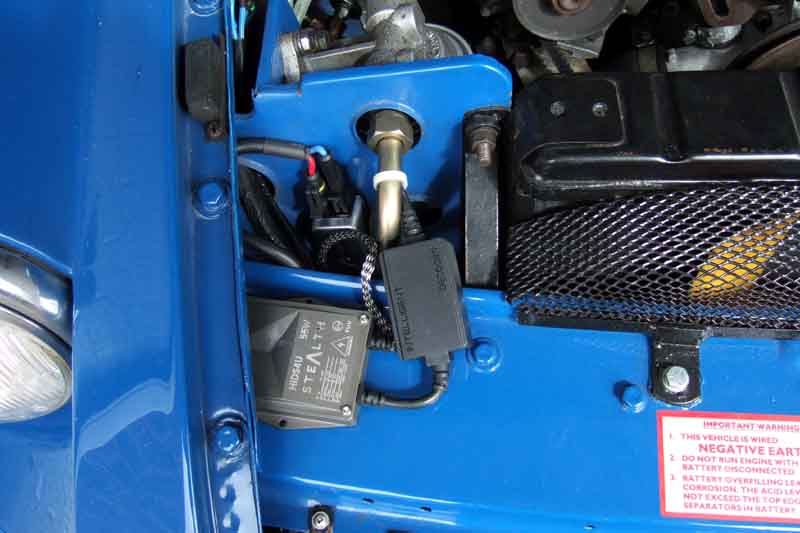
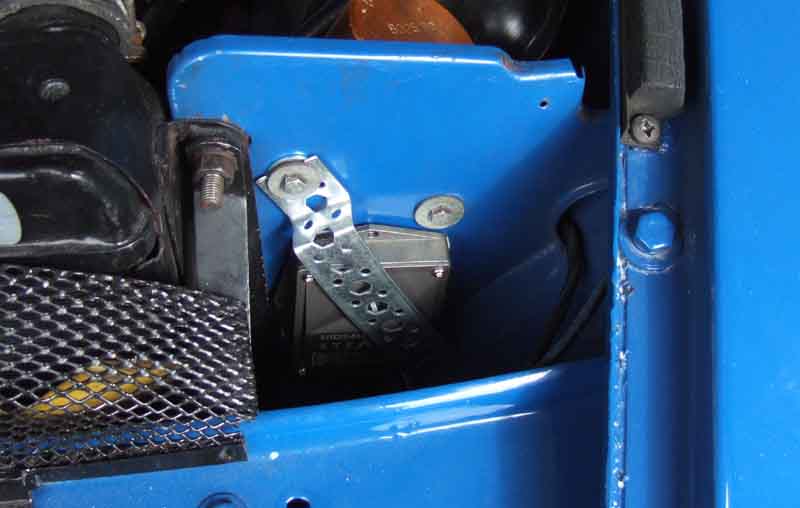
Very cramped by the off-side headlight - doubly so with the forward mounted radiator and oil cooler/filter pipe. I could have run the HID cable back past the radiator but there is no flat surface large enough to mount the ballast on its sticky pad until opposite the exhaust manifolds. Care needs to be taken with the positioning particularly of the ballast (pictured on top of the slam-panel) to keep it below 100C so needing to be clear of the manifolds, and perhaps even the output of the radiator. However it also needs to avoid getting soaked, which means there is also some risk in front of the radiator as here. Hence on top of the slam-panel and hopefully out of driving rain. I've tried a couple of positions, it can't go 'fore and aft' so the black box can be tucked out of sight like the other modules are as the flange at the back of the slam panel is too deep to allow the grey ballast unit to sit flat on its sticky pad. However it subsequently occurred to me that turning it round 180 degrees the black module would sit partly under the gutter behind the slam panel which would be neater:
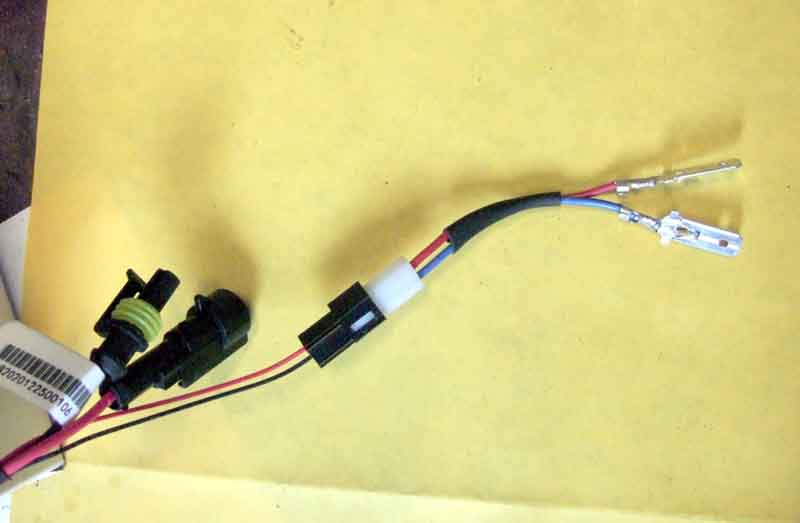
Near-side adapters ready to pick up the headlight wiring behind the grille and connect HID solenoid power to the original headlight sub-harness main and dip wires ...
... and extend HID solenoid power from the original headlight sub-harness to the HID bulb. I haven't fitted the spades to the plug body yet to be sure I get them in the right places!
More space for a neater installation on the near-side, but heat caused the sticky pad to unstick and it tipped forwards to be clattered by the (fortunately plastic) fan blade, so I have had to clamp it in position:
Driving at night on the motorway passing under road signs they are noticeably illuminated which I've not been aware of before, and this is from the rim of the glass, roadside signs also well illuminated. An interesting (not to say expensive) exercise but really quite involved, I can't imagine many people with a bowl arrangement like the MGB would bother. At the next MOT some discussion was needed as there is a patch of light above the line on the beam tester with dipped beam which led to an initial fail, but we got there in the end.
July 2022: Looking at this again immediately prior to the MOT this year I noticed that with the normal dipped beam showing on the upper half of the glass there is a splash of light in the middle below the centre round the pilot light (what you see through the glass is reversed in use) which probably accounts for the scatter in the upper half of the MOT beam tester which caused the initial fail last year and seems to be coming from round the pilot light:
This isn't a 'defect' in the HID (although they possibly could have designed it out) as the same splash of light can be seen in the halogen albeit nowhere near as bright so probably ignored on the beam tester. So I stuck some tape on the glass to cover that area (similar to old-style continental beam deflectors) and this time got the pass straight away. Modern beam deflectors seem to be a fresnel lens that diverts the beam, rather than the old-fashioned tape which obstructs it and can cause increased heat in the glass, so I'll maybe look at those. But as there is less light in the lower half of the glass with HID on main beam compared to incandescent it probably won't be an issue.