
Relative dimensions of the pegs, press-stud, and hook plate. However Kelvin Dodd of Moss America has written to say: "In reality, the rear snaps moved around quite a lot when the V8/rubber bumper shell was built. I've done some research on this and have found that the stud location on the cars up to 1974.5 is pretty standard. From then on the snaps vary even from side to side. To allow the later tops to fit these later cars accurately the snaps and even the cut of the top from some manufacturers is slightly different.":
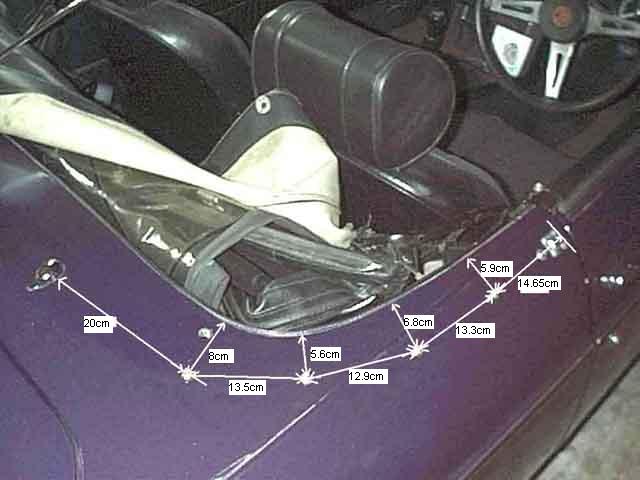
The positioning of the press-stud is dependant on what tonneau or hood cover you are using. I've had two full tonneau covers and both fitted my stud in this position, but I have seen others with a smaller spacing i.e. a bigger gap to the front socket:

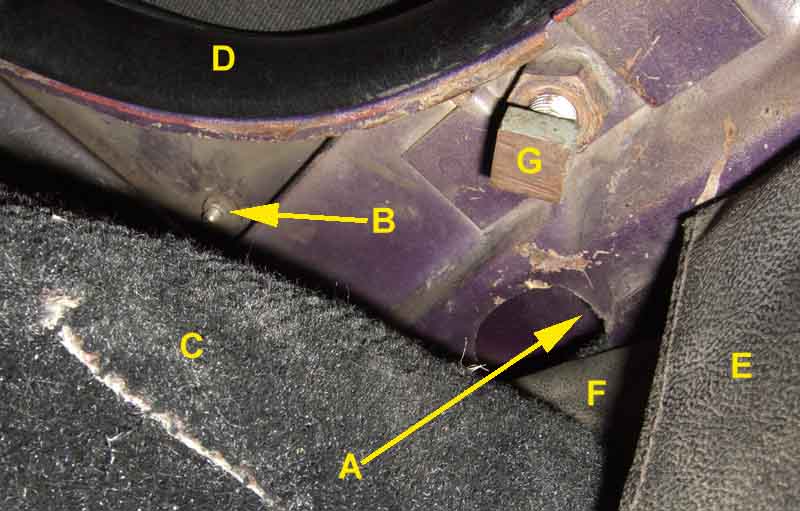
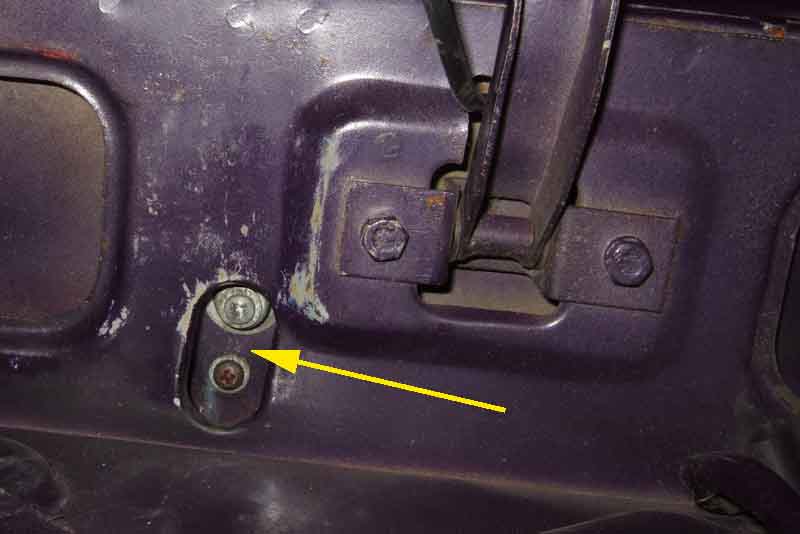
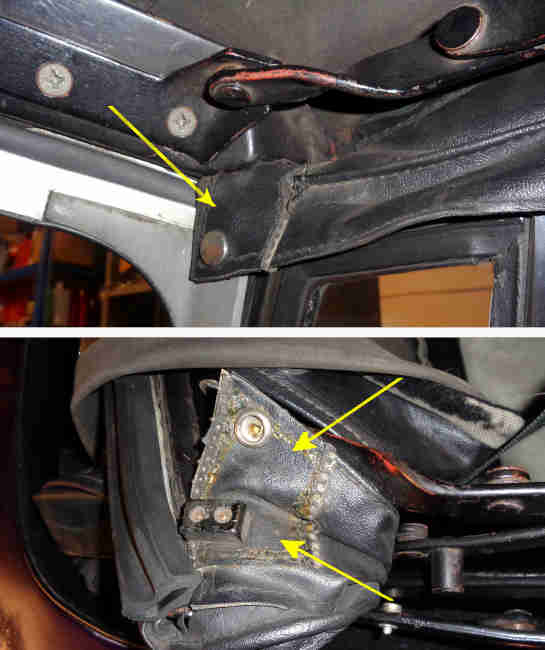
The pegs are secured with washers and nuts that are a fiddle to get to, this picture is of the off-side. The rear one (A) is accessed through the arrowed hole which is awkward enough, but also to one side which is why you can only feel it and can't see it without a mirror. The next one moving forwards (B) is easier to access, and the other two further forward still are accessed by removing the trim panel aft of the doors. 'C' is the carpeted wheel arch, 'D' the cockpit rail, 'E' the straps that go round the folded hood, and 'F' the rear bulkhead trim panel. 'G' is a gash bolt I have screwed up from below to block off the hole that was used for the static belt quick-release fitting, to prevent water running down:
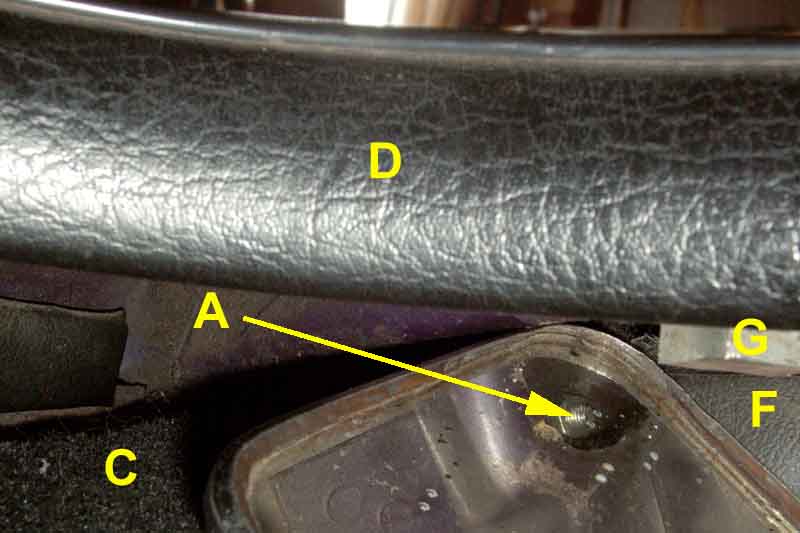
Seen with a mirror, 'A' etc. are the same components as in the picture above:
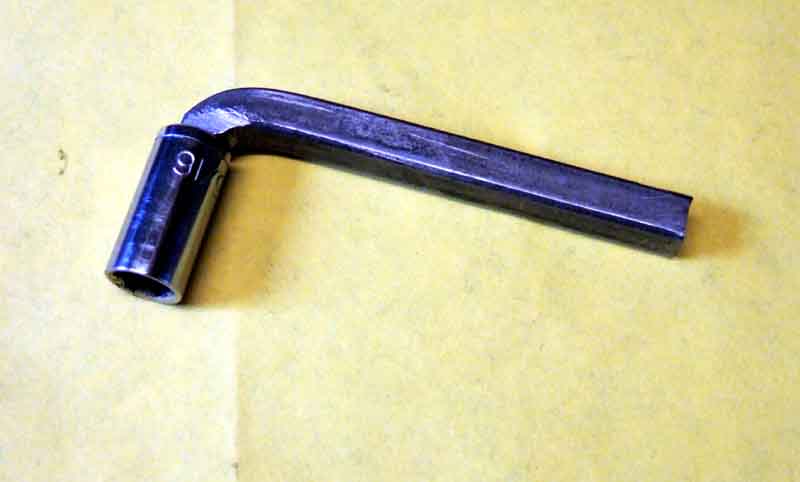
An 8mm or 5/16" socket is a snug fit on the nuts, or a 2BA spanner. However whilst I can get my miniature 1/4" drive ratchet and socket on 'B' above there isn't enough room for 'A'. Initially I used a 6mm Allen key which can be wiggled into the 1/4" square drive of the socket, and that will just fit on that nut. Subsequently I expanded on this idea to use square bar in a 1/4" drive socket for the heater valve nuts, and that bar can be used with the 5/16" socket as well. Also note that you don't really need to turn the nut, just hold it in position, while you carefully screw the peg down into it. Stuff the socket so the washer and nut sit just below the top otherwise the stud won't pick them up. Do that before putting the stud in the hole which will allow you to align them with the hole as well as give you more space. Use a soft washer of some kind between stud and body to protect the paint, I used offcuts of vinyl used to recover the cockpit rail or dash:
The two 'teardrops' for the rear of the hood and tonneau cover are accessed from the boot, via a hole near the lid hinge:
Rear retaining bar - curved as well as chamfers on one side of each end:
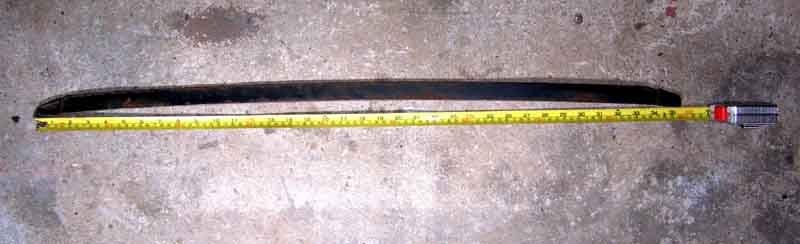
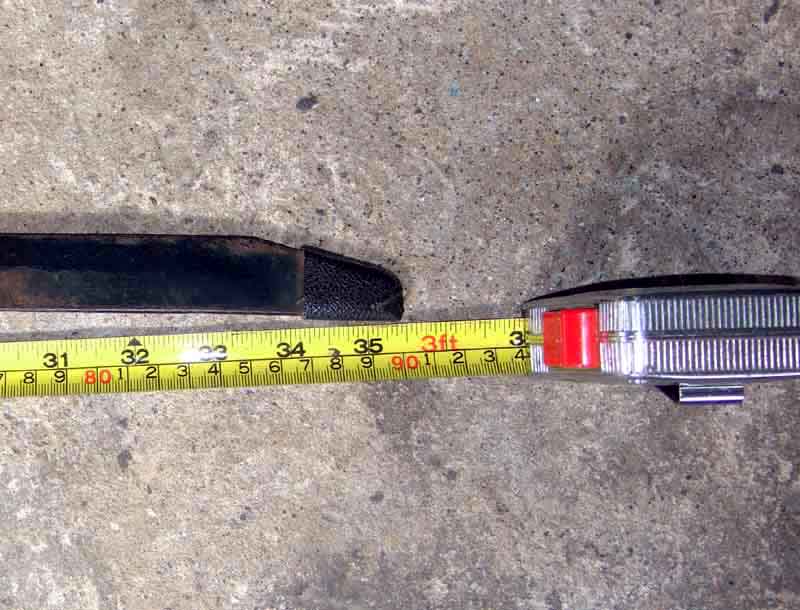
A shade under 35.5" long, little vinyl boots glued on the ends in case the bar should move sideways far enough to come out of one of the slots:
Fitted and slot arrowed:
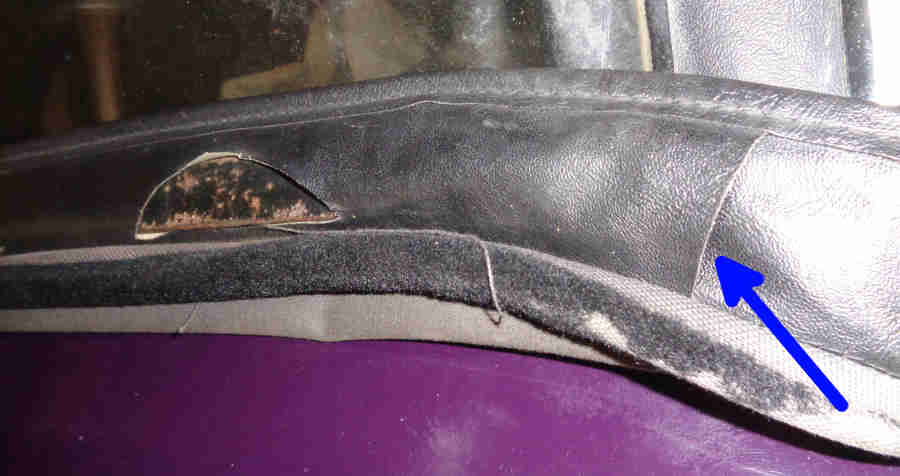
With the hood fastened and the drop-glass raised pull each flap or tab into position for neatest fit including the internal flaps laying against the glass. Then use a bradawl to punch through material over the males attached to the hood frame, and at the top of the screen frame. You may need to position both B-post ones at the same time before punching holes. Despite the inwards bow of the vertical internal flap here nothing comes through even in the heaviest rain, whereas on the passenger side it does even in light rain and I've used a length of clothes-hanger wire inside a channel to press it against the glass:
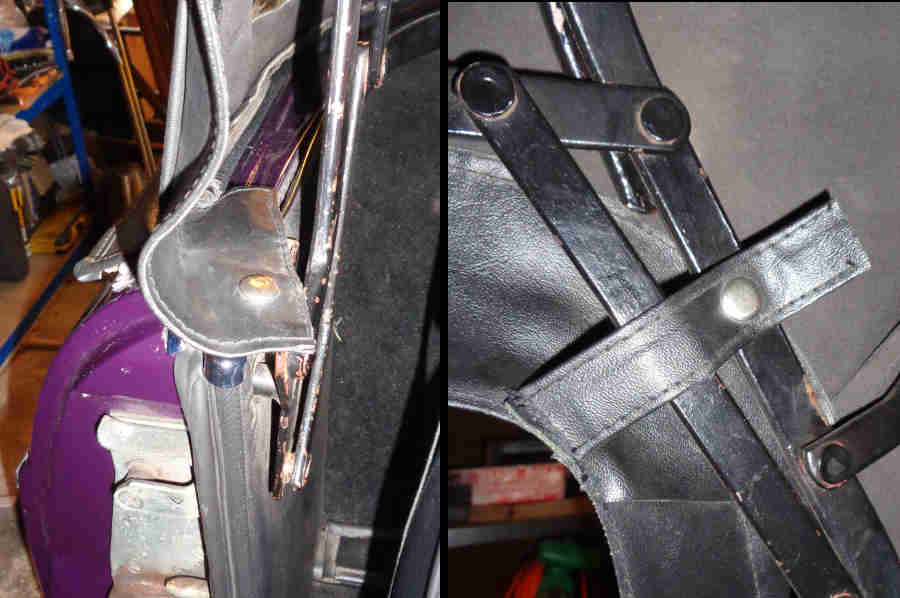
The front tabs seemed flimsy, I had some vinyl left over from something else when I re-trimmed the car and sewed a square over each and onto the main material at each corner to make a much stronger flap:
This top came to me with the car 33 years ago although it was nearly new at that time. It's as good as ever, although apart from planned runs where it is wet and MOTs, and in the garage when we are away for a while doing other things, it's never up of course!